What is Git?
A distributed version control system, similar to SVN, but far more powerful than SVN. ①Git can conveniently perform version management locally, just like you have a version management server locally. We can choose to push the local version to a unified version management server at an appropriate time. ②Each time Git extracts a complete mirror of the entire code repository, which is equivalent to making a backup of the entire code repository. In this way, even if the version server has problems, we can directly use the local repository to restore! Combined with the local version management feature, if the remote version management server has problems, we can still continue writing our own code. When it recovers, we can submit our local version! In the early stages of Git's development, it was meant to better manage the Linux kernel, but now it is widely used in various projects!
Installing Git
If your system is Linux, directly open the shell and enter:
sudo apt-get install git
Of course, most systems are probably Windows, which requires us to download Git for Windows from the internet. You can download it from the following website:https://git-for-windows.github.io/Click Download, it will jump to Github, then just download the corresponding installation package!
After clicking, you will enter the page. Just download the file as follows:
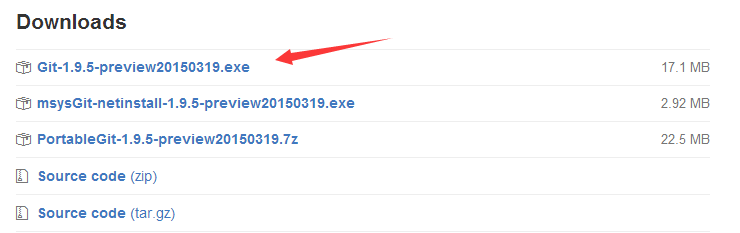
Or directly download the latest version 2.7.0:v2.7.0.windows.1Then just go with the foolproof "Next" steps~ Next, you can find Git Gui and start playing with Git, but if you switch to other platforms in the future, without a graphical interface you'll be stuck! So, if you are interested, let's play with the command line, so that after changing systems you can still play Git normally!
Mastering the Git Command Line
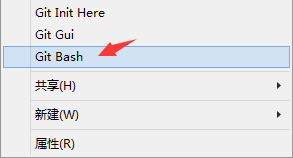
Of course, Git is definitely more fun when paired with GitHub, but let's first learn some local commands! After you install Git, you can right-click anywhere and click Git bash to open our Git command line! You can also click Git Init Here to directly create a code repository in the current directory, or click Git Gui to open the Gui graphical operation page!
1. Creating a Code Repository
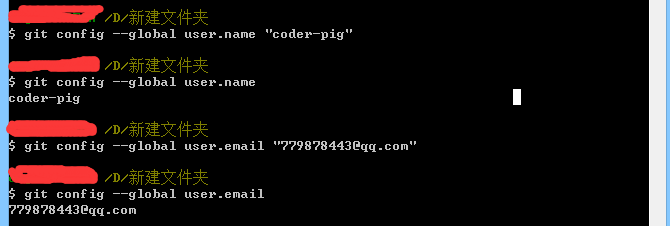
Step 1: Let's configure our identity first, so that Git can know who submitted the code when committing. The commands are as follows:
git config --global user.name "coder-pig"
git config --global user.email "779878443@qq.com"
After the configuration is complete, we can enter the command again, omitting the name, and we can see that we have configured it successfully.
Step 2: Find a place to create our code repository. Then I created a new project: TestForGit. Go to the project directory, right-click, open our Git Bash, and type the following command to complete the creation of the code repository! In addition, this code repository is actually used to save some information needed for version management. The code we commit locally will all be submitted to the code repository. Therefore, we can choose to restore to a certain version. Of course, if necessary, we can also push the code saved in the code repository to a remote repository! Such as GitHub!
git init
With a simple command, the code repository is created! Continue typing: ls - al and you can see that there is a .git folder in the directory, that's it!
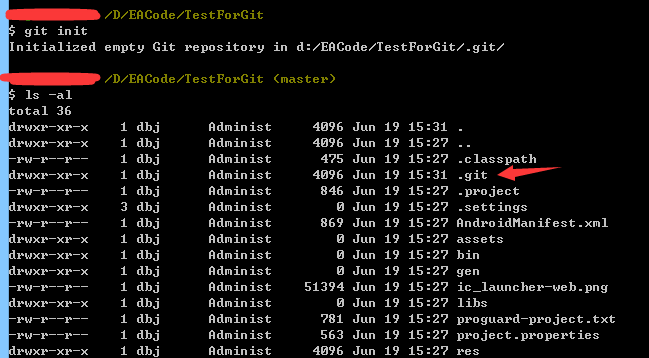
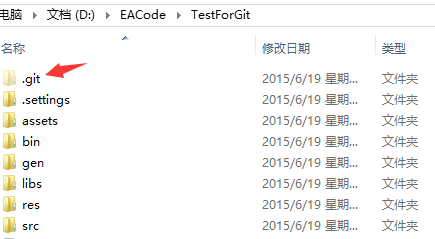
You can also open the project directory and see the .git folder too; if we want to delete the code repository, just delete this folder!
2. Committing Local Code
After creating the code repository, let's talk about how to commit code. We first use the add command to add the content to be committed, and then commit is what really executes the commit operation! An example of the commands is as follows. You can add them slowly one by one, or of course, you can commit everything at once by directly running git add .! Now let's create a readme.txt file in the project directory to try it out, write something in it, and then enter the following commands in order:
 git add readme.txt
 git commit -m "Wrote a readme file"
Try entering the commands:
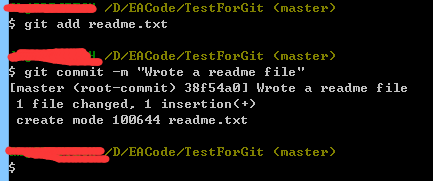
Of course, you can add multiple files and then commit them all at once. However, if we have a lot of changed files, we can use git add . to add everything at once. But there are some files that never change for ages or are automatically generated, such as the lib, gen, bin folders, etc. We can create a file named .gitignore in the root directory of the code repository, then edit its contents to ignore the files that don't need to be committed!
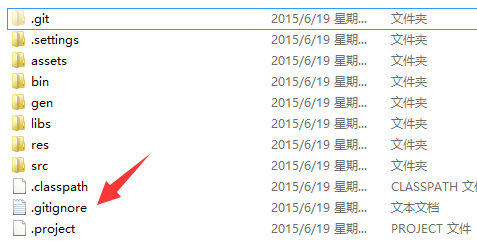
Then just enter the content of the files to be ignored when committing!
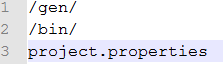
Then when we run git add ., the files here won't be added. Also, you might think writing -m "xxx" after commit is very troublesome and want to be lazy, but you should still write it! What you enter is a declaration for this commit, such as what you modified! It's just like when writing code - if you are lazy and don't write comments, a few days later you won't even know what the hell you wrote...
3. Viewing Modified Content
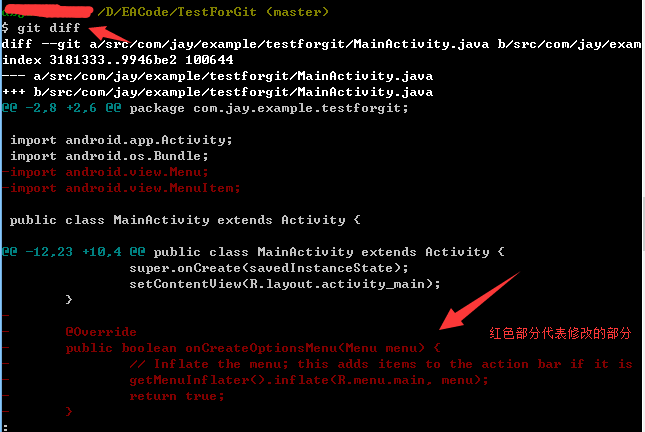
Alright, earlier we used git add to commit the entire project to the local repository. Next, let's change something, and then use git status to view the modified parts. For example, let's delete the menu code in MainActivity.java and the redundant menu-related packages!
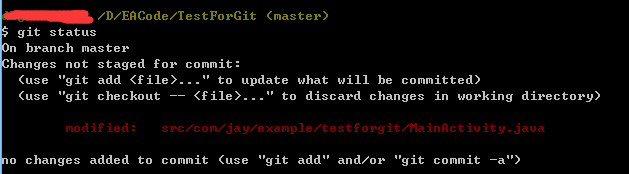
It will tell us which files have changed but have not been committed yet. If we want to see what exactly has changed, we can use the git diff command. Also, press Q to return to command line input!
4. Viewing Commit History
Of course, as our project goes deeper, the number of commits will also increase. Maybe you have long forgotten what was modified in each commit. No worries, Git remembers it for you. Use git log to view the historical commit information! Type
git log
Press Enter:
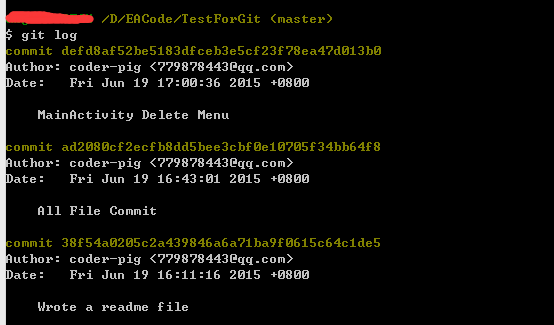
Let's take a small portion of it to analyze:
commit defd8af52be5183dfceb3e5cf23f78ea47d013b0
Author: coder-pig <779878443@qq.com>
Date:   Fri Jun 19 17:00:36 2015 +0800
MainActivity Delete Menu
In order, they are:
- The version number corresponding to this commit
- Committer: Name Email
- The time of the commit
- The content modified in the submitted version: it is the xxx in our commit -m "xxx"
5. Undoing Uncommitted Changes
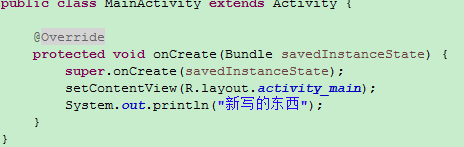
For example, we just committed a version, and then wrote a bunch of messy stuff. Suddenly we find that we accidentally deleted something, and then we saved it with ctrl + s. At this time, isn't it despairing? But with Git, we only need a checkout command to undo the changes. Of course, this is when you haven't added (staged) yet. For example, we randomly add a statement in MainActivity, and then press ctrl + s to save the code!
Then type in the command line: git diff:
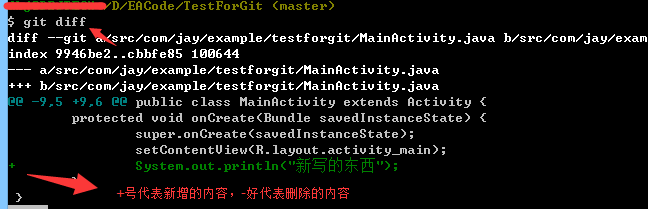
Well, here we can see the content we changed. We can go back and delete this line of code, but if you have changed thousands of lines, how would you change them? So at this time we can use
git checkout src/com/jay/example/testforgit/MainActivity.java
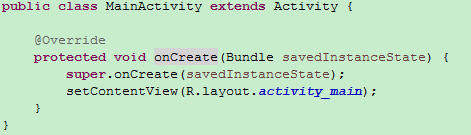
Then you will magically find that the code we newly wrote is gone! It disappears with a "duang"! If you don't believe me, you can try it yourself.
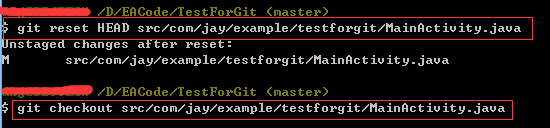
Of course, if we have already added (staged) them, then checkout has no effect at all. We need to cancel the adding first before we can revert the commit. Use the following command:
git reset HEAD src/com/jay/example/testforgit/MainActivity.java
git checkout src/com/jay/example/testforgit/MainActivity.java
6. Rolling Back Versions
In point 5, we taught everyone how to undo uncommitted changes. But if it has been committed, what should we do if we want to roll back to a previous version? In point 4, we can view our commit history through git log. We need to get a version number from here. Generally, we only need the first seven characters; in addition, in Git, we useHEADto represent the current version, and the previous version isHEAD^, and the one before that isHEAD^^and so on! Let's first use git log to look at the version history!
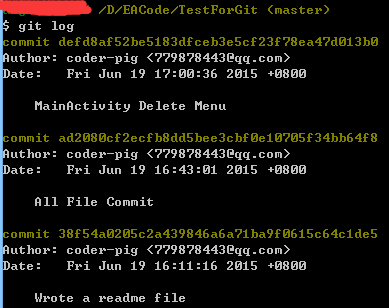
Let's go back to the previously committed version. Type the following commands in order:
 git reset --hard HEAD
 git reset --hard HEAD^
 git log
Now look at our console:
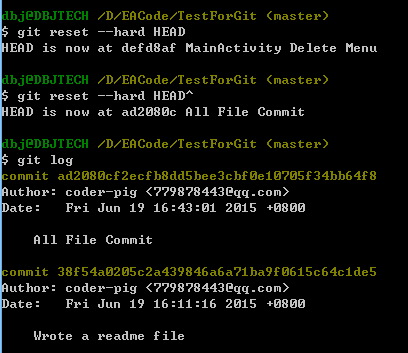
We can see that we have rolled back to the previous version. Of course, you can also write it directly like this:
git reset --hard ad2080c
It's just that simple! After rolling back, you suddenly regret it and want to roll back to the newer version. Unfortunately, when you type git log, you find that the latest version number is gone. What should you do... No worries, Git provides you with this "regret medicine". Git records every command you entered! Type:
git reflog
You will find that the version number is right here:
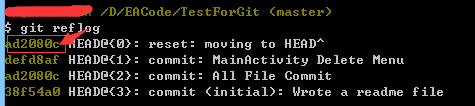
Then type:
git reset --hard ad2080c
You can see that we are back to the latest version again. That's just how awesome it is!

7. Summary of This Section
In this section, we introduced the project management tool Git to manage our local repository and learned some basic command line operations. I believe it will bring convenience to your project development. Of course, local management alone is far from enough. In the next section, we will learn how to host our projects on GitHub! Stay tuned~