Section Introduction:
In the previous section, we learned about the first UI controlTextView (text box), and the article provided solutions to many needs you may encounter in actual development, which should bring convenience to your development. In this section, we will learn about the second very commonly used controlEditText (input box); it is very similar to TextView; the biggest difference is that EditText can accept user input! Just like before, we won't explain attributes one by one, only practical applications. If you want to dig into attributes, you can check the API documentation yourself:API documentation; then let's start the content of this section!
1. Set default hint text
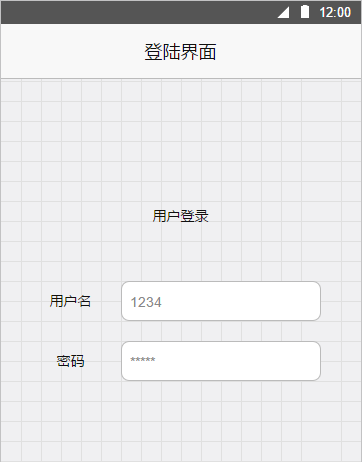
As shown below, I believe you are familiar with this kind of user login interface, right? We often use this kind of interface.
Compared to this other one, what about the one below?
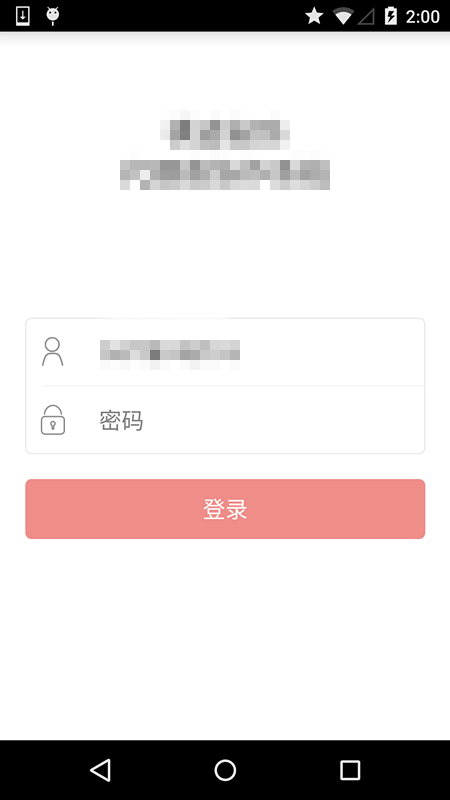
Not bad, right? Of course, we won't post the layout here; we only introduce the two control attributes of the default hint text:
The two attributes of the default hint text are as follows:
android:hint="默认提示文本"
android:textColorHint="#95A1AA"
The former sets the text content of the hint, the latter sets the color of the hint text!
2. Select all text content in the component after gaining focus
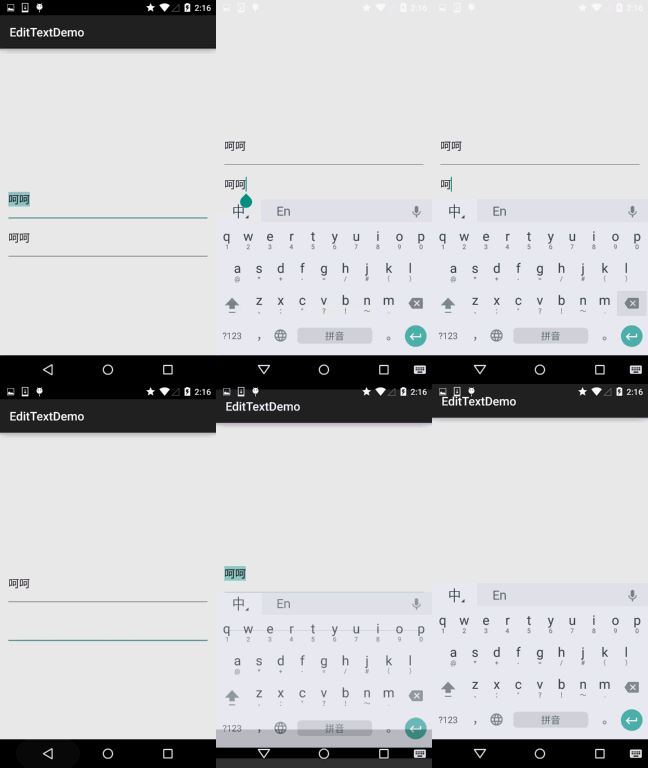
When we want to click the input box to gain focus, not to move the cursor to the beginning or end of the text, but to select all the text content in the input box! In this case, we can use theselectAllOnFocusattribute
android:selectAllOnFocus="true"
For example, the effect diagram below: The first one has this attribute set, the second one does not. The EditText with it set to true selects all text after gaining focus!
3. Restrict EditText input type
Sometimes we may need to restrict the input data. For example, when entering a phone number, if you enter a string of letters, this is obviously not what we expect. Restricting the input type can be achieved through the inputType attribute!
For example, restrict to phone number, password (textPassword):
<EditText
        android:layout_width="fill_parent"
        android:layout_height="wrap_content"
        android:inputType="phone" />
Optional parameters are as follows:
Text type, mostly uppercase, lowercase, and numeric symbols
android:inputType="none"
android:inputType="text"
android:inputType="textCapCharacters"
android:inputType="textCapWords"
android:inputType="textCapSentences"
android:inputType="textAutoCorrect"
android:inputType="textAutoComplete"
android:inputType="textMultiLine"
android:inputType="textImeMultiLine"
android:inputType="textNoSuggestions"
android:inputType="textUri"
android:inputType="textEmailAddress"
android:inputType="textEmailSubject"
android:inputType="textShortMessage"
android:inputType="textLongMessage"
android:inputType="textPersonName"
android:inputType="textPostalAddress"
android:inputType="textPassword"
android:inputType="textVisiblePassword"
android:inputType="textWebEditText"
android:inputType="textFilter"
android:inputType="textPhonetic"
Numeric type
android:inputType="number"
android:inputType="numberSigned"
android:inputType="numberDecimal"
android:inputType="phone"//拨号键盘
android:inputType="datetime"
android:inputType="date"//日期键盘
android:inputType="time"//时间键盘
4. Set minimum lines, maximum lines, single line, multi-line, automatic line wrapping
EditText is displayed in multiple lines by default and can wrap automatically. That is, when one line cannot display everything, it will automatically wrap to the second line.
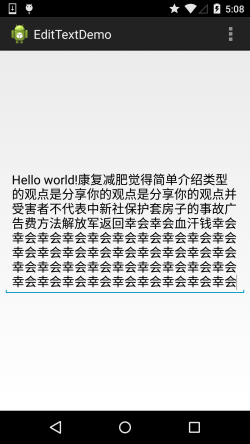
We can restrict it, for example:
Set the minimum number of lines:android:minLines="3"
Or set the maximum number of lines for EditText:android:maxLines="3"
PS: When the input content exceeds maxLines, the text will automatically scroll upward!!
In addition, many times we may need to restrict EditText to allow only single-line input without scrolling. For example, in the login interface example above, we only need to set
android:singleLine="true"
to achieve single-line input without line wrapping.
5. Set text spacing and set English letter capitalization type
We can set the character spacing through the following two attributes:
android:textScaleX="1.5"    //设置字与字的水平间隔
android:textScaleY="1.5"    //设置字与字的垂直间隔
In addition, EditText also provides us with attributes to set the English letter capitalization type:android:capitalizeThe default is none, with three optional values:
- sentences:Only the first letter is capitalized
- words:The first letter of each word is capitalized, words are separated by spaces
- characters:Every English letter is capitalized
6. Control the spacing around EditText and the distance between the internal text and the border
We usemarginrelated attributes to increase the distance of the component relative to other controls, such as android:marginTop = "5dp". Usepaddingto increase the distance between the text inside the component and the component border, such as android:paddingTop = "5dp"
7. Set EditText to gain focus and pop up the small keyboard
Regarding the issue of EditText gaining focus and popping up the small keyboard, this troubled me for a while in a recent project. The requirement was: after entering an Activity, let EditText gain focus and pop up the small keyboard for user input! I tried many methods online but none worked; I wonder if it's because of the 5.1 system I was using! Below is a summary:
First, the methods to let EditText gain focus and clear focus:
edit.requestFocus(); // Request focus
edit.clearFocus(); // Clear focus
After gaining focus, popping up the small keyboard is where I spent most of my time:
- On lower-version systems, simply calling requestFocus will automatically pop up the small keyboard.
- Slightly higher versions require us to manually pop up the keyboard: The first method:
InputMethodManager imm = (InputMethodManager) getSystemService(Context.INPUT_METHOD_SERVICE);
imm.toggleSoftInput(0, InputMethodManager.HIDE_NOT_ALWAYS);
The second method:
InputMethodManager imm = (InputMethodManager) getSystemService(Context.INPUT_METHOD_SERVICE);     imm.showSoftInput(view,InputMethodManager.SHOW_FORCED);
imm.hideSoftInputFromWindow(view.getWindowToken(), 0); //强制隐藏键盘
I don't know why, but the above two methods did not pop up the small keyboard. In the end, I used the:windowSoftInputModeattribute to solve the problem of popping up the small keyboard. Here I'll share it with you:
android:windowSoftInputModeActivity main window and soft keyboard interaction mode. It can be used to avoid the problem of the input method panel blocking content. It is a new feature after Android 1.5.
This attribute can affect two things:Simply put, it's the keyboard control when there is focus and whether to reduce the activity's window size to accommodate the small keyboard.
There are the following values to choose from. Multiple values can be set, separated by "|":
stateUnspecified: The state of the soft keyboard is not specified; the system will choose a suitable state or depend on the theme's settings.
stateUnchanged: When this activity appears, the soft keyboard will always remain in the state it was in the previous activity, whether hidden or shown.
stateHidden: When the user selects the activity, the soft keyboard is always hidden.
stateAlwaysHidden: When the activity's main window gains focus, the soft keyboard is also always hidden.
stateVisible: The soft keyboard is usually visible.
stateAlwaysVisible: When the user selects the activity, the soft keyboard is always in the shown state.
adjustUnspecified: Default setting. Usually the system decides whether to hide or show it.
adjustResize: The activity always adjusts the screen size to leave space for the soft keyboard.
adjustPan: The content of the current window will automatically move so that the current focus is never covered by the keyboard and the user can always see the part being input.
We can set this attribute in AndroidManifest.xml for the Activity that needs to pop up the small keyboard, for example:

Then just call requestFocus() on the EditText object and that's it~
8. Control of EditText cursor position
Sometimes we may need to control the cursor in EditText to move to a specified position or select some text!
EditText provides us with thesetSelection() method, which has two forms:
The one-parameter form sets the cursor position; the two-parameter form sets the part between the start position and end position, that is, partial selection!
Of course, we can also callsetSelectAllOnFocus(true); so that EditText selects all text when it gains focus!
In addition, we can also callsetCursorVisible(false); to set the cursor not to be displayed.
We can also call getSelectionStart()andgetSelectionEndto get the current cursor's start and end positions.

9. Simple implementation of EditText with emoji
I believe everyone is familiar with QQ or WeChat. When we send text, we can send emoji along with it. There are two simple implementation methods:
1. Use SpannableString to implement
2. Use the Html class to implement
Here I used the first method. I only implement a simple effect here. You can extract the method and customize an EditText;
You can also write your own input box similar to QQ that has multiple emoji selections!
Take a look at the effect diagram (click Add Emoji to complete adding emoji):

The code is also very simple:
public class MainActivity extends Activity {
    private Button btn_add;
    private EditText edit_one;
    @Override
    protected void onCreate(Bundle savedInstanceState) {
        super.onCreate(savedInstanceState);
        setContentView(R.layout.activity_main);
        btn_add = (Button) findViewById(R.id.btn_add);
        edit_one = (EditText) findViewById(R.id.edit_one);
        btn_add.setOnClickListener(new OnClickListener() {
            @Override
            public void onClick(View v) {
                SpannableString spanStr = new SpannableString("imge");
                Drawable drawable = MainActivity.this.getResources().getDrawable(R.drawable.f045);
                drawable.setBounds(0,0,drawable.getIntrinsicWidth(),drawable.getIntrinsicHeight());
                ImageSpan span = new ImageSpan(drawable,ImageSpan.ALIGN_BASELINE);
                spanStr.setSpan(span,0,4,Spannable.SPAN_EXCLUSIVE_EXCLUSIVE);
                int cursor = edit_one.getSelectionStart();
                edit_one.getText().insert(cursor, spanStr);
            }
        });
    }
}
PS: By the way, don't forget to put an image~
10. EditText with delete button
We often see this in App input interfaces:

After we input content, a small cross icon will appear on the right. When we click it, it will clear the content in the input box!
It is actually very simple to implement:
Set addTextChangedListener for EditText, then override the abstract methods in TextWatcher(), which are used to listen for changes in the input box; then use setCompoundDrawablesWithIntrinsicBounds to set the small cross image; finally, override the onTouchEvent method, and if the clicked area is the position of the small cross image, clear the text!
The implementation code is as follows:
public class EditTextWithDel extends EditText {

    private final static String TAG = "EditTextWithDel";
    private Drawable imgInable;
    private Drawable imgAble;
    private Context mContext;

    public EditTextWithDel(Context context) {
        super(context);
        mContext = context;
        init();
    }

    public EditTextWithDel(Context context, AttributeSet attrs) {
        super(context, attrs);
        mContext = context;
        init();
    }

    public EditTextWithDel(Context context, AttributeSet attrs, int defStyleAttr) {
        super(context, attrs, defStyleAttr);
        mContext = context;
        init();
    }

    private void init() {
        imgInable = mContext.getResources().getDrawable(R.drawable.delete_gray);
        addTextChangedListener(new TextWatcher() {
            @Override
            public void onTextChanged(CharSequence s, int start, int before, int count) {
            }

            @Override
            public void beforeTextChanged(CharSequence s, int start, int count, int after) {
            }

            @Override
            public void afterTextChanged(Editable s) {
                setDrawable();
            }
        });
        setDrawable();
    }

    // 设置删除图片
    private void setDrawable() {
        if (length() < 1)
            setCompoundDrawablesWithIntrinsicBounds(null, null, null, null);
        else
            setCompoundDrawablesWithIntrinsicBounds(null, null, imgInable, null);
    }

    // 处理删除事件
    @Override
    public boolean onTouchEvent(MotionEvent event) {
        if (imgInable != null && event.getAction() == MotionEvent.ACTION_UP) {
            int eventX = (int) event.getRawX();
            int eventY = (int) event.getRawY();
            Log.e(TAG, "eventX = " + eventX + "; eventY = " + eventY);
            Rect rect = new Rect();
            getGlobalVisibleRect(rect);
            rect.left = rect.right - 100;
            if (rect.contains(eventX, eventY))
                setText("");
        }
        return super.onTouchEvent(event);
    }
    @Override
    protected void finalize() throws Throwable {
        super.finalize();
    }
}
Section Summary:
This section introduced the EditText (input box) control in Android UI controls. There are many usages. Of course, the above situations definitely cannot meet actual needs. In actual development, we may need to customize EditText according to our own needs! Of course, this involves the more advanced topic of custom controls. In the advanced section, we will explain custom controls in Android in detail! For now, it's enough to know how to use it~