Introduction to this section:
Starting from this section, let's explore animations in Android. After all, adding some animations to an APP will make our application look cool, such as the simplest closing and opening of Activities. Of course, custom control animations are definitely indispensable~ Animations in Android are divided into three major categories:Frame-by-frame animation (Frame)andTween animation (Tween)as well as the one introduced after Android 3.0:Property animation (Property)And what this section brings you is a basic usage of the first type of animation—frame-by-frame animation~

1. Concept and usage of frame animation
Frame animation is very easy to understand. It simply collects N static images, and then we control the sequential display of these images. Due to the "persistence of vision" of the human eye, it creates the "illusion" of animation, just like the principle of playing a movie!
To implement frame animation in Android, we usually use a Drawable explained earlier:AnimationDrawableFirst write the Drawable, then call start() and stop() in code to start or stop playing the animation~
Of course, we can also create frame-by-frame animation in Java code by creating an AnimationDrawable object, then calling addFrame(Drawable frame, int duration) to add frames to the animation, and then calling start() and stop()~
Below, let's write two examples to experience the effect of frame animation and get familiar with its usage.
2. Usage examples:
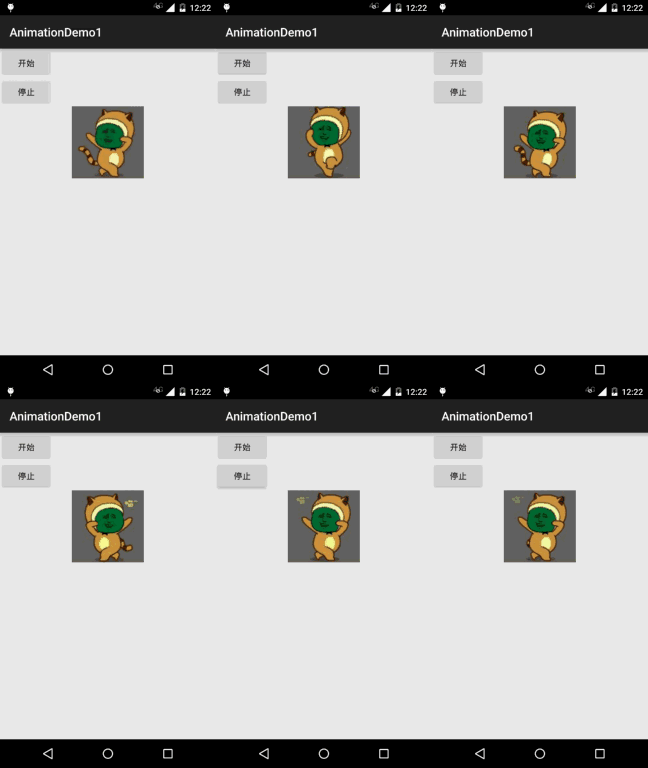
Example 1: The simplest example:
Running effect screenshot:
Code implementation:
First, write our animation file. It's very simple: create an anim directory under res, then start writing our animation file:miao_gif.xml: Here android:oneshot sets whether the animation plays only once; true means play only once, false means loop playback!
<?xml version="1.0" encoding="utf-8"?>
<animation-list xmlns:android="http://schemas.android.com/apk/res/android"
    android:oneshot="false">
    <item
        android:drawable="@mipmap/img_miao1"
        android:duration="80" />
    <item
        android:drawable="@mipmap/img_miao2"
        android:duration="80" />
    <item
        android:drawable="@mipmap/img_miao3"
        android:duration="80" />
    <!--限于篇幅,省略其他item,自己补上-->
    ...
</animation-list>
Now that we have the animation file, next is our layout file:activity_main.xml:
<LinearLayout xmlns:android="http://schemas.android.com/apk/res/android"
    android:layout_width="match_parent"
    android:layout_height="match_parent"
    android:orientation="vertical">

    <Button
        android:id="@+id/btn_start"
        android:layout_width="wrap_content"
        android:layout_height="wrap_content"
        android:text="开始" />

    <Button
        android:id="@+id/btn_stop"
        android:layout_width="wrap_content"
        android:layout_height="wrap_content"
        android:text="停止" />

    <ImageView
        android:id="@+id/img_show"
        android:layout_width="120dp"
        android:layout_height="120dp"
        android:layout_gravity="center"
        android:background="@anim/miao_gif" />

</LinearLayout>
Finally, there is ourMainActivity.java, where we control the start and pause of the animation:
public class MainActivity extends AppCompatActivity implements View.OnClickListener {

    private Button btn_start;
    private Button btn_stop;
    private ImageView img_show;
    private AnimationDrawable anim;

    @Override
    protected void onCreate(Bundle savedInstanceState) {
        super.onCreate(savedInstanceState);
        setContentView(R.layout.activity_main);
        bindViews();
        anim = (AnimationDrawable) img_show.getBackground();
    }

    private void bindViews() {
        btn_start = (Button) findViewById(R.id.btn_start);
        btn_stop = (Button) findViewById(R.id.btn_stop);
        img_show = (ImageView) findViewById(R.id.img_show);
        btn_start.setOnClickListener(this);
        btn_stop.setOnClickListener(this);
    }

    @Override
    public void onClick(View v) {
        switch (v.getId()) {
            case R.id.btn_start:
                anim.start();
                break;
            case R.id.btn_stop:
                anim.stop();
                break;
        }
    }
}
Okay, it's very simple~
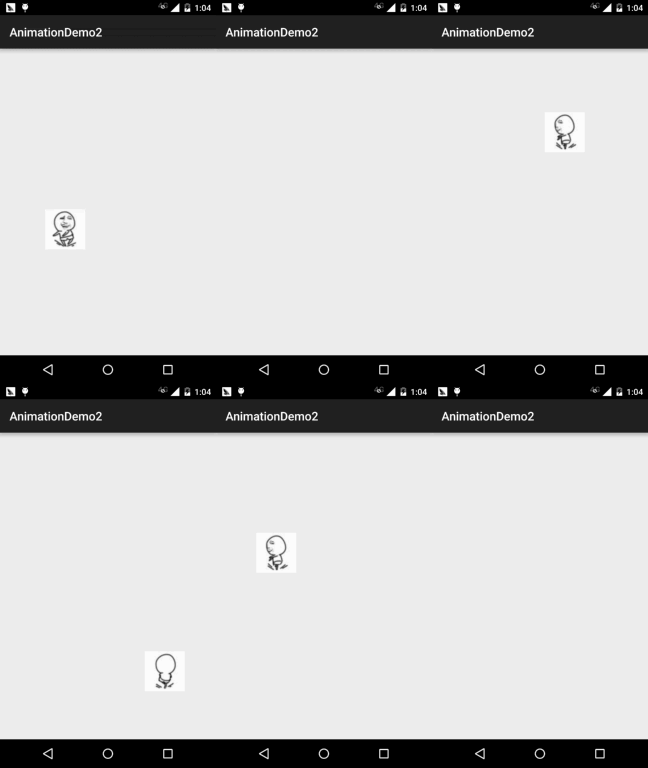
Example 2: Playing frame animation at a specified location
Running effect screenshot:
Code implementation:
Again, first is our animation file:anim_zhuan.xml:
<animation-list xmlns:android="http://schemas.android.com/apk/res/android"
    android:oneshot="true">
    <item
        android:drawable="@mipmap/img_zhuan1"
        android:duration="80" />
    <item
        android:drawable="@mipmap/img_zhuan2"
        android:duration="80" />
    <item
        android:drawable="@mipmap/img_zhuan3"
        android:duration="80" />
     <!--限于篇幅,省略其他item,自己补上-->
    ...
</animation-list>
Next, let's write a custom ImageView:FrameView.java, here we use reflection to get the currently playing frame, then check if it is the last frame; if so, hide the control!
/**
 * Created by Jay on 2015/11/15 0015.
 */
public class FrameView extends ImageView {

    private AnimationDrawable anim;

    public FrameView(Context context) {
        super(context);
    }

    public FrameView(Context context, AttributeSet attrs) {
        super(context, attrs);
    }

    public FrameView(Context context, AttributeSet attrs, int defStyleAttr) {
        super(context, attrs, defStyleAttr);
    }

    public void setAnim(AnimationDrawable anim){
        this.anim = anim;
    }

    public void setLocation(int top,int left){
        this.setFrame(left,top,left + 200,top + 200);
    }

    @Override
    protected void onDraw(Canvas canvas) {
        try{
            //反射调用AnimationDrawable里的mCurFrame值
            Field field = AnimationDrawable.class
                    .getDeclaredField("mCurFrame");
            field.setAccessible(true);
            int curFrame = field.getInt(anim);// 获取anim动画的当前帧
            if (curFrame == anim.getNumberOfFrames() - 1)// 如果已经到了最后一帧
            {
                //让该View隐藏
                setVisibility(View.INVISIBLE);
            }
        }catch (Exception e){e.printStackTrace();}
        super.onDraw(canvas);
    }
}
Finally, there is ourMainActivity.java, create a FrameLayout, add Views, handle the press event in touch events, show the control, and start the animation~
public class MainActivity extends AppCompatActivity {

    private FrameView fView;
    private AnimationDrawable anim = null;

    @Override
    protected void onCreate(Bundle savedInstanceState) {
        super.onCreate(savedInstanceState);
        FrameLayout fly = new FrameLayout(this);
        setContentView(fly);
        fView = new FrameView(this);
        fView.setBackgroundResource(R.anim.anim_zhuan);
        fView.setVisibility(View.INVISIBLE);
        anim = (AnimationDrawable) fView.getBackground();
        fView.setAnim(anim);
        fly.addView(fView);
        fly.setOnTouchListener(new View.OnTouchListener() {
            @Override
            public boolean onTouch(View v, MotionEvent event) {
                //设置按下时才产生动画效果
                if(event.getAction() == MotionEvent.ACTION_DOWN){
                    anim.stop();
                    float x = event.getX();
                    float y = event.getY();
                    fView.setLocation((int) y - 40,(int)x-20);  //View显示的位置
                    fView.setVisibility(View.VISIBLE);
                    anim.start();    //开启动画
                }
                return false;
            }
        });
    }
}
Okay, it's also very simple~
3. Download of example code and GIF frame extraction tool for this section
AnimationDemo1.zip
AnimationDemo2.zip
GIF frame extraction tool
Section summary:
Okay, this section introduced the simplest of the three types of Android animations—frame animation. It is not used much in actual development, but learning more things gives us more ideas in the future~ Alright, that's all for this section, thank you~