Introduction to this section:
In this section we continue to learn Adapter-type controls. This time we bring AutoCompleteTextView. I believe you careful ones have noticed that controls related to Adapter allow you to customize the item style, right? Or each Item's layout~ play however you want~ Well, without further ado, let's start this section. By the way, here is the official API:AutoCompleteTextView
1. Related attributes:
- android:completionHint: Set the hint title in the drop-down menu
- android:completionHintView: Define the drop-down menu displayed in the hint view
- android:completionThreshold: Specify the minimum number of characters the user must enter before showing hints
- android:dropDownAnchor: Set the positioning "anchor" component of the dropdown menu. If this attribute is not specified, the TextView will be used as the positioning "anchor" component.
- android:dropDownHeight: Set the height of the dropdown menu
- android:dropDownWidth: Set the width of the dropdown menu
- android:dropDownHorizontalOffset: Specify the horizontal spacing between the dropdown menu and the text
- android:dropDownVerticalOffset: Specify the vertical spacing between the dropdown menu and the text
- android:dropDownSelector: Set the click effect of the dropdown menu
- android:popupBackground: Set the background of the dropdown menu
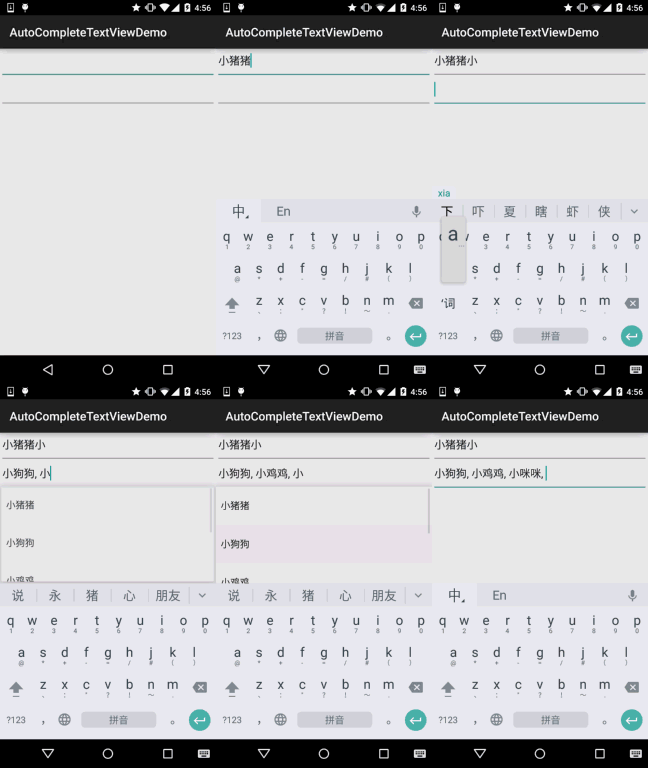
In addition, there is also actuallyMultiAutoCompleteTextView(The auto-complete text box with multiple hint items) has a similar function to AutoCompleteTextView and the same attributes. Where exactly is the difference? We'll experience it in the code below. In addition, both of these perform full-word matching. For example, 'small猪猪': if you type 'small' -> it will suggest 'small猪猪', but if you type '猪猪' -> it will not suggest 'small猪猪'!
2. Code example:
Running effect screenshot:
Implementation code:
Here we won't customize the layout; we'll just use ArrayAdapter to implement it!
Layout file:activity_main.xml:
<LinearLayout xmlns:android="http://schemas.android.com/apk/res/android"
    xmlns:tools="http://schemas.android.com/tools"
    android:layout_width="match_parent"
    android:layout_height="match_parent"
    android:orientation="vertical"
    tools:context=".MainActivity">

    <AutoCompleteTextView
        android:id="@+id/atv_content"
        android:layout_width="match_parent"
        android:layout_height="48dp"
        android:completionHint="请输入搜索内容"
        android:completionThreshold="1"
        android:dropDownHorizontalOffset="5dp" />

    <MultiAutoCompleteTextView
        android:id="@+id/matv_content"
        android:layout_width="match_parent"
        android:layout_height="48dp"
        android:completionThreshold="1"
        android:dropDownHorizontalOffset="5dp"
        android:text="" />

</LinearLayout>
MainActivity.java:
public class MainActivity extends AppCompatActivity {

    private AutoCompleteTextView atv_content;
    private MultiAutoCompleteTextView matv_content;

    private static final String[] data = new String[]{
            "小猪猪", "小狗狗", "小鸡鸡", "小猫猫", "小咪咪"
    };


    @Override
    protected void onCreate(Bundle savedInstanceState) {
        super.onCreate(savedInstanceState);
        setContentView(R.layout.activity_main);
        atv_content = (AutoCompleteTextView) findViewById(R.id.atv_content);
        matv_content = (MultiAutoCompleteTextView) findViewById(R.id.matv_content);


        ArrayAdapter<String> adapter = new ArrayAdapter<String>(MainActivity.
                this, android.R.layout.simple_dropdown_item_1line, data);
        atv_content.setAdapter(adapter);

        ArrayAdapter<String> adapter2 = new ArrayAdapter<String>(getApplicationContext(), android.R.layout.simple_dropdown_item_1line, data);
        matv_content.setAdapter(adapter);
        matv_content.setTokenizer(new MultiAutoCompleteTextView.CommaTokenizer());
    }
}
Partial code analysis:
- android:completionThreshold="1": Here we set it to show hints after entering one character.
- android:completionHint="Please enter search content": This is the text displayed at the bottom of the box. If you think it's ugly, you can use android:completionHintView to set a View!
- android:dropDownHorizontalOffset="5dp": sets the horizontal margin to 5dp.
- matv_content.setTokenizer(new MultiAutoCompleteTextView.CommaTokenizer()); setTokenizer is used to set a separator for it.
3. Sample code download:
AutoCompleteTextViewDemo.zip
Summary of this section:
This section introduced AutoCompleteTextView (auto-complete text box) to everyone. It is very simple. You can extend it according to actual development needs. Okay, that's all, thanks~