Introduction to this section:
Hehe, seeing this title, I believe some readers will ask: have you finished the Fragment tutorials from before? Well, not yet, because coming up with examples takes some time. To improve efficiency, I decided to write tutorials concurrently like multithreading, which might speed up the progress of the tutorial. Up to now, I have just written 60 articles, still far from completing the introductory tutorial. As I mentioned earlier, I want to complete this tutorial within one and a half to two months. Today is already September 1st, so I need to work harder~ Okay, enough rambling. This section introduces one of Android's data storage and access methods - file storage and read/write. Of course, besides this method, we can also store data in SharedPreferences, databases, or Application. These will all be covered later. Alright, let's begin this section~
1. Android file operation modes
Students who have learned Java know that we can create a new file and then write data to it. But Android is different, because Android is based on Linux. When reading and writing files, we also need to add the file operation mode. The operation modes in Android are as follows:
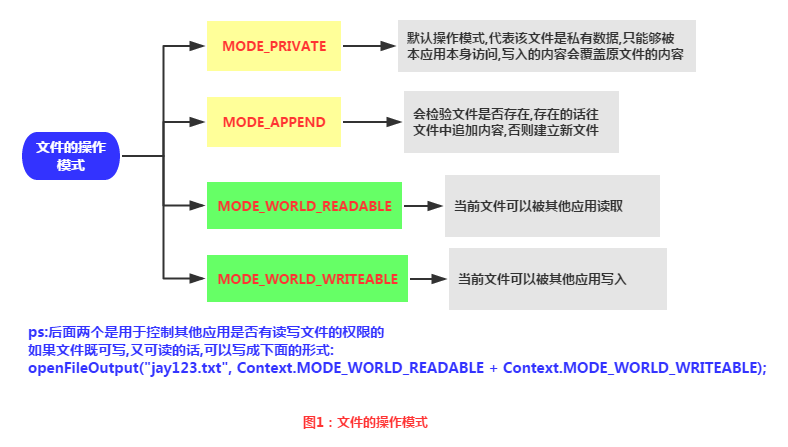
2. Related file operation methods
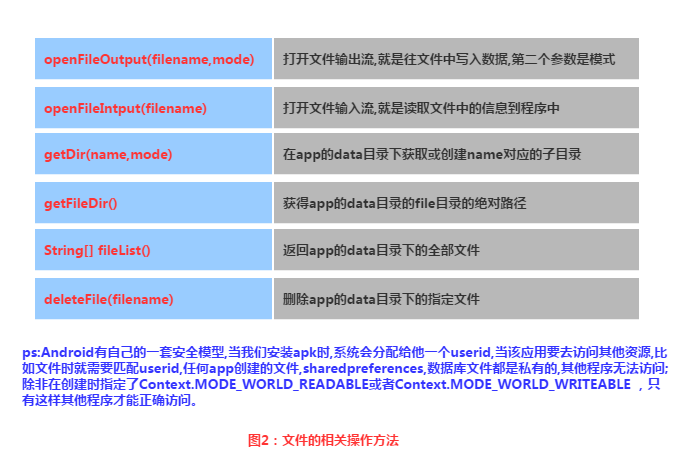
3. Implementation of file read/write
File read/write in Android is the same as file I/O in Java, and the process is also very simple. Let's write a simple example below:
Screenshot of the result:
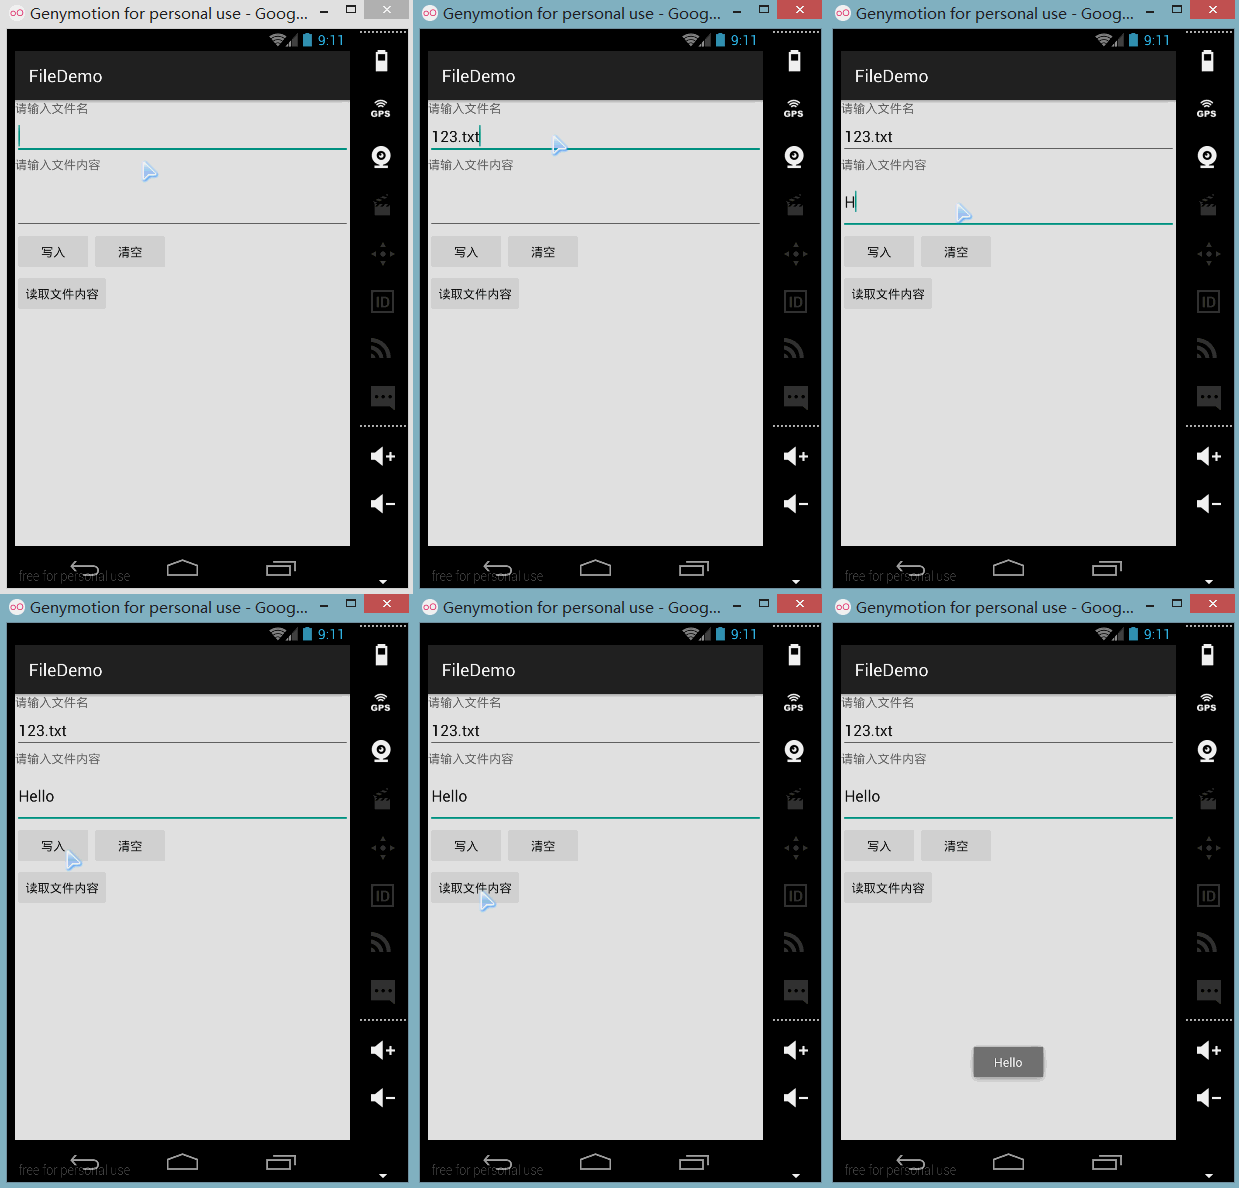
PS:Here we are using the emulator because the author's N5 is not rooted, so we cannot see the file storage directory. Below, when we open DDMS's File Explorer, we can see the file we wrote in data/data/<package name>/file:
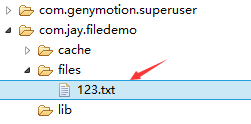
We can click the corresponding icon in the top-right corner to import the file into the computer, then open it to verify the written content:
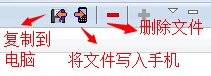
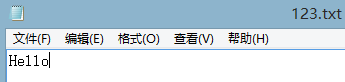
Code implementation:
First is the layout file:main_activity.xml
<LinearLayout xmlns:android="http://schemas.android.com/apk/res/android"
    xmlns:tools="http://schemas.android.com/tools"
    android:id="@+id/LinearLayout1"
    android:layout_width="match_parent"
    android:layout_height="match_parent"
    android:orientation="vertical"
    tools:context="com.jay.example.filedemo1.MainActivity">

    <TextView
        android:layout_width="wrap_content"
        android:layout_height="wrap_content"
        android:text="@string/nametitle" />

    <EditText
        android:id="@+id/editname"
        android:layout_width="match_parent"
        android:layout_height="wrap_content" />

    <TextView
        android:layout_width="wrap_content"
        android:layout_height="wrap_content"
        android:text="@string/detailtitle" />

    <EditText
        android:id="@+id/editdetail"
        android:layout_width="match_parent"
        android:layout_height="wrap_content"
        android:minLines="2" />

    <LinearLayout
        android:layout_width="fill_parent"
        android:layout_height="wrap_content"
        android:orientation="horizontal">

        <Button
            android:id="@+id/btnsave"
            android:layout_width="wrap_content"
            android:layout_height="wrap_content"
            android:text="@string/btnwrite" />

        <Button
            android:id="@+id/btnclean"
            android:layout_width="wrap_content"
            android:layout_height="wrap_content"
            android:text="@string/btnclean" />
    </LinearLayout>

    <Button
        android:id="@+id/btnread"
        android:layout_width="wrap_content"
        android:layout_height="wrap_content"
        android:text="@string/btnread" />

</LinearLayout>
Then let's write a file helper class:FileHelper.java
/**
 * Created by Jay on 2015/9/1 0001.
 */
public class FileHelper {

    private Context mContext;

    public FileHelper() {
    }

    public FileHelper(Context mContext) {
        super();
        this.mContext = mContext;
    }

    /*
    * 这里定义的是一个文件保存的方法,写入到文件中,所以是输出流
    * */
    public void save(String filename, String filecontent) throws Exception {
        //这里我们使用私有模式,创建出来的文件只能被本应用访问,还会覆盖原文件哦
        FileOutputStream output = mContext.openFileOutput(filename, Context.MODE_PRIVATE);
        output.write(filecontent.getBytes());  //将String字符串以字节流的形式写入到输出流中
        output.close();         //关闭输出流
    }


    /*
    * 这里定义的是文件读取的方法
    * */
    public String read(String filename) throws IOException {
        //打开文件输入流
        FileInputStream input = mContext.openFileInput(filename);
        byte[] temp = new byte[1024];
        StringBuilder sb = new StringBuilder("");
        int len = 0;
        //读取文件内容:
        while ((len = input.read(temp)) > 0) {
            sb.append(new String(temp, 0, len));
        }
        //关闭输入流
        input.close();
        return sb.toString();
    }

}
Finally, there isMainActivity.java, and here we complete the related operations:
public class MainActivity extends AppCompatActivity implements View.OnClickListener {

    private EditText editname;
    private EditText editdetail;
    private Button btnsave;
    private Button btnclean;
    private Button btnread;
    private Context mContext;

    @Override
    protected void onCreate(Bundle savedInstanceState) {
        super.onCreate(savedInstanceState);
        setContentView(R.layout.activity_main);
        mContext = getApplicationContext();
        bindViews();
    }


    private void bindViews() {
        editdetail = (EditText) findViewById(R.id.editdetail);
        editname = (EditText) findViewById(R.id.editname);
        btnclean = (Button) findViewById(R.id.btnclean);
        btnsave = (Button) findViewById(R.id.btnsave);
        btnread = (Button) findViewById(R.id.btnread);

        btnclean.setOnClickListener(this);
        btnsave.setOnClickListener(this);
        btnread.setOnClickListener(this);
    }


    @Override
    public void onClick(View v) {
        switch (v.getId()) {
            case R.id.btnclean:
                editdetail.setText("");
                editname.setText("");
                break;
            case R.id.btnsave:
                FileHelper fHelper = new FileHelper(mContext);
                String filename = editname.getText().toString();
                String filedetail = editdetail.getText().toString();
                try {
                    fHelper.save(filename, filedetail);
                    Toast.makeText(getApplicationContext(), "数据写入成功", Toast.LENGTH_SHORT).show();
                } catch (Exception e) {
                    e.printStackTrace();
                    Toast.makeText(getApplicationContext(), "数据写入失败", Toast.LENGTH_SHORT).show();
                }
                break;
            case R.id.btnread:
                String detail = "";
                FileHelper fHelper2 = new FileHelper(getApplicationContext());
                try {
                    String fname = editname.getText().toString();
                    detail = fHelper2.read(fname);
                } catch (IOException e) {
                    e.printStackTrace();
                }
                Toast.makeText(getApplicationContext(), detail, Toast.LENGTH_SHORT).show();
                break;
        }
    }
}
4. Reading files on the SD card
Read flow chart:
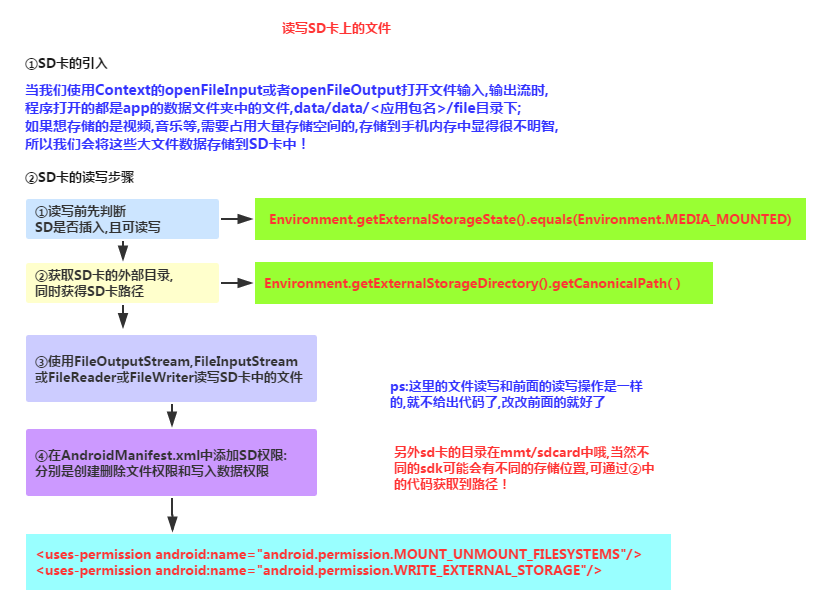
Code example:
Running result screenshot:
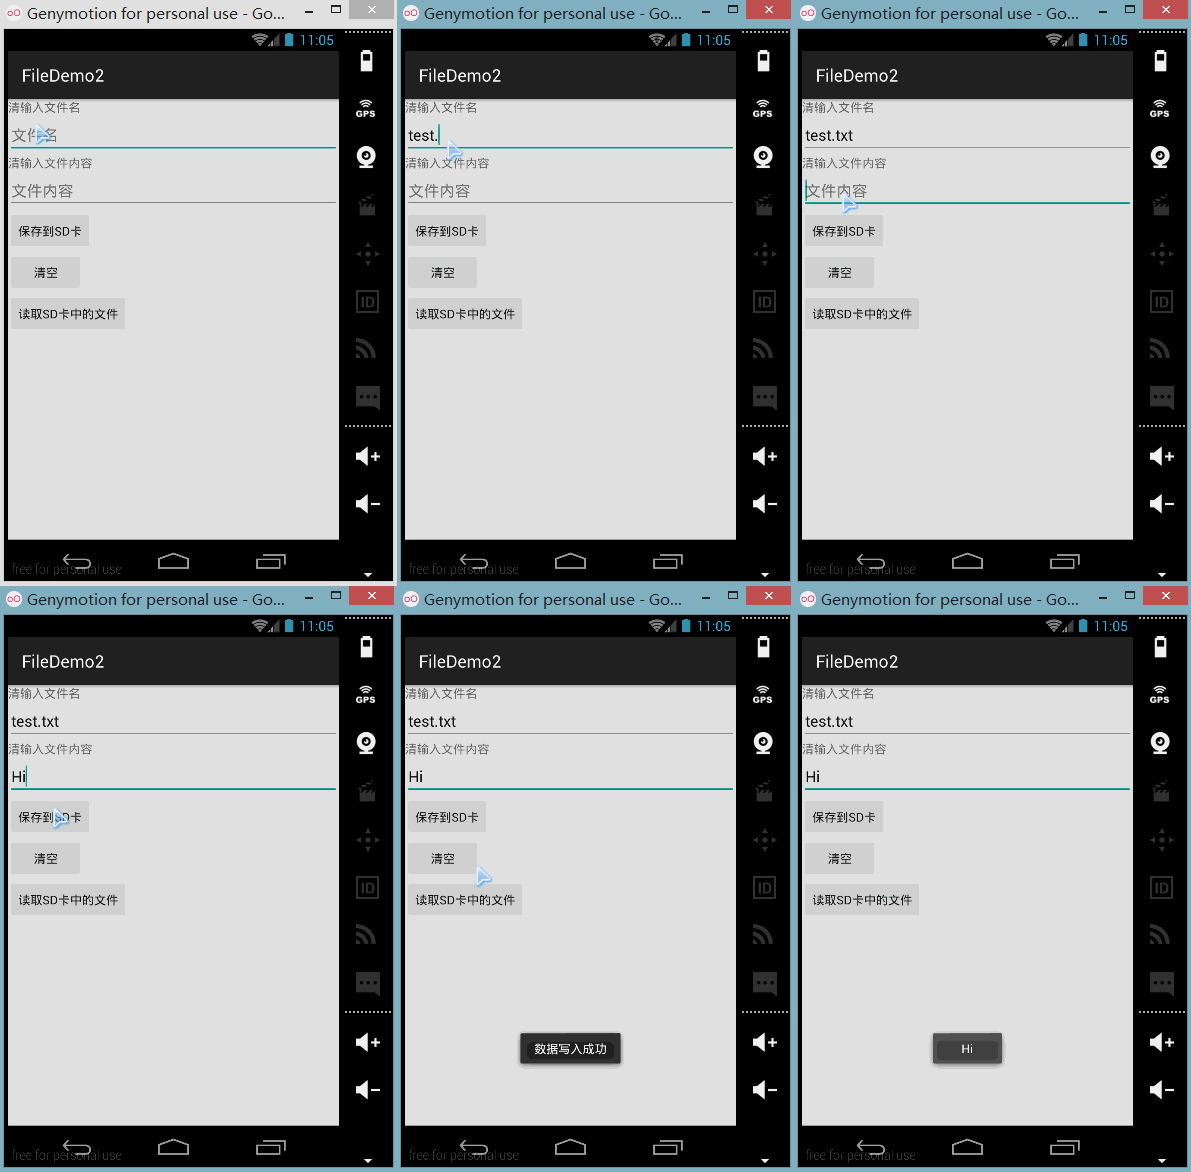
Similarly, open DDMS's File Explorer. On older versions of the system, we can find it directly under mmt\sdcard, but on newer versions we may need to look for it ourselves. First, let's go to this path:

Click on sdcard, but there is nothing. We continue looking under this path /storage/emulated/legacy:

Alright, it jumped to another place again. We continue looking in /storage/shell/emilated/0
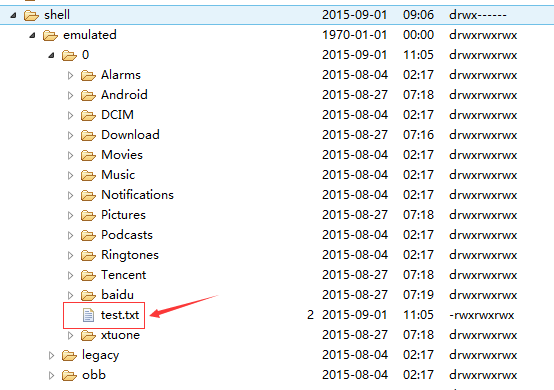
Sure enough, we found test.txt that we generated on the SD card! Export it to the computer to see the contents:
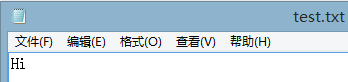
Hehe, reading and writing to the SD card succeeded~ Next, let's look at how the code is written:
Code implementation:
main_activity.xml:
<LinearLayout xmlns:android="http://schemas.android.com/apk/res/android"
    xmlns:tools="http://schemas.android.com/tools"
    android:id="@+id/LinearLayout1"
    android:layout_width="match_parent"
    android:layout_height="match_parent"
    android:orientation="vertical"
    tools:context="com.jay.example.filedemo2.MainActivity">

    <TextView
        android:layout_width="wrap_content"
        android:layout_height="wrap_content"
        android:text="清输入文件名" />

    <EditText
        android:id="@+id/edittitle"
        android:layout_width="match_parent"
        android:layout_height="wrap_content"
        android:hint="文件名" />


    <TextView
        android:layout_width="wrap_content"
        android:layout_height="wrap_content"
        android:text="清输入文件内容" />

    <EditText
        android:id="@+id/editdetail"
        android:layout_width="match_parent"
        android:layout_height="wrap_content"
        android:hint="文件内容" />

    <Button
        android:id="@+id/btnsave"
        android:layout_width="wrap_content"
        android:layout_height="wrap_content"
        android:text="保存到SD卡" />

    <Button
        android:id="@+id/btnclean"
        android:layout_width="wrap_content"
        android:layout_height="wrap_content"
        android:text="清空" />

    <Button
        android:id="@+id/btnread"
        android:layout_width="wrap_content"
        android:layout_height="wrap_content"
        android:text="读取sd卡中的文件" />

</LinearLayout>
Next, let's write an SD operation class: SDFileHelper.java
/**
 * Created by Jay on 2015/9/1 0001.
 */
public class SDFileHelper {

    private Context context;

    public SDFileHelper() {
    }

    public SDFileHelper(Context context) {
        super();
        this.context = context;
    }

    //往SD卡写入文件的方法
    public void savaFileToSD(String filename, String filecontent) throws Exception {
        //如果手机已插入sd卡,且app具有读写sd卡的权限
        if (Environment.getExternalStorageState().equals(Environment.MEDIA_MOUNTED)) {
            filename = Environment.getExternalStorageDirectory().getCanonicalPath() + "/" + filename;
            //这里就不要用openFileOutput了,那个是往手机内存中写数据的
            FileOutputStream output = new FileOutputStream(filename);
            output.write(filecontent.getBytes());
            //将String字符串以字节流的形式写入到输出流中
            output.close();
            //关闭输出流
        } else Toast.makeText(context, "SD卡不存在或者不可读写", Toast.LENGTH_SHORT).show();
    }

    //读取SD卡中文件的方法
    //定义读取文件的方法:
    public String readFromSD(String filename) throws IOException {
        StringBuilder sb = new StringBuilder("");
        if (Environment.getExternalStorageState().equals(Environment.MEDIA_MOUNTED)) {
            filename = Environment.getExternalStorageDirectory().getCanonicalPath() + "/" + filename;
            //打开文件输入流
            FileInputStream input = new FileInputStream(filename);
            byte[] temp = new byte[1024];

            int len = 0;
            //读取文件内容:
            while ((len = input.read(temp)) > 0) {
                sb.append(new String(temp, 0, len));
            }
            //关闭输入流
            input.close();
        }
        return sb.toString();
    }


}
ThenMainActivity.javaimplement the related logic:
public class MainActivity extends AppCompatActivity implements View.OnClickListener{

    private EditText editname;
    private EditText editdetail;
    private Button btnsave;
    private Button btnclean;
    private Button btnread;
    private Context mContext;

    @Override
    protected void onCreate(Bundle savedInstanceState) {
        super.onCreate(savedInstanceState);
        setContentView(R.layout.activity_main);
        mContext = getApplicationContext();
        bindViews();
    }

    private void bindViews() {
        editname = (EditText) findViewById(R.id.edittitle);
        editdetail = (EditText) findViewById(R.id.editdetail);
        btnsave = (Button) findViewById(R.id.btnsave);
        btnclean = (Button) findViewById(R.id.btnclean);
        btnread = (Button) findViewById(R.id.btnread);

        btnsave.setOnClickListener(this);
        btnclean.setOnClickListener(this);
        btnread.setOnClickListener(this);
    }

    @Override
    public void onClick(View v) {
        switch (v.getId()){
            case R.id.btnclean:
                editdetail.setText("");
                editname.setText("");
                break;
            case R.id.btnsave:
                String filename = editname.getText().toString();
                String filedetail = editdetail.getText().toString();
                SDFileHelper sdHelper = new SDFileHelper(mContext);
                try
                {
                    sdHelper.savaFileToSD(filename, filedetail);
                    Toast.makeText(getApplicationContext(), "数据写入成功", Toast.LENGTH_SHORT).show();
                }
                catch(Exception e){
                    e.printStackTrace();
                    Toast.makeText(getApplicationContext(), "数据写入失败", Toast.LENGTH_SHORT).show();
                }
                break;
            case R.id.btnread:
                String detail = "";
                SDFileHelper sdHelper2 = new SDFileHelper(mContext);
                try
                {
                    String filename2 = editname.getText().toString();
                    detail = sdHelper2.readFromSD(filename2);
                }
                catch(IOException e){e.printStackTrace();}
                Toast.makeText(getApplicationContext(), detail, Toast.LENGTH_SHORT).show();
                break;
        }
    }
}
Finally, don't forget toAndroidManifest.xmladd the permission for reading and writing the SD card!
<!-- 在SDCard中创建与删除文件权限 -->
<uses-permission android:name="android.permission.MOUNT_UNMOUNT_FILESYSTEMS"/>
<!-- 往SDCard写入数据权限 -->
<uses-permission android:name="android.permission.WRITE_EXTERNAL_STORAGE"/>
5. Issues with the native emulator SD card
If debugging on a real device, it usually works; but for the native emulator, there are many problems. When we previously used Environment.getExternalStorageState().equals(Environment.MEDIA_MOUNTED), it may always return false, meaning the SD card doesn't exist. This is the main problem. Now, newer versions of the SDK will also allocate an SD card storage area when creating an AVD.
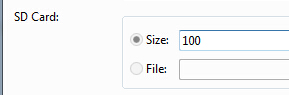
For older versions of the SDK or for other reasons, you may need to manually associate the SD card. The settings are as follows:
① Find the path of the created AVD image:
Click to open the AVD interface, click Detail, and view the directory of the AVD image.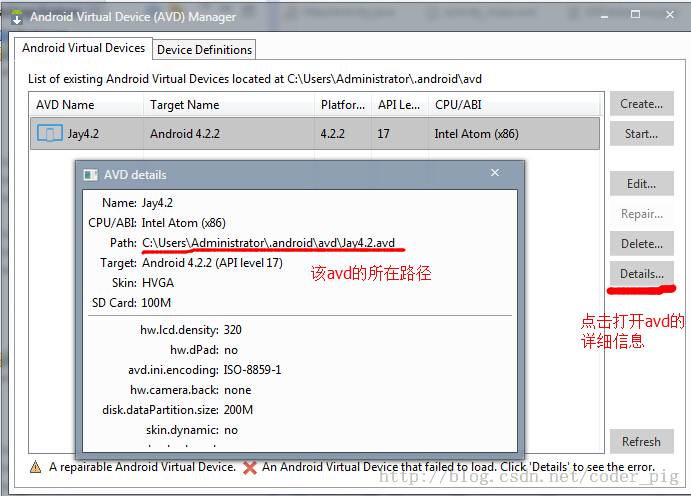
② Go to the path where the AVD image is located, and copy the path of sdcard.img:
For example, mine: -sdcard C:\Users\Administrator.android\avd\Jay4.2.avd\sdcard.img③ Then click
to reach the following interface:
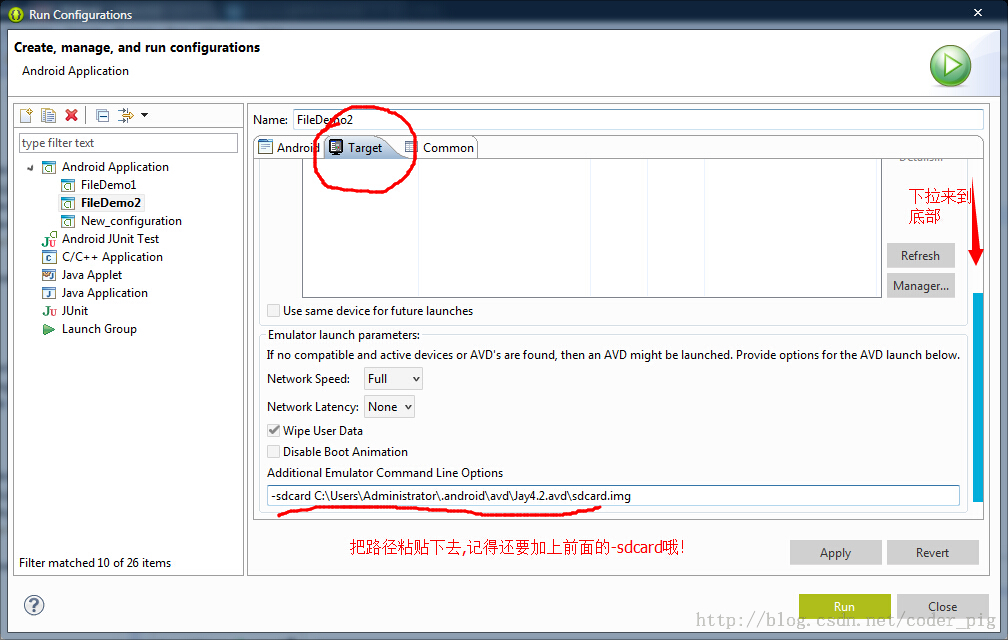
Finally, click Apply, and then Run and it's done!
6. Reading files in the raw and assets folders
I believe everyone is familiar with these two folders. If we don't want our files to be compiled into binary files, we can put the files in these two directories. The difference between the two is as follows:
- res/raw: The file will be mapped into the R.java file. When accessing, you can access it directly through the resource ID. Moreover, it cannot have a directory structure, meaning you cannot create folders.
- assets: It will not be mapped into the R.java file. It is accessed through AssetManager and can have a directory structure, that is, you can create folders yourself.
Reading file resources:
res/raw:
InputStream is =getResources().openRawResource(R.raw.filename);
assets:
AssetManager am =  getAssets();
InputStream is = am.open("filename");
Code download:
- FileDemo.zip:Download FileDemo.zip
- FileDemo2.zip:Download FileDemo2.zip
Summary of this section:
Alright, that's all for the first section on Android data storage and access - file read/write. If you encounter any problems while learning this article, or find any errors or omissions, you are welcome to point them out. I would be very grateful. Thank you~