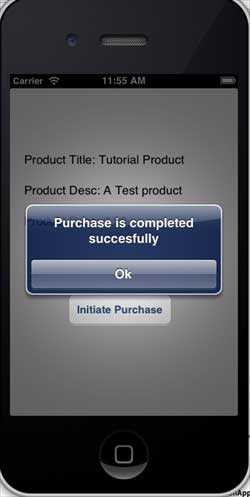
iOS In-App Purchase
Introduction
In-app purchase is a feature used by applications to purchase additional content or upgrade functionality.
Example Steps
1. In iTunes Connect, make sure you have a unique App ID. When creating the bundle ID and updating the app, the code will be signed in Xcode with the corresponding provisioning profile.
2. Create a new app and update the app information. You can learn more about this in Apple's "Adding a New App" documentation.
3. On the app page, under Manage In-App Purchases, add a new product for in-app purchase.
4. Make sure the bank details are set for the app. These need to be configured for In-App Purchase. In addition, in iTunes, use the Manage Users option to create a test user account on your app's page.
5. The next step is to handle the code and create the UI related to our in-app purchase.
6. Create a single view application, and enter the bundle identifier in iTunes Connect that matches the specified identifier.
7. Update ViewController.xib as shown below.
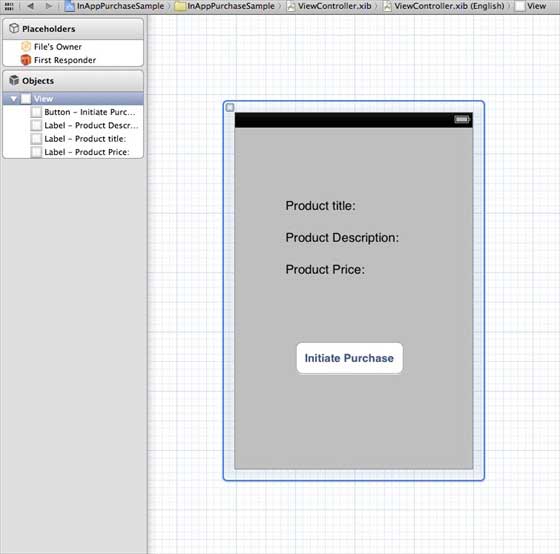
8. Create IBOutlets for the three labels and the button, naming them productTitleLabel, productDescriptionLabel, productPriceLabel, and purchaseButton respectively.
9. Select the project file, then select the target, then add StoreKit.framework.
10. Update ViewController.h as shown below.
#import <UIKit/UIKit.h>
#import <StoreKit/StoreKit.h>

@interface ViewController : UIViewController<
SKProductsRequestDelegate,SKPaymentTransactionObserver>
{
    SKProductsRequest *productsRequest;
    NSArray *validProducts;
    UIActivityIndicatorView *activityIndicatorView;
    IBOutlet UILabel *productTitleLabel;
    IBOutlet UILabel *productDescriptionLabel;
    IBOutlet UILabel *productPriceLabel;
    IBOutlet UIButton *purchaseButton;
}
- (void)fetchAvailableProducts;
- (BOOL)canMakePurchases;
- (void)purchaseMyProduct:(SKProduct*)product;
- (IBAction)purchase:(id)sender;

@end
11. Update ViewController.m as shown below.
#import "ViewController.h"
#define kTutorialPointProductID
@"com.tutorialPoints.testApp.testProduct"

@interface ViewController ()

@end

@implementation ViewController

- (void)viewDidLoad
{
    [super viewDidLoad];
    // Adding activity indicator
    activityIndicatorView = [[UIActivityIndicatorView alloc]
    initWithActivityIndicatorStyle:UIActivityIndicatorViewStyleWhiteLarge];
    activityIndicatorView.center = self.view.center;
    [activityIndicatorView hidesWhenStopped];
    [self.view addSubview:activityIndicatorView];
    [activityIndicatorView startAnimating];
    //Hide purchase button initially
    purchaseButton.hidden = YES;
    [self fetchAvailableProducts];
}

- (void)didReceiveMemoryWarning
{
    [super didReceiveMemoryWarning];
    // Dispose of any resources that can be recreated.
}

-(void)fetchAvailableProducts{
    NSSet *productIdentifiers = [NSSet
    setWithObjects:kTutorialPointProductID,nil];
    productsRequest = [[SKProductsRequest alloc]
    initWithProductIdentifiers:productIdentifiers];
    productsRequest.delegate = self;
    [productsRequest start];
}

- (BOOL)canMakePurchases
{
    return [SKPaymentQueue canMakePayments];
}
- (void)purchaseMyProduct:(SKProduct*)product{
    if ([self canMakePurchases]) {
        SKPayment *payment = [SKPayment paymentWithProduct:product];
        [[SKPaymentQueue defaultQueue] addTransactionObserver:self];
        [[SKPaymentQueue defaultQueue] addPayment:payment];
    }
    else{
        UIAlertView *alertView = [[UIAlertView alloc]initWithTitle:
        @"Purchases are disabled in your device" message:nil delegate:
        self cancelButtonTitle:@"Ok" otherButtonTitles: nil];
        [alertView show];
    }
}
-(IBAction)purchase:(id)sender{
    [self purchaseMyProduct:[validProducts objectAtIndex:0]];
    purchaseButton.enabled = NO;
}

#pragma mark StoreKit Delegate

-(void)paymentQueue:(SKPaymentQueue *)queue
 updatedTransactions:(NSArray *)transactions {
    for (SKPaymentTransaction *transaction in transactions) {
        switch (transaction.transactionState) {
            case SKPaymentTransactionStatePurchasing:
                    NSLog(@"Purchasing");
                break;
            case SKPaymentTransactionStatePurchased:
               if ([transaction.payment.productIdentifier
                  isEqualToString:kTutorialPointProductID]) {
                   NSLog(@"Purchased ");
                   UIAlertView *alertView = [[UIAlertView alloc]initWithTitle:
                   @"Purchase is completed succesfully" message:nil delegate:
                   self cancelButtonTitle:@"Ok" otherButtonTitles: nil];
                   [alertView show];
                }
                [[SKPaymentQueue defaultQueue] finishTransaction:transaction];
                break;
            case SKPaymentTransactionStateRestored:
                NSLog(@"Restored ");
                [[SKPaymentQueue defaultQueue] finishTransaction:transaction];
                break;
            case SKPaymentTransactionStateFailed:
                NSLog(@"Purchase failed ");
                break;
            default:
                break;
        }
    }
}

-(void)productsRequest:(SKProductsRequest *)request
 didReceiveResponse:(SKProductsResponse *)response
{
    SKProduct *validProduct = nil;
    int count = [response.products count];
    if (count>0) {
        validProducts = response.products;
        validProduct = [response.products objectAtIndex:0];
        if ([validProduct.productIdentifier
           isEqualToString:kTutorialPointProductID]) {
            [productTitleLabel setText:[NSString stringWithFormat:
            @"Product Title: %@",validProduct.localizedTitle]];
            [productDescriptionLabel setText:[NSString stringWithFormat:
            @"Product Desc: %@",validProduct.localizedDescription]];
            [productPriceLabel setText:[NSString stringWithFormat:
            @"Product Price: %@",validProduct.price]];
        }
    } else {
        UIAlertView *tmp = [[UIAlertView alloc]
                            initWithTitle:@"Not Available"
                            message:@"No products to purchase"
                            delegate:self
                            cancelButtonTitle:nil
                            otherButtonTitles:@"Ok", nil];
        [tmp show];
    }
    [activityIndicatorView stopAnimating];
    purchaseButton.hidden = NO;
}

@end
Note:You need to modify the kTutorialPointProductID for the In-App Purchase you created. By modifying the NSSet of product identifiers in fetchAvailableProducts, you can add multiple products.
Output
Run the app, the output is as follows.
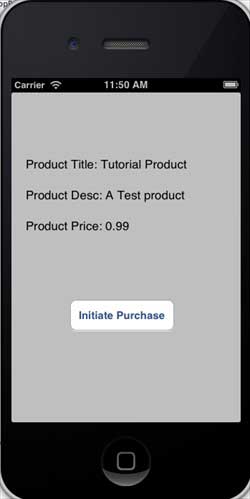
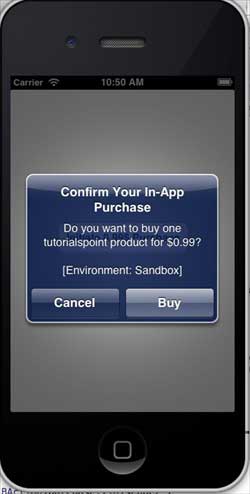
Make sure you are logged in. Click purchase to select the existing Apple ID. Enter the username and password of a valid test account. After a few seconds, the following message is displayed.
Once the product is successfully purchased, the following information will be shown. Where this information is displayed, you can update the code related to app functionality.