Create Your First iPhone Application
Now let's create a simple view application (a blank application) that runs on the iOS Simulator.
The steps are as follows:
1. Open Xcode and select Create a new Xcode project.
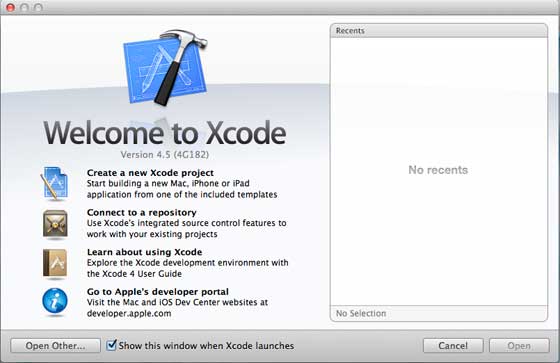
2. Then select Single View Application.
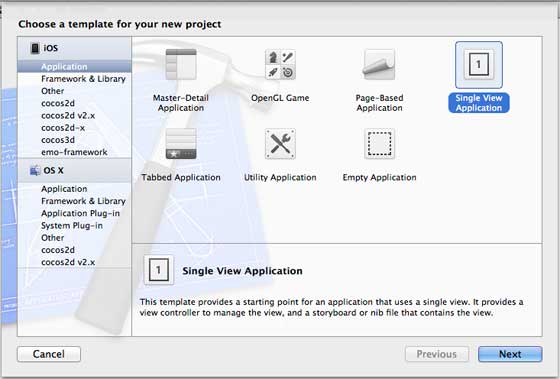
3. Next, enter the Product Name (the application name), Organization Name, and Company Identifier.
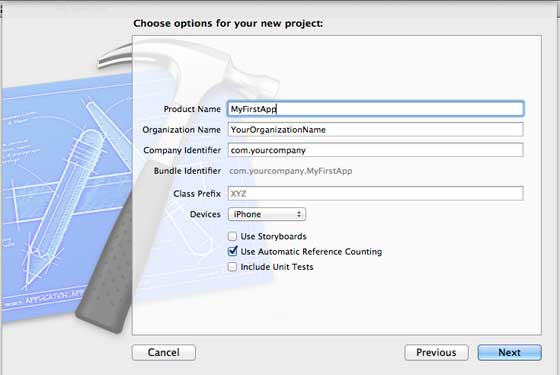
4. Make sure Automatic Reference Counting is selected to automatically release resources that go out of scope. Click Next.
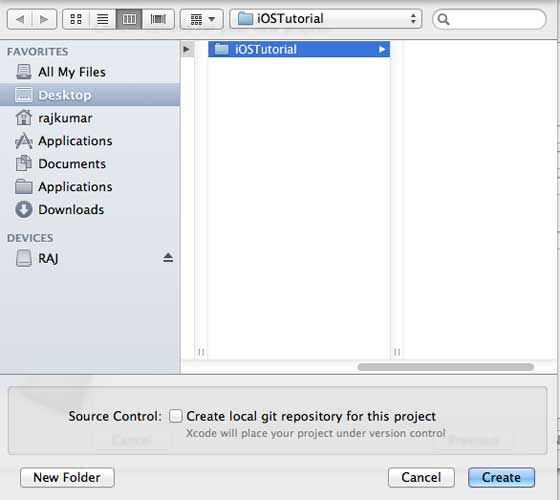
5. Select the project directory and click Create.
6. You will see a page as shown below.
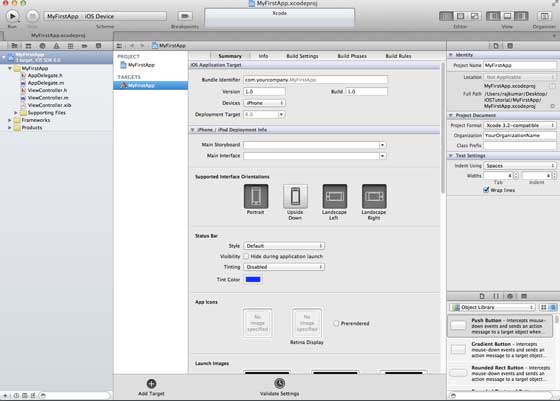
At the top of the screen you can set orientation, build, and release. There is a deployment target; the device supports a deployment target of version 4.3 and above. These are not required. For now, just focus on running the application.
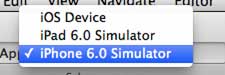
7. Select iPhone Simulator from the drop-down menu and run.
8. If the first application runs successfully, you will get the output as shown below.
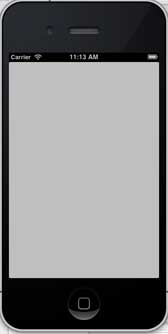
Change the background color to start using Interface Builder. Select ViewController.xib. Select the Background option on the right, change the color, and run.
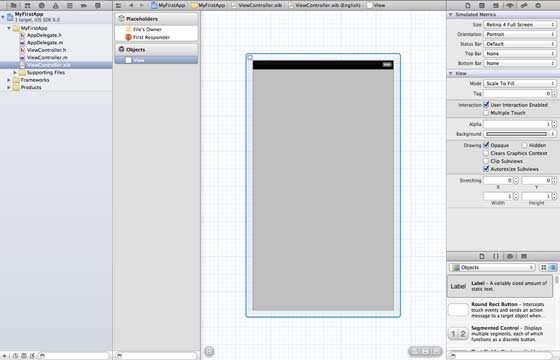
In the above project, by default, the deployment target is set to iOS 6.0 and Auto Layout is enabled.
To ensure the application runs properly on iOS 4.3 devices, we have already modified the deployment target when we started creating the application, but we have not disabled Auto Layout. To disable Auto Layout, we need to uncheck the Auto Layout checkbox in the File Inspector for each nib, i.e., xib file.
The various parts of the Xcode project IDE are shown below (Apple Xcode 4 User Documentation).
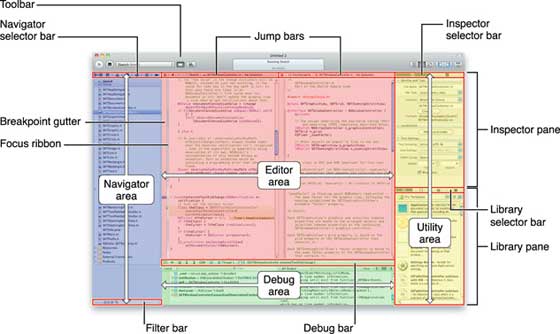
In the Inspector Selector bar shown above, you can find the File Inspector and uncheck Auto Layout. You can use Auto Layout when your deployment target is only iOS 6.0 devices.
Of course, you can also use new features, such as Passbook, when targeting iOS 6. For now, use iOS 4.3 as the deployment target.
Deep Dive into the Code of Your First iOS Application
The application is generated from 5 different files, as shown below.- AppDelegate.h
- AppDelegate.m
- ViewController.h
- ViewController.m
- ViewController.xib
We use single-line comments (//) to explain simple code. Important project code is explained below the code.
AppDelegate.h
// Header File that provides all UI related items.
#import <UIKit/UIKit.h>

 // Forward declaration (Used when class will be defined /imported in future)
@class ViewController;

 // Interface for Appdelegate
@interface AppDelegate : UIResponder <UIApplicationDelegate>

// Property window
@property (strong, nonatomic) UIWindow *window;

 // Property Viewcontroller

 @property (strong, nonatomic) ViewController *viewController;
//this marks end of interface
@end
Code Explanation
- AppDelegate invokes UIResponder to handle iOS events.
- Implements UIApplication commands, providing key application events such as launch finished, termination, etc.
- On the iOS device screen, UIWindow objects are used to manage and coordinate various views. It is like a base view for other loaded views. Usually an application has only one window.
- UIViewController handles the screen flow.
AppDelegate.m
// Imports the class Appdelegate's interface
import "AppDelegate.h"

// Imports the viewcontroller to be loaded
#import "ViewController.h"

// Class definition starts here
@implementation AppDelegate

// Following method intimates us the application launched  successfully
- (BOOL)application:(UIApplication *)application
 didFinishLaunchingWithOptions:(NSDictionary *)launchOptions
{
    self.window = [[UIWindow alloc] initWithFrame:
    [[UIScreen mainScreen] bounds]];
    // Override point for customization after application launch.
    self.viewController = [[ViewController alloc]
     initWithNibName:@"ViewController" bundle:nil];
    self.window.rootViewController = self.viewController;
    [self.window makeKeyAndVisible];
    return YES;
}

- (void)applicationWillResignActive:(UIApplication *)application
{
    /* Sent when the application is about to move from active to inactive state.
    This can occur for certain types of temporary interruptions
    (such as an incoming phone call or SMS message)
    or when the user quits the application and it begins the transition to the
    background state. Use this method to pause ongoing tasks, disable timers,
    and throttle down OpenGL ES frame rates. Games should use this method
    to pause the game.*/
}

- (void)applicationDidEnterBackground:(UIApplication *)application
{
    /* Use this method to release shared resources, save user data, invalidate
    timers, and store enough application state information    to restore your
    application to its current state in case it is terminated later. If your
    application supports background execution, this method is called instead
    of applicationWillTerminate: when the user quits.*/
}

- (void)applicationWillEnterForeground:(UIApplication *)application
{
    /* Called as part of the transition from the background to the inactive state;
    here you can undo many of the changes made on entering the background.*/
}

- (void)applicationDidBecomeActive:(UIApplication *)application
{
    /* Restart any tasks that were paused (or not yet started) while the
    application was inactive. If the application was previously in the background,
    optionally refresh the user interface.*/
}

- (void)applicationWillTerminate:(UIApplication *)application
{
    /* Called when the application is about to terminate. Save data if appropriate.
    See also applicationDidEnterBackground:. */
}

@end
Code Explanation
- Here UIApplication is defined. All the methods defined above are invoked by the application UI and do not contain any user-defined methods.
- A UIWindow object is allocated to hold the application's allocated objects.
- UIController serves as the window's initial view controller.
- Calling makeKeyAndVisible makes the window visible.
ViewController.h
#import

// Interface for class ViewController
@interface ViewController : UIViewController

@end
Code Explanation
- The ViewController class inherits from UIViewController, providing the basic view management model for iOS applications.
ViewController.m
#import "ViewController.h"

// Category, an extension of ViewController class
@interface ViewController ()

@end

@implementation ViewController

- (void)viewDidLoad
{
    [super viewDidLoad];
    // Do any additional setup after loading the view, typically from a nib.
}

- (void)didReceiveMemoryWarning
{
    [super didReceiveMemoryWarning];
    // Dispose of any resources that can be recreated.
}

@end
Code Explanation
- Here, two methods defined in the base class of the UIViewController class are implemented.
- After the initial view is loaded, viewDidLoad is called to perform setup.
- In the case of a memory warning, didReceviveMemoryWarning is called.