Creating Videos with Claude Code and remotion-best-practices
This chapter explains how to build and generate a Remotion promotional video project from scratch locally using Claude Code with the remotion-best-practices skill.
Prerequisites
Before you begin, make sure your local environment meets the following requirements.
| Dependencies | Version Requirement | Purpose |
|---|---|---|
| Node.js | >= 18.0 | Run Remotion and npm scripts |
| npm / pnpm | Latest stable version | Dependency package management |
| Claude Code | Latest version | AI-assisted code generation and project scaffolding |
| remotion-best-practices | Installed as a skill | Provides Remotion project standards and templates |
Installing Claude Code
The official one-click installation script is available; run the corresponding command based on your system.
macOS、Linux、WSL:
curl -fsSL https://claude.ai/install.sh | bash
Windows PowerShell:
irm https://claude.ai/install.ps1 | iex
Windows CMD:
curl -fsSL https://claude.ai/install.cmd -o install.cmd && install.cmd && del install.cmd
After installation, verify whether it succeeded:
$ claude --version
2.1.142 (Claude Code)
First run requires logging in to your Anthropic account and authorizing. If you don't have an official account, you can checkClaude Code API Configuration
Installing the remotion-best-practices Skill
A Skill is an extension capability package for Claude Code. remotion-best-practices packages Remotion project best practices and code templates.
What is a Skill
A Skill is essentially a structured prompt document (SKILL.md). After Claude Code reads it, it gains professional knowledge and specification constraints in the corresponding domain.
The remotion-best-practices skill includes the following content:
| Content Module | Description |
|---|---|
| Project directory standards | Defines standard layered structures for compositions, components, and assets |
| Animation API usage | Standard patterns for interpolate, spring, and useCurrentFrame |
| Performance best practices | Specifications for avoiding redundant rendering, preloading static assets, etc. |
| Render configuration templates | Recommended parameter combinations for codec, fps, resolution, etc. |
Installation Method
In the terminal, navigate to your project directory and run the installation command:
npx skills add https://github.com/remotion-dev/skills --skill remotion-best-practices
After installation, you can verify that the skill has been recognized:
claude skills list
You should see a section similar to the following:
Installed skills:
  - remotion-best-practices  (active)
remotion-best-practices source code address:https://github.com/remotion-dev/skills
Creating a Remotion Project
After all preparations are complete, launch Claude Code in an empty directory and use a single prompt to let it automatically set up the project.
Launching Claude Code and Passing a Prompt
We can create a directoryvideo-marker, then enter it:
mkdir video-marker
cd video-marker
Run in the project directory:
claude
After entering the interactive interface, paste the following prompt:
先读取 remotion-best-practices skill,然后创建一个 Remotion 项目。

目标:6 秒钟的「Hello Example」好莱坞风格片头视频,1920x1080,30fps。

效果要求:
- 纯黑背景
- "HELLO EXAMPLE" 文字以冲击力方式砸入画面,伴随冲击波扭曲效果
- 撞击瞬间爆发金色粒子
- 强烈的色差闪光(chromatic aberration)
- 文字落定后,绿色(#3A7EC2)轮廓光晕脉冲
- 顶部和底部黑色宽幅遮幅条像电影一样滑入

只需一个 Composition,不用拆分场景。整体质感对标好莱坞大片片头字幕。
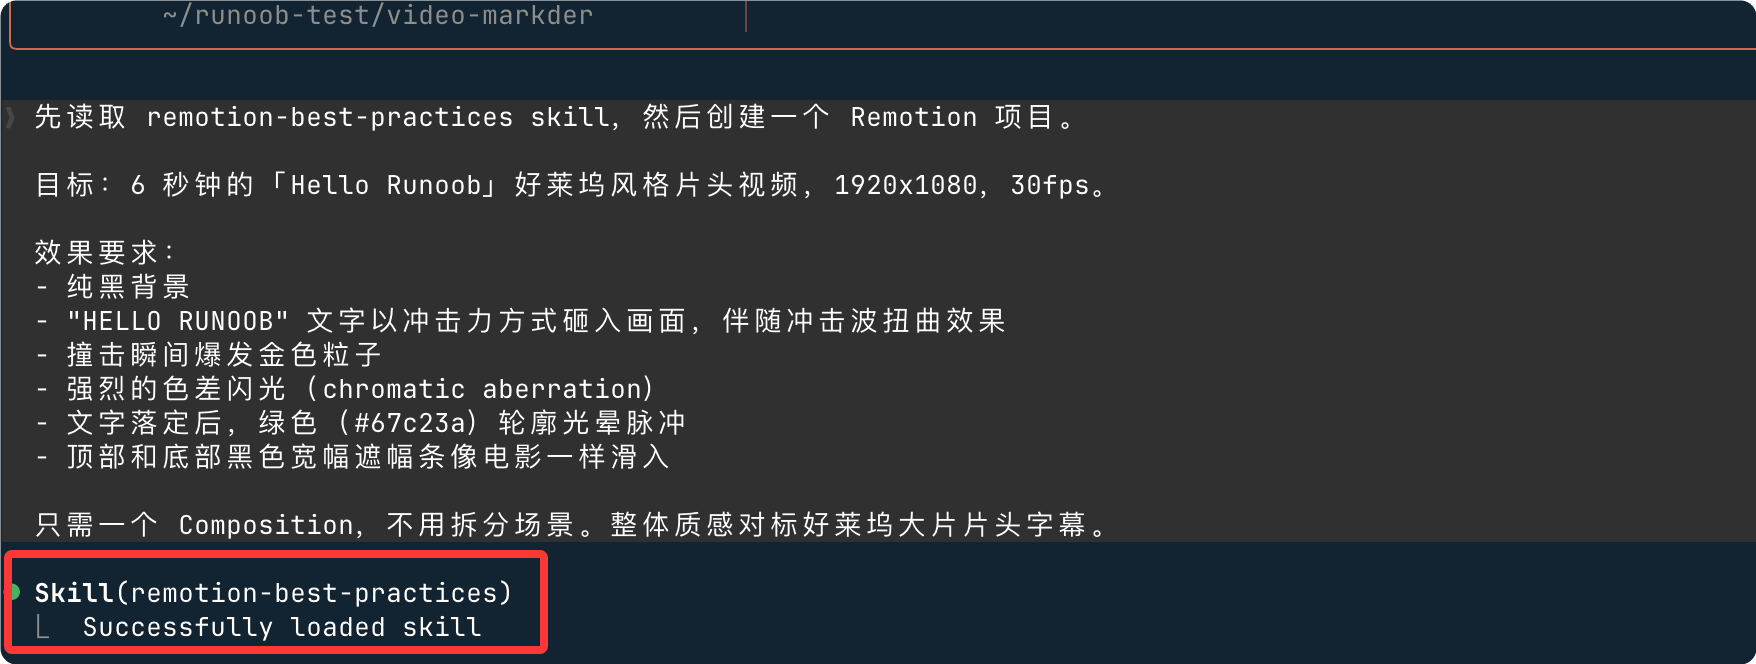
Then just wait for it to generate~
Once done, it will tell you how to generate the mp4 file:
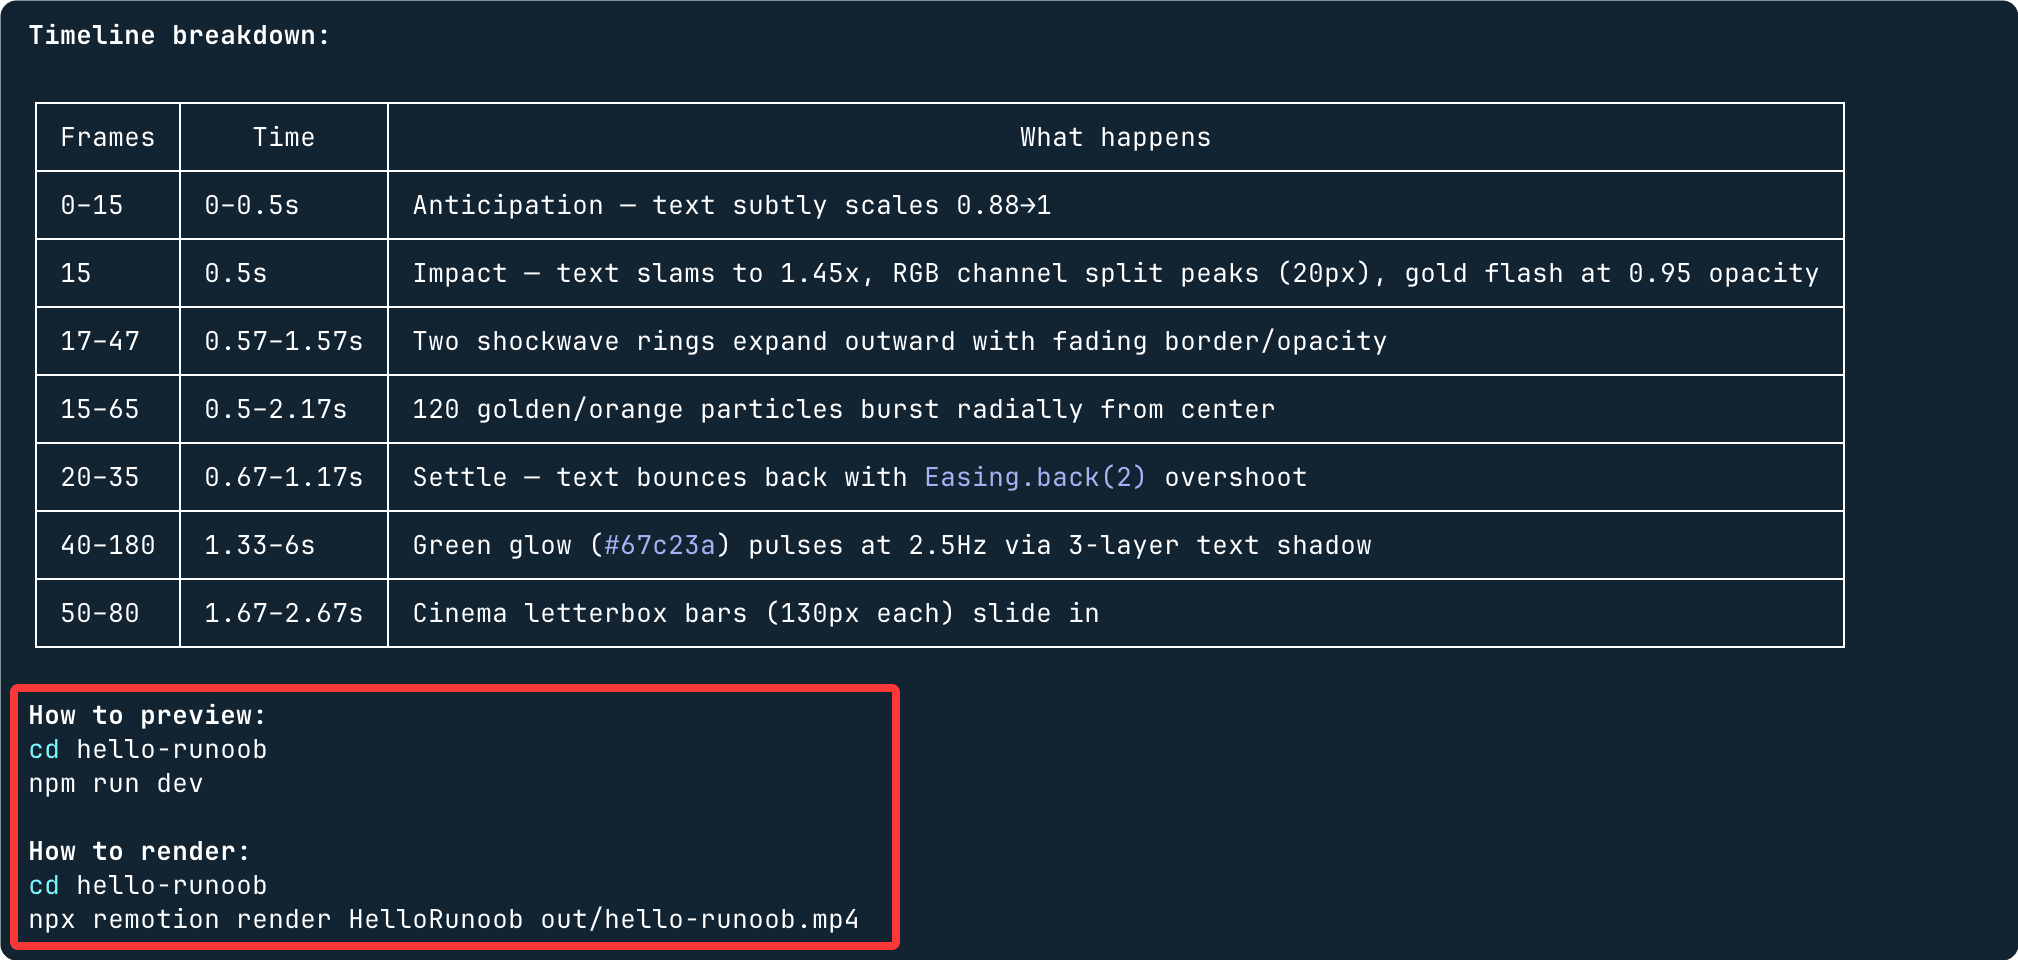
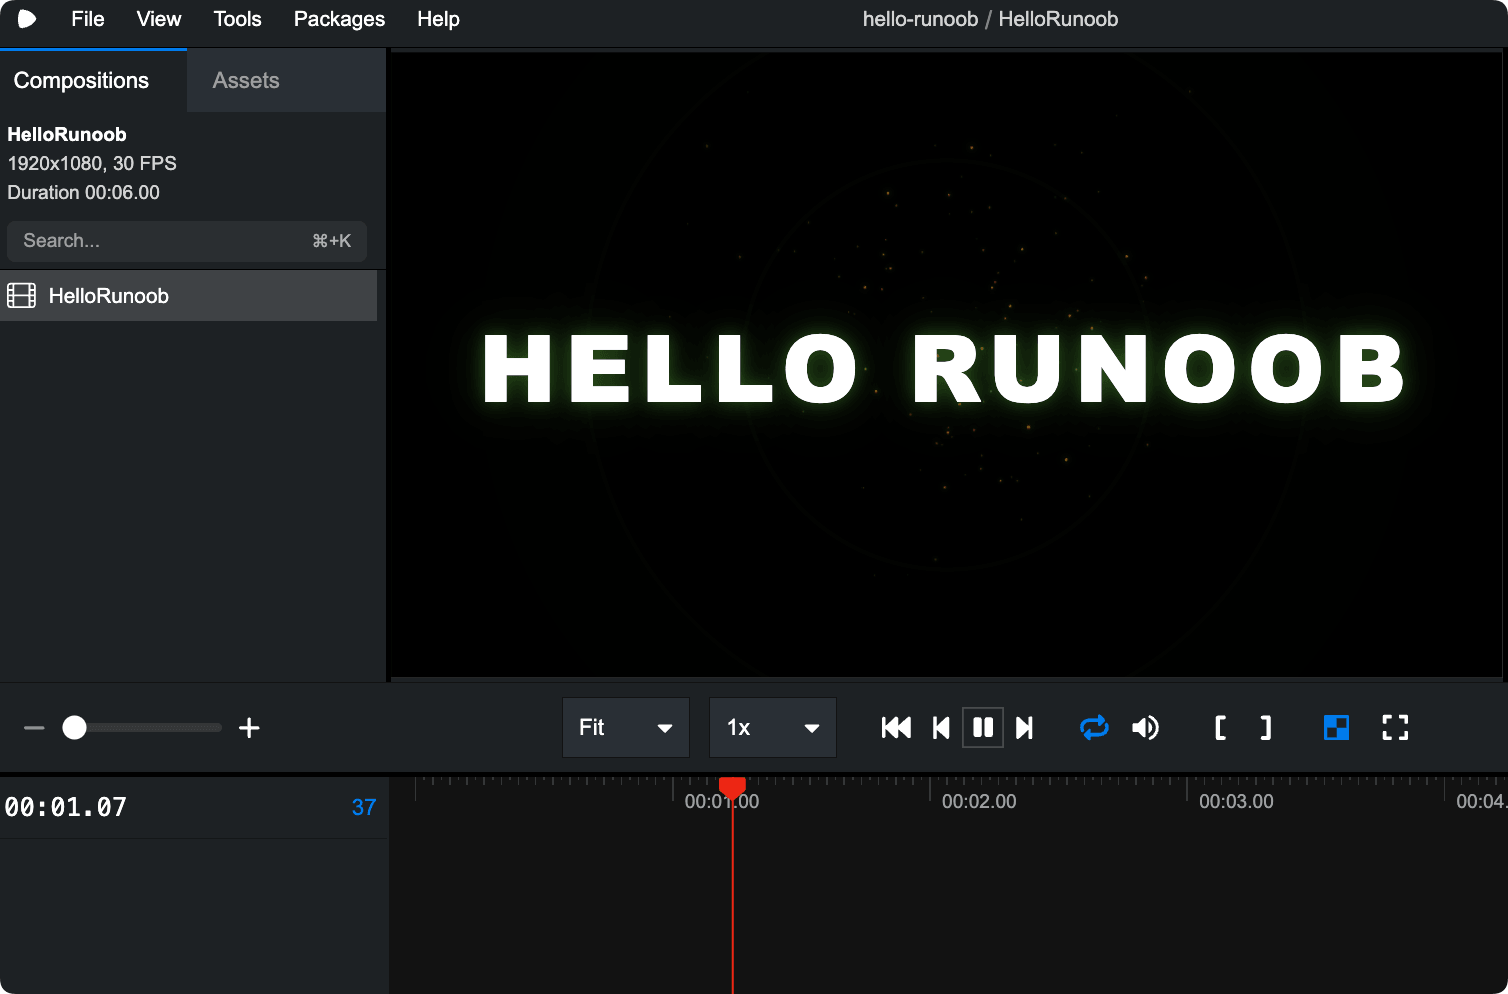
Browser preview:
cd hello-example
npm run dev
Preview effect:
Generate mp4:
cd hello-example
npx remotion render HelloExample out/hello-example.mp4
Export information:

The video is in the out directory:

The prompt explicitly requires Claude Code to read the skill first, so the generated code strictly follows the remotion-best-practices specification rather than relying on the model's own default habits.
What Claude Code Will Do
After reading the skill, Claude Code will automatically complete the following steps:
| Step | Action | Generated content |
|---|---|---|
| 1 | Initialize project | package.json、tsconfig.json、remotion.config.ts |
| 2 | Create directory structure | src/compositions、src/components、src/assets |
| 3 | Generate Scene components | Intro.tsx、FeaturesScene.tsx、StatsScene.tsx、Outro.tsx |
| 4 | Generate common components | TechCard.tsx、AnimatedCounter.tsx、CodeSnippet.tsx |
| 5 | Register Composition | Complete all scene stitching in Root.tsx |
More Examples
Example 1: Number growth animation
帮我用 Remotion 创建一个 8 秒的视频。背景是深色,画面中央显示一个数字,从 0 逐渐增长到 1,000,000,数字有弹跳动画效果,最后定格时出现"突破百万!"的字样。字体要大,颜色用金黄色。
Claude Code 接到这个指令后会:
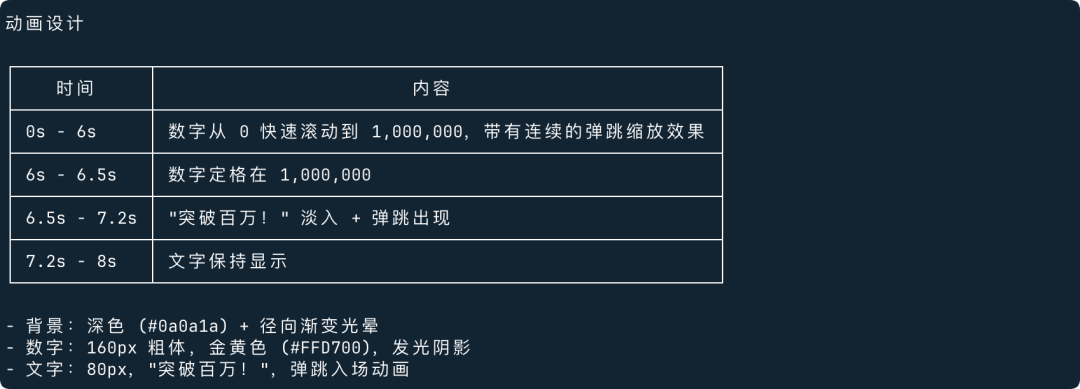
We can directly let the AI export the video for us in Claude:
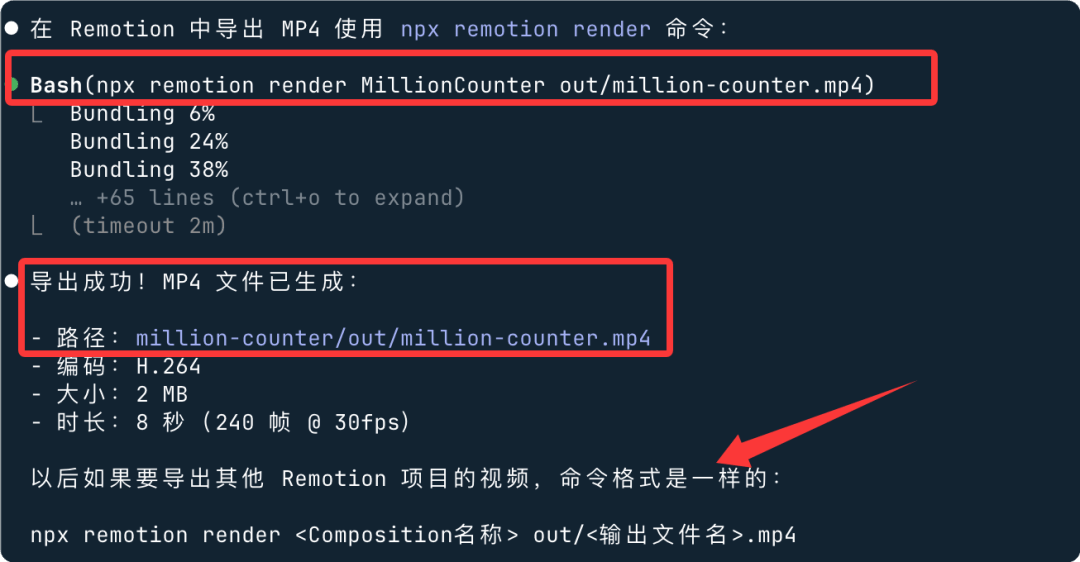
Generated video:

Example 2: Product launch countdown
用 Remotion 做一个 15 秒的产品发布倒计时视频。从 10 倒数到 0,每个数字出现时有缩放+透明度的过渡动画,背景用黑色,数字用白色大字体,右上角有"NEW"红色徽章。倒计时结束时全屏出现产品名称"CLAUDE PRO",字体要震撼。
Generated video:

Key points:The more specific the prompt, the better. If you clearly describe the time, colors, effects, and text content, Claude Code can get it right in one go without requiring repeated adjustments.
Understanding the Generated Project Structure
After the project is set up, the directory structure is as follows:
hello-example/
├── package.json
├── tsconfig.json
├── remotion.config.ts
└── src/
    ├── index.ts              ← 入口,注册所有 Composition
    ├── Root.tsx              ← 主 Composition,拼接所有场景
    ├── compositions/
    │   ├── Intro.tsx         ← 开场 Logo 动画
    │   ├── ProblemScene.tsx  ← 问题引入场景
    │   ├── FeaturesScene.tsx ← 技术卡片展示
    │   ├── StatsScene.tsx    ← 数据统计场景
    │   └── Outro.tsx         ← 结尾 CTA
    ├── components/
    │   ├── TechCard.tsx      ← 单个技术卡片
    │   ├── AnimatedCounter.tsx ← 数字滚动
    │   └── CodeSnippet.tsx   ← 代码块动画
    └── assets/
        ├── colors.ts         ← 品牌色常量
        └── logo.svg

Core File Explanation
Root.tsxIt is the entry point of the entire video, where all scenes are stitched together in timeline order:
Root.tsx Structure Overview
import { Composition } from "remotion";
import { HelloExample } from "./Composition";
export const RemotionRoot: React.FC = () => {
return (
<>
<Composition
id="HelloExample"
component={HelloExample}
durationInFrames={180}
fps={30}
width={1920}
height={1080}
/>
</>
);
};
The main video component, using Series to stitch scenes in order:
const MainVideo = () => {
  return (
    <Series>
      <Series.Sequence durationInFrames={90}>   {/* 3秒 */}
        <Intro />
      </Series.Sequence>
      <Series.Sequence durationInFrames={210}>  {/* 7秒 */}
        <FeaturesScene />
      </Series.Sequence>
      <Series.Sequence durationInFrames={450}>  {/* 15秒 */}
        <StatsScene />
      </Series.Sequence>
      <Series.Sequence durationInFrames={300}>  {/* 10秒 */}
        <Outro />
      </Series.Sequence>
    </Series>
  );
};
Installing Dependencies and Previewing
After Claude Code generates the code, install dependencies according to its prompts:
npm install
Launch Remotion Studio to preview the video effect:
npx remotion studio
> example-promo@1.0.0 studio
> remotion studio

Remotion Studio running at http://localhost:3000
The browser will open automaticallyhttp://localhost:3000, and you can drag the timeline to preview the effect of each frame in real time.
If an animation in a scene looks too fast or too slow during preview, just tell Claude Code: "The card entrance animation in scene 2 is too fast, make the delay longer," and it will locate the corresponding code and modify it.
Iterating with Claude Code for Adjustments
While previewing in Remotion Studio, if you find issues, you can describe them directly in natural language in Claude Code without manually changing code.
Common Adjustment Scenarios
| Problem description | How to tell Claude Code |
|---|---|
| Card animation too fast | Lower the spring stiffness of the cards in FeaturesScene to 80 |
| Background color is wrong | Change the background color of all scenes to #0d1117 |
| Number counter is not smooth | Use easeOutCubic easing for AnimatedCounter in StatsScene |
| Want to add a scene | Add a 10-second scene after StatsScene that showcases the online instance feature |
| Text font is too small | Change the main title font in Intro.tsx to 96px |
Describe the problem directly in the Claude Code terminal, and it will find the corresponding file and modify it. Once modified, Remotion Studio will automatically hot-reload.
Rendering and Exporting the Final Video
After you're satisfied with the result, render it into an MP4 file:
Render Command
src/index.ts \ # Entry file
ExamplePromo \ # Composition ID, consistent with Root.tsx
out/example-promo.mp4 \ # Output path
--codec=h264 \ # Encoding format, best compatibility
--width=1920 \ # Output width
--height=1080 # Output height
Rendering ExamplePromo (1800 frames)
Progress: ████████████████████ 100%
Rendered in 2m 34s → out/example-promo.mp4
Remotion Best Practices: Helping AI Do Better
Rendering speed depends on scene complexity and machine performance. If the video is long and has many effects, you can add--concurrency=4the parameter to enable multi-threaded parallel rendering, which can speed up by 3 to 4 times.
In actual use, there are some tips that can greatly improve the quality of your videos. Adding these instructions to your prompt will make a noticeable difference:
🎬 Frame Rate and Size
- Tell Claude Code which platform you're targeting: Douyin uses1080×1920 vertical screen; Bilibili uses1920×1080 horizontal screen, WeChat uses1:1 square。
- For frame rate (fps), it's recommended to use30fps(smooth) or60fps(ultra-smooth, larger file size).
🎞 Animation Rhythm
- Use Remotion's
spring()function for spring animations, which is 10 times more natural than linear animations. In the prompt, say "use spring easing effects." - When text appears character by character, tell Claude to use "stagger delay," with each character appearing a few frames apart.
- Add 0.5 seconds of fade in and fade out at the beginning and end of the video for a more professional look.
🎨 Visual Texture
- Don't use a solid color for the background; have Claude use gradients or grid textures to instantly improve the texture.
- When adding subtitles, add a
text-shadowto the text; white text is clearer on dark backgrounds. - For data charts, use the
@remotion/motion-blurplugin, which adds a blur effect during motion, making it look more like a cinematic shot.
⚡ Rendering Efficiency
- During development, use
npx remotion previewpreview, and render/export only when satisfied, saving time. - If the video is very long, have Claude enable
--concurrencyparameter for parallel rendering, making it several times faster. - For image and font resources, use
staticFile()references to avoid path errors.
Frequently Asked Questions
Claude Code Did Not Read the Skill
If the generated code doesn't comply with the remotion-best-practices specification, it means the skill wasn't read correctly.
Add this sentence explicitly at the beginning of the prompt:
Force Reading the Skill
Remotion Studio Startup Error
A common cause is that the Node.js version is too old. Check and upgrade:
Upgrade Node.js
nvm install 20
nvm use 20
spring() Animation Only Shows the First Frame
This is becauseframe - delaywhen the value is negative, spring returns 0.
Add clamp protection:
Fixing the Negative Frame Issue
frame: Math.max(0, frame - delay), // Ensure the passed value is not negative
fps,
config: { damping: 12, stiffness: 180 },
});