PyCharm Create First Python Project
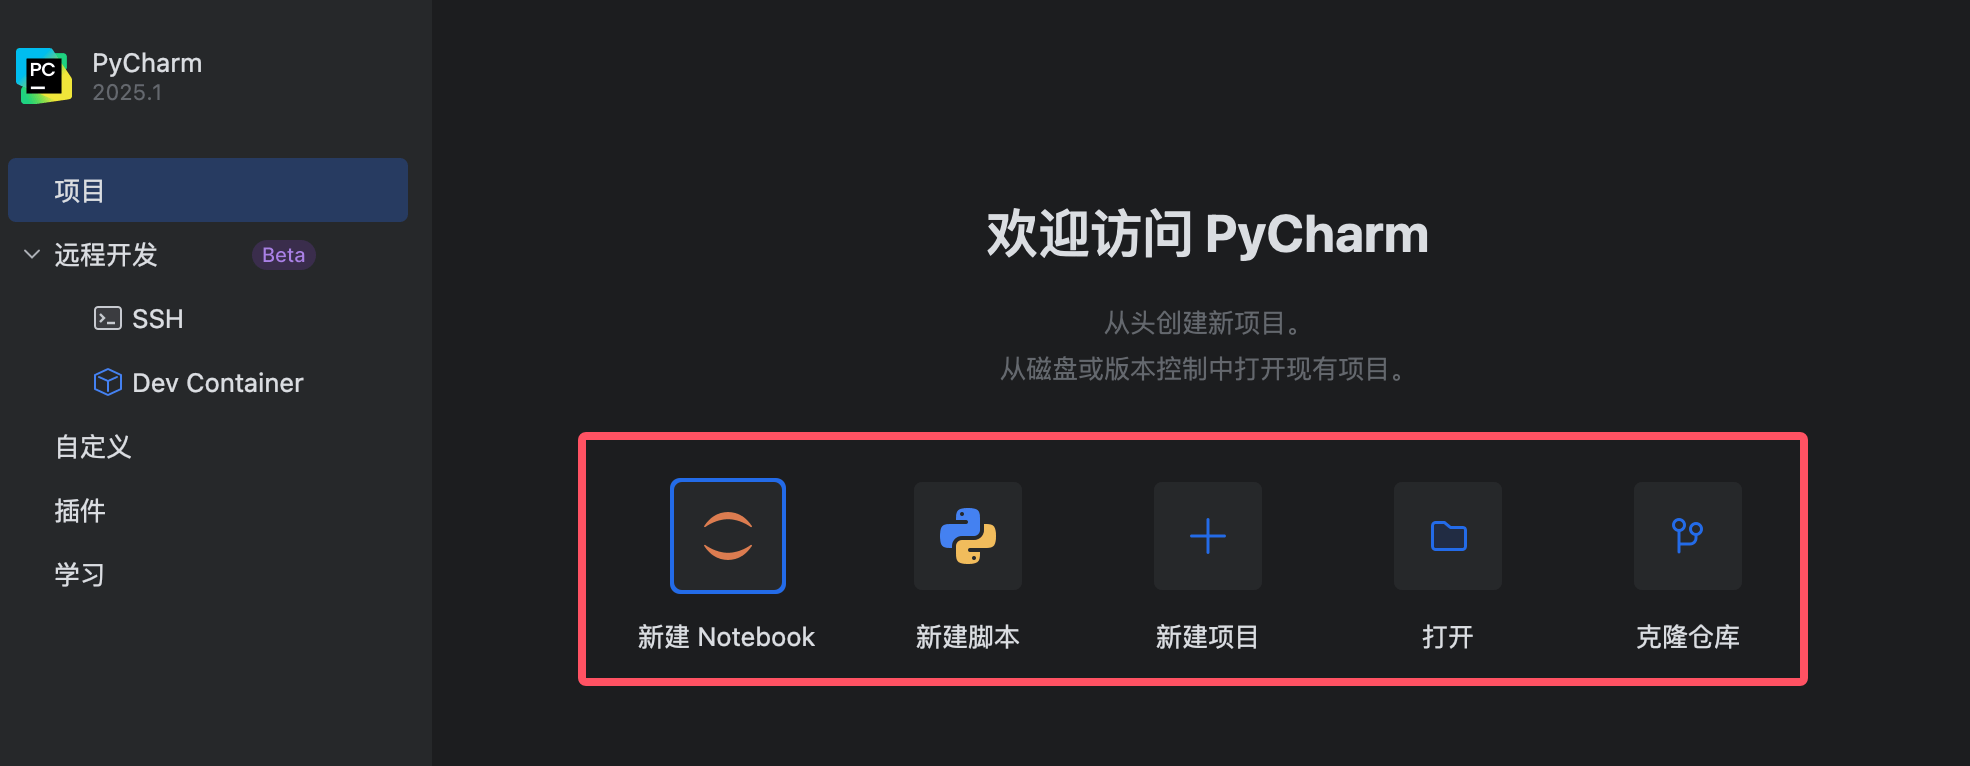
Actually, PyCharm provides many shortcuts upon startup:
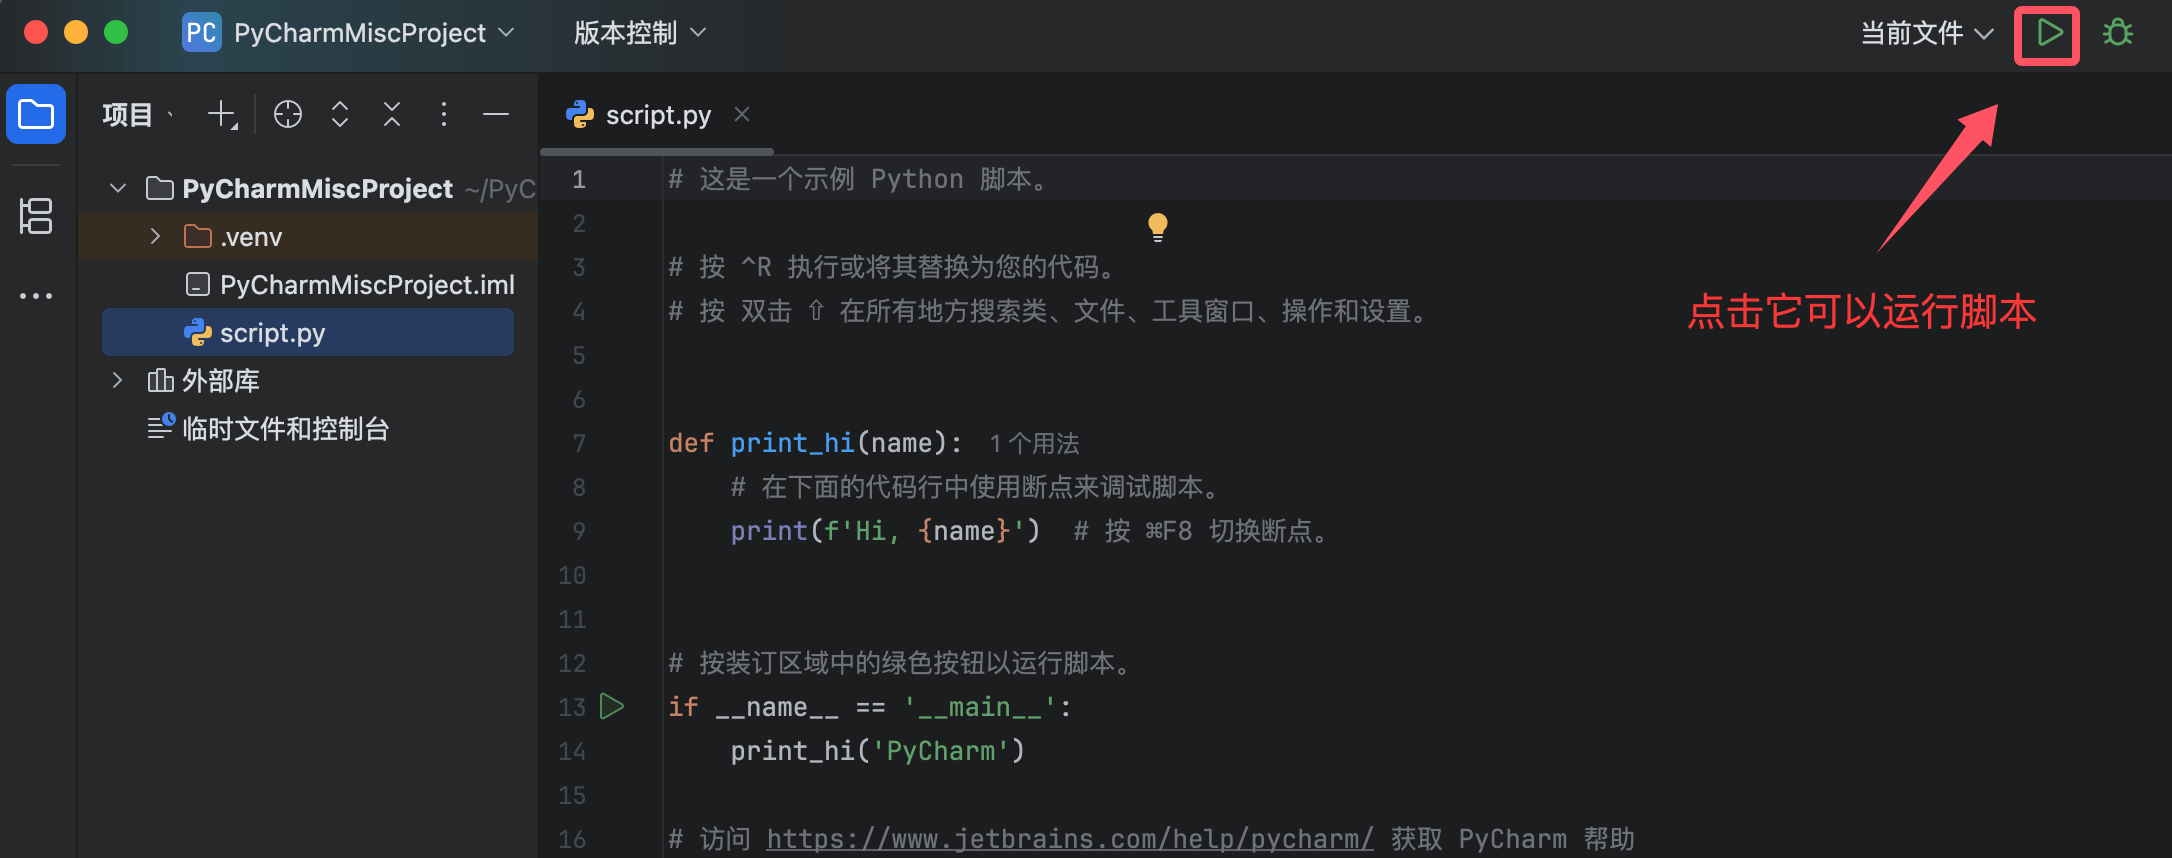
When we click the "New Script" button, PyCharm will help us create ascript.pyfile, and automatically initialize the code and environment:
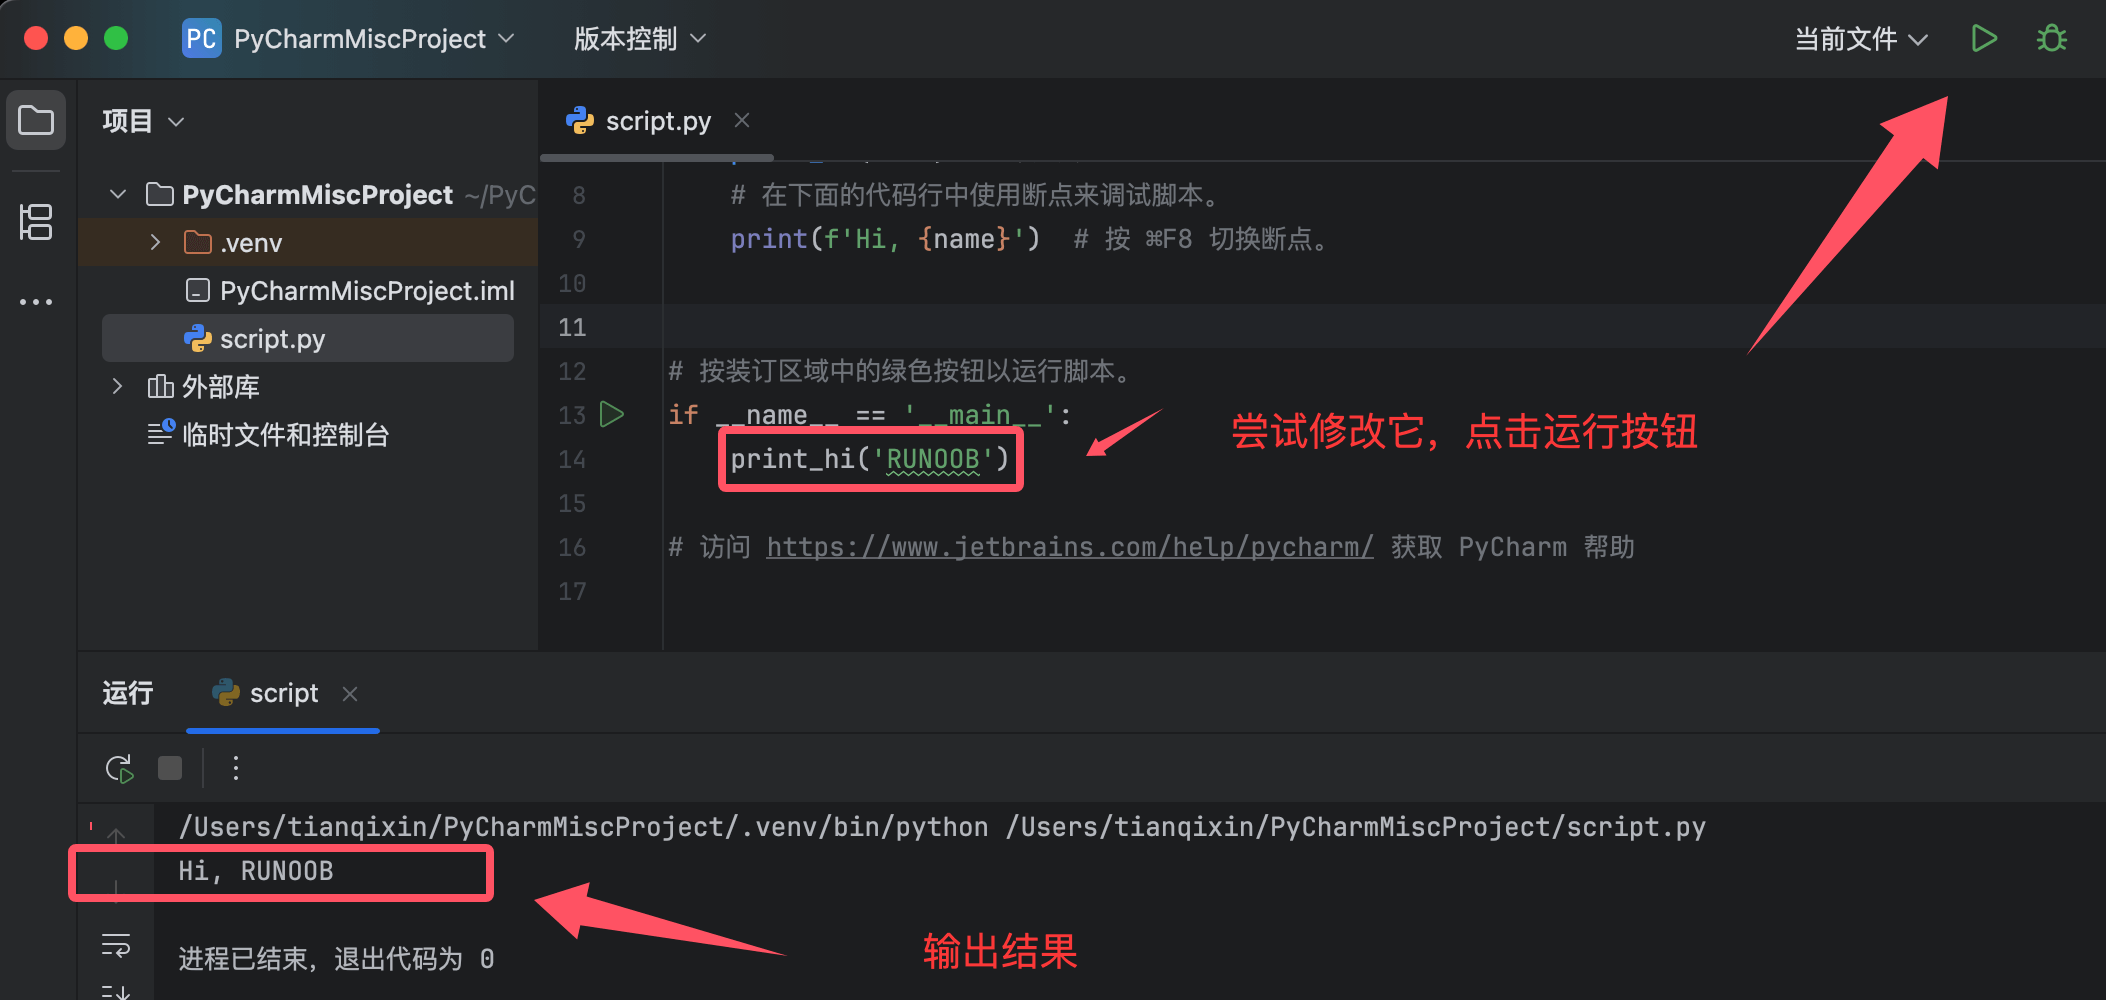
We can try modifying the script file and run it to see the output:
Create Project via Menu Bar
Start PyCharm and click "New Project".
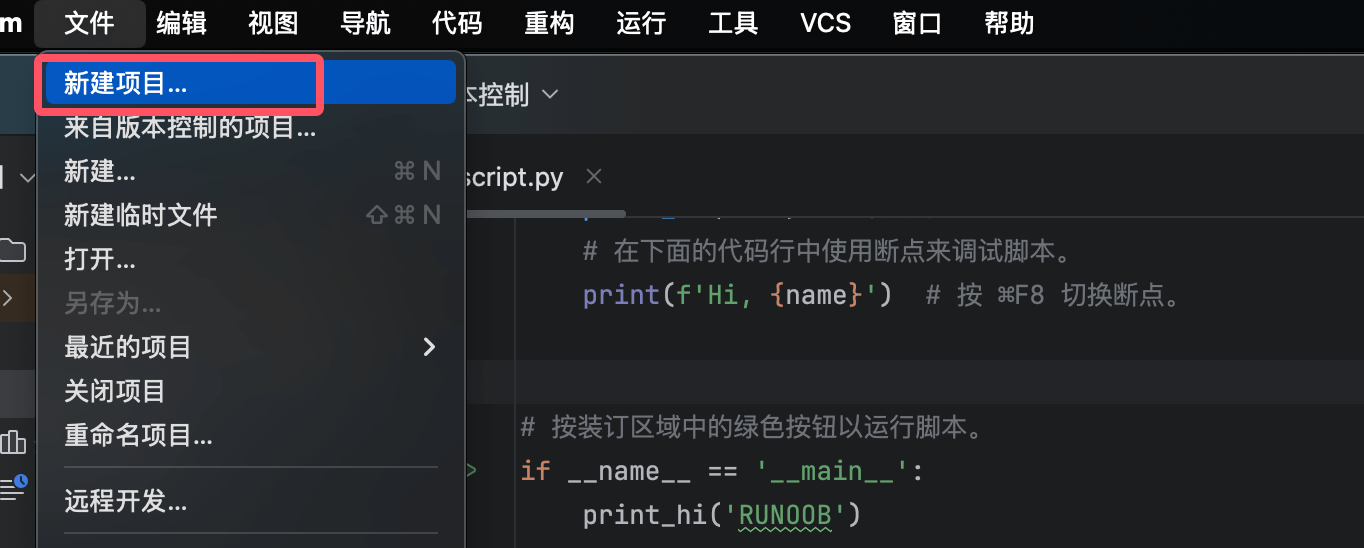
Enter the project nameEXAMPLE, set the project path, select the Python interpreter, and click "Create" to create the project.
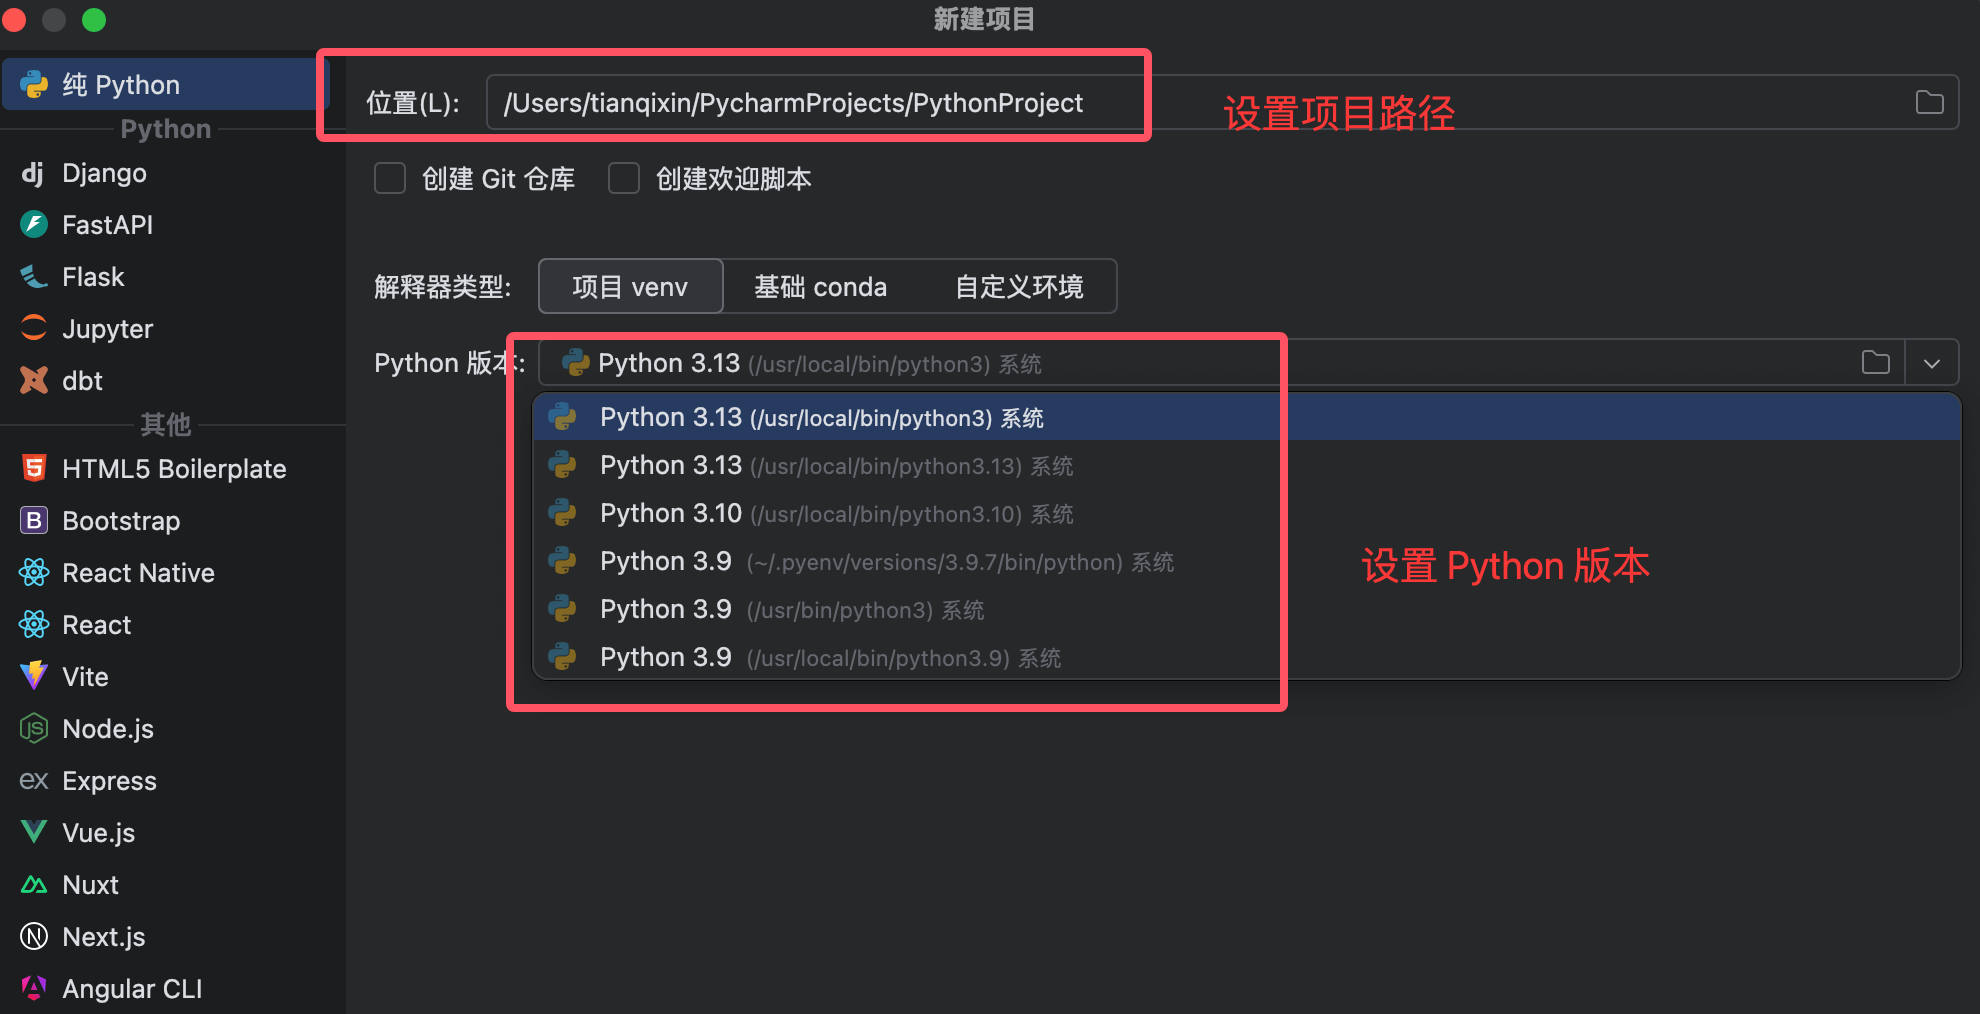
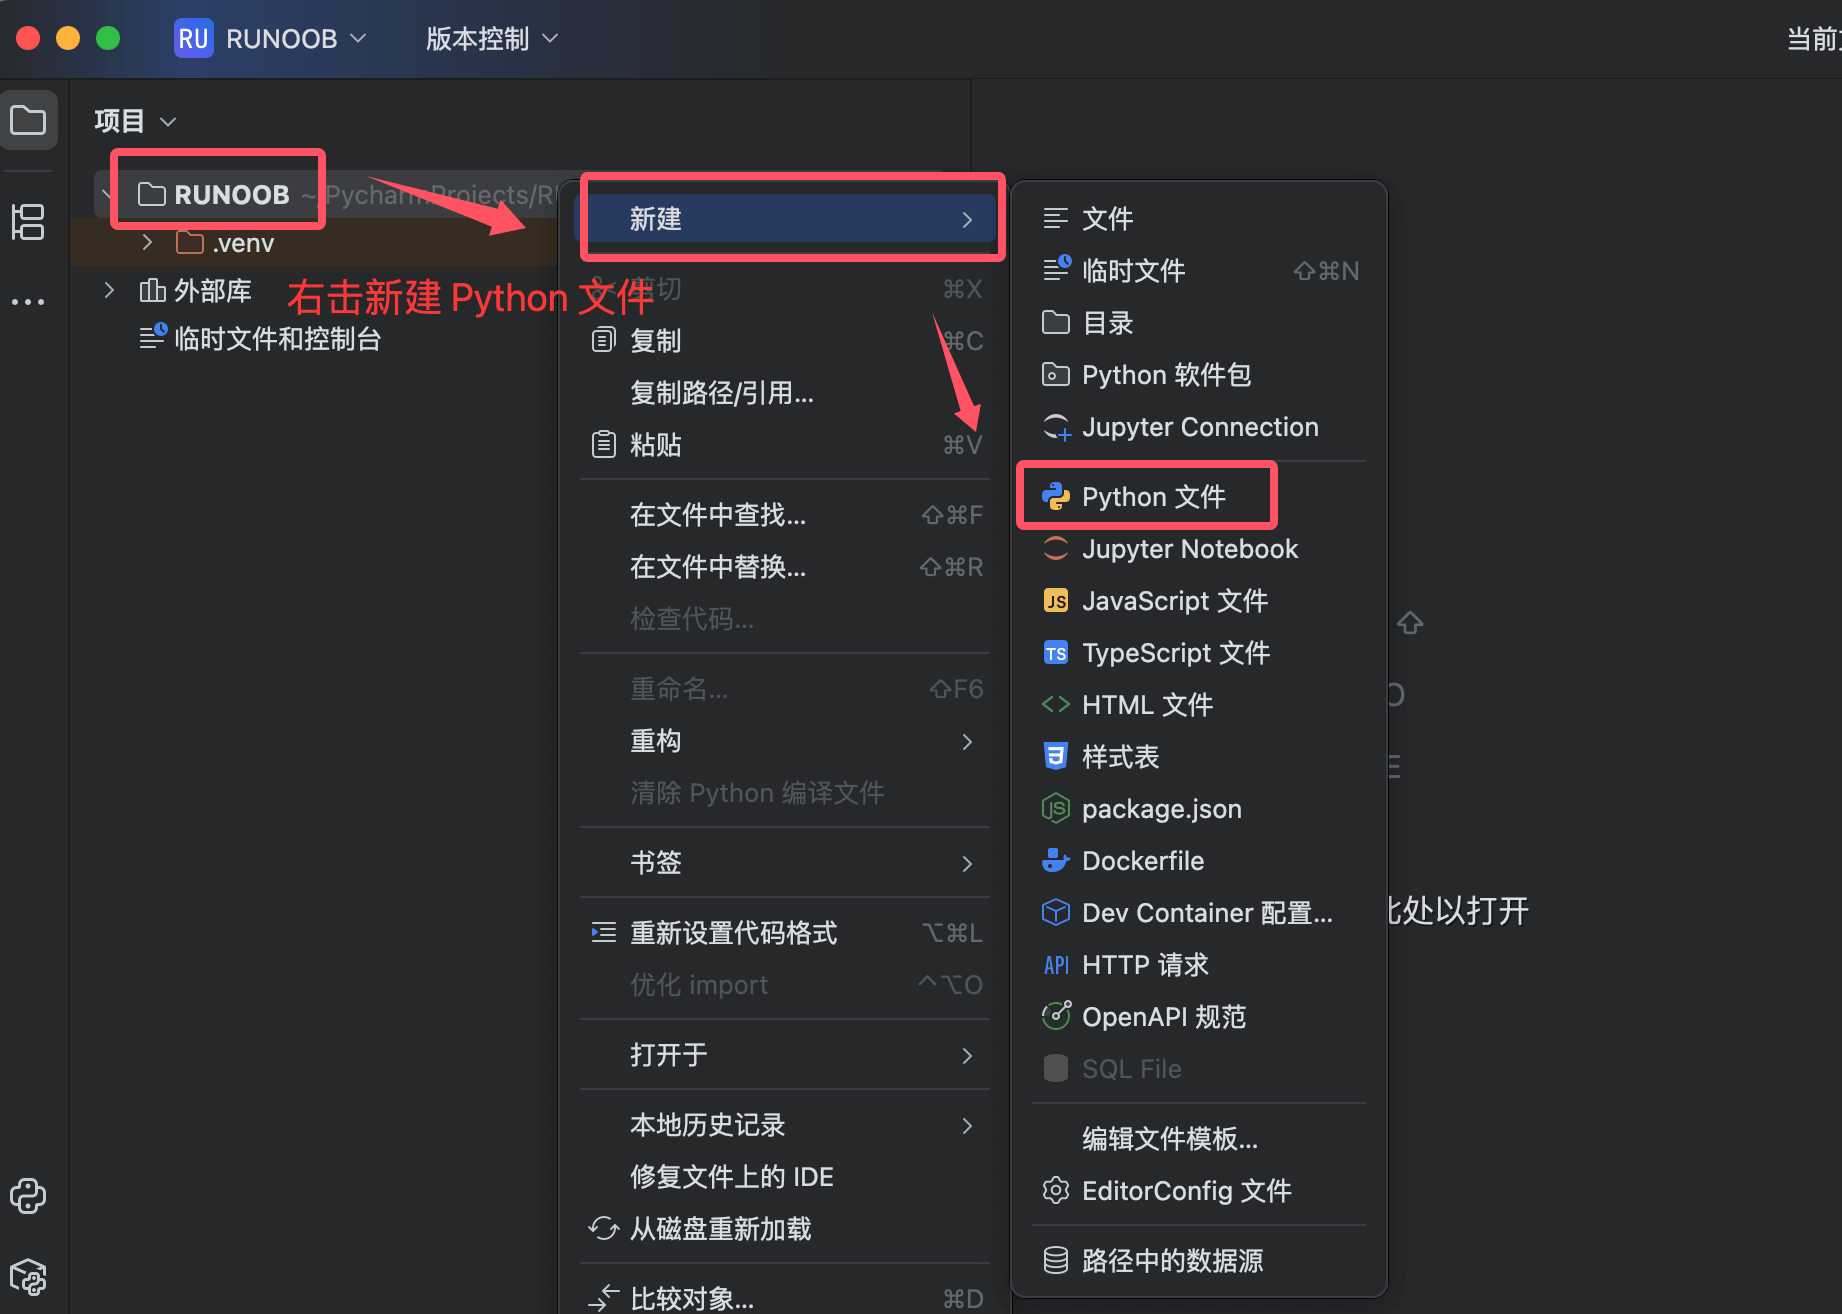
Next, we set the project as EXAMPLE, and then create a Python script file under the project.
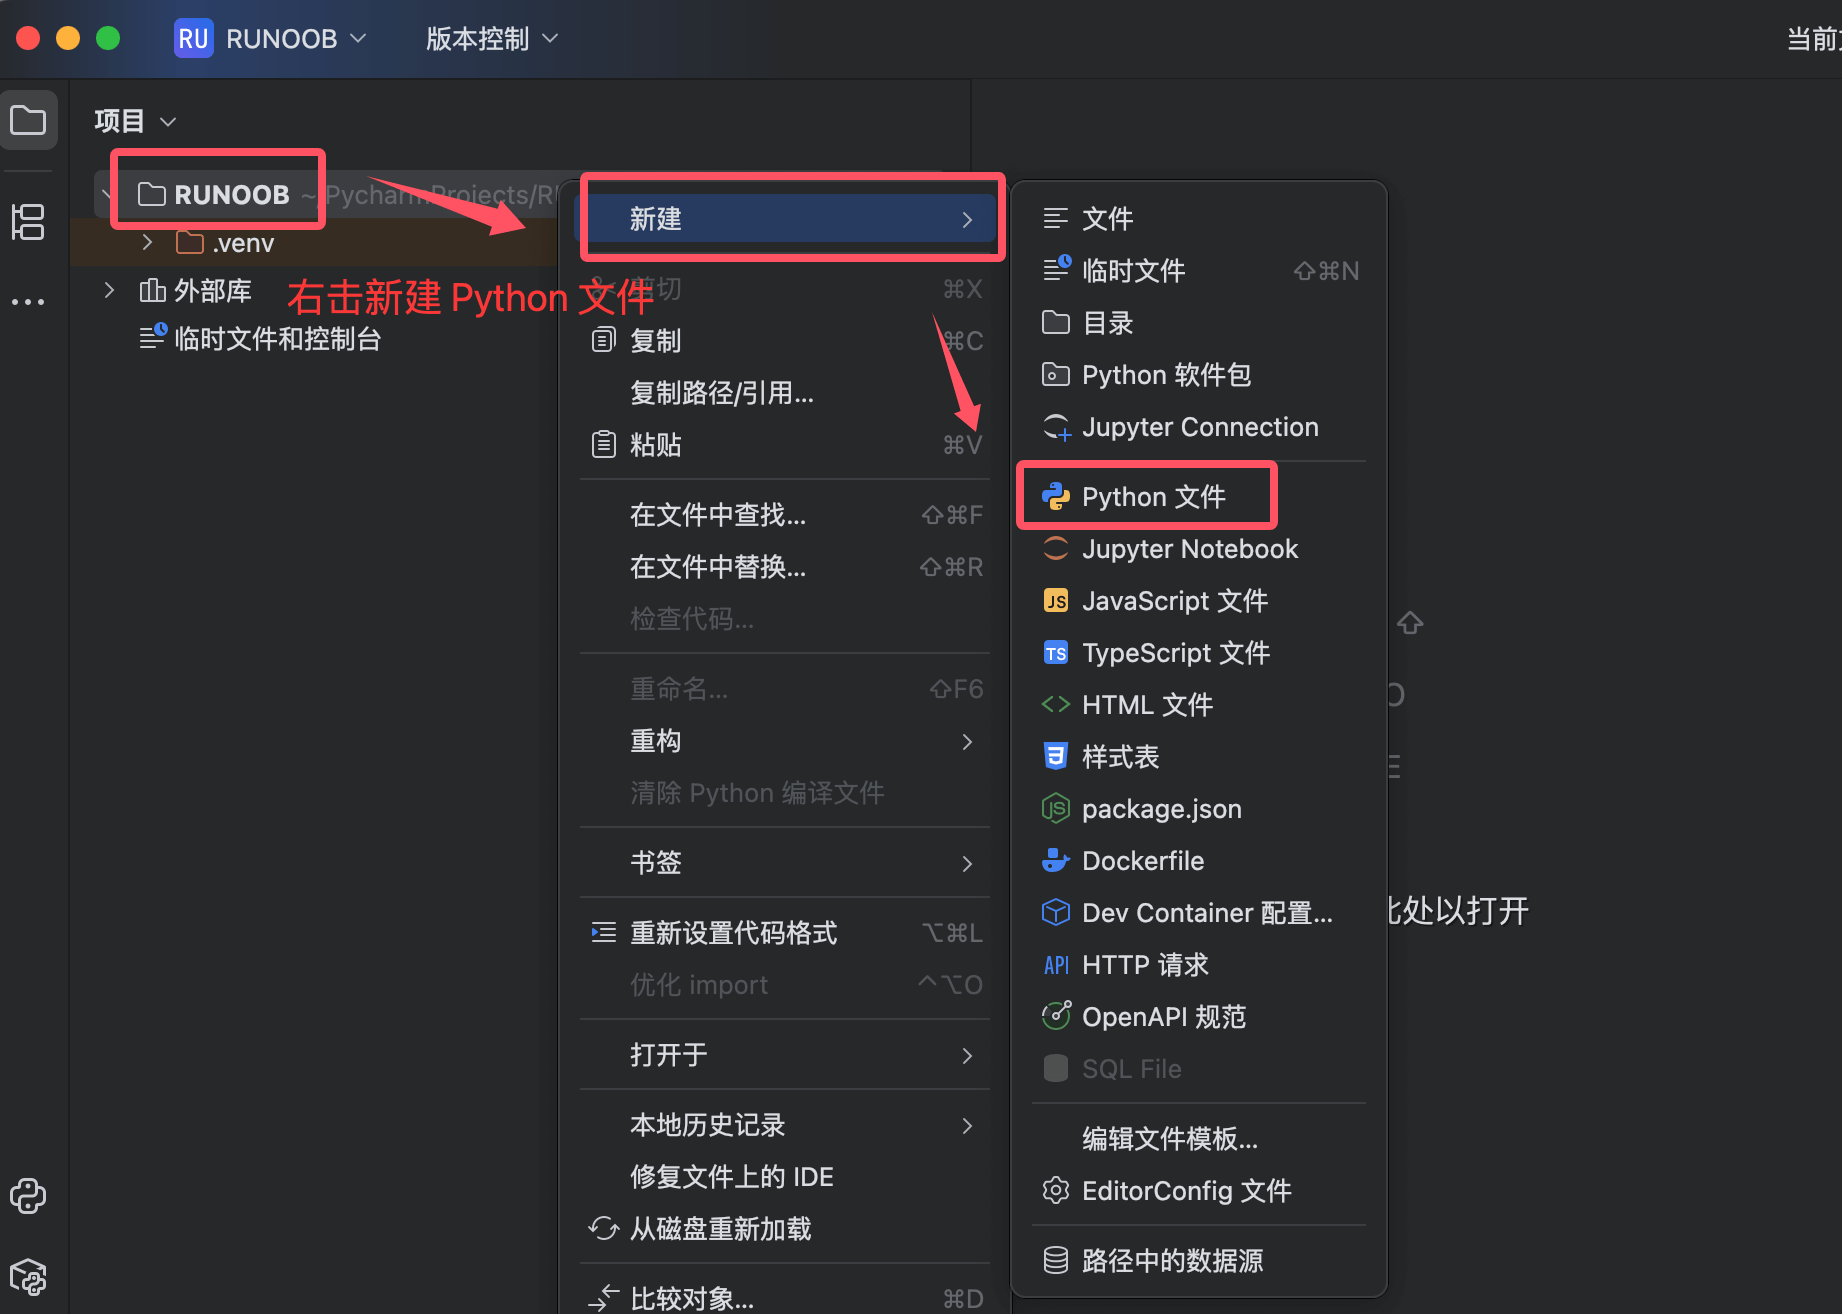
In the projectEXAMPLE, right-click and select"New -> Python File"to create a new Python file.
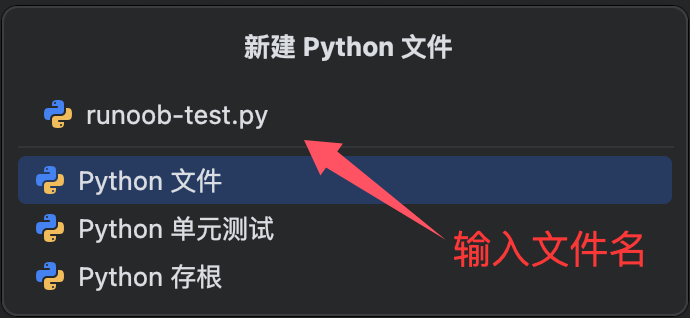
Enter the file name, for exampleexample-test.py, to create a new Python file:
Enter the following code in the file:
Example
After entering the code, you can click the Run button in the top-right corner:
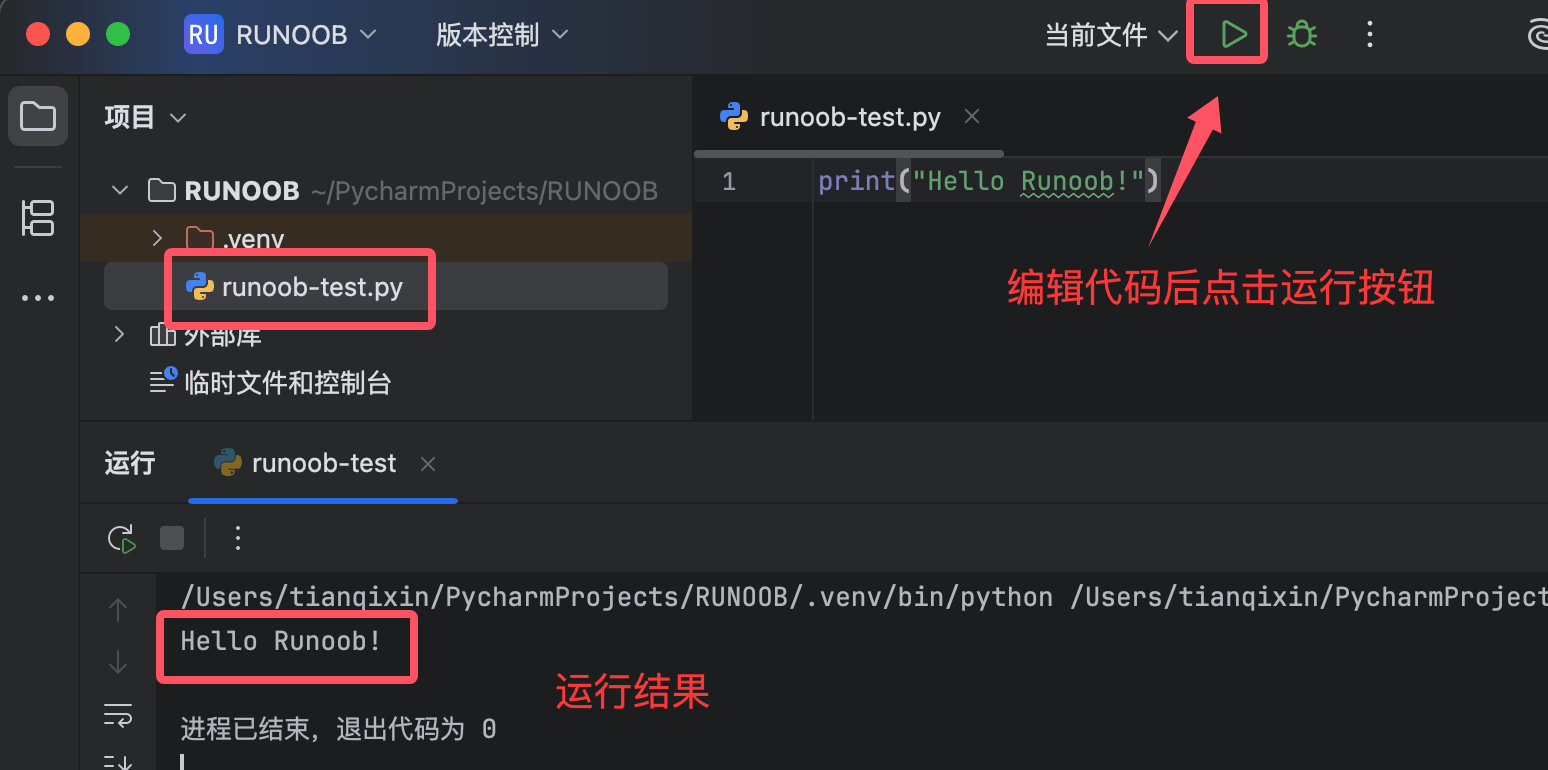
You can also right-click the code area and select"Run 'example-test'"to run the code.
Project Settings
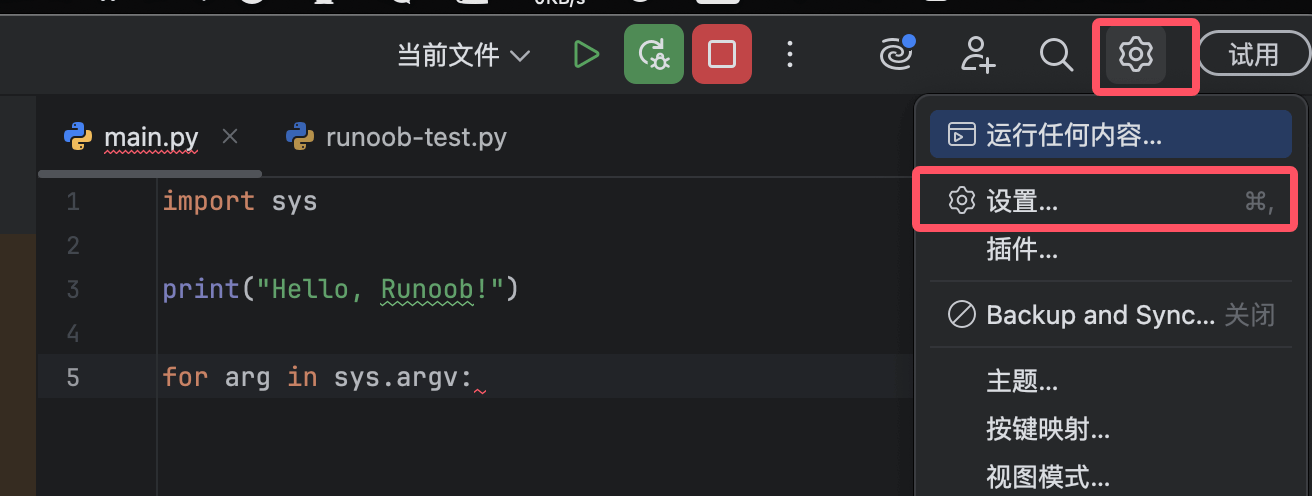
After the project is created, we can click the settings icon in the top-right corner to configure some options:
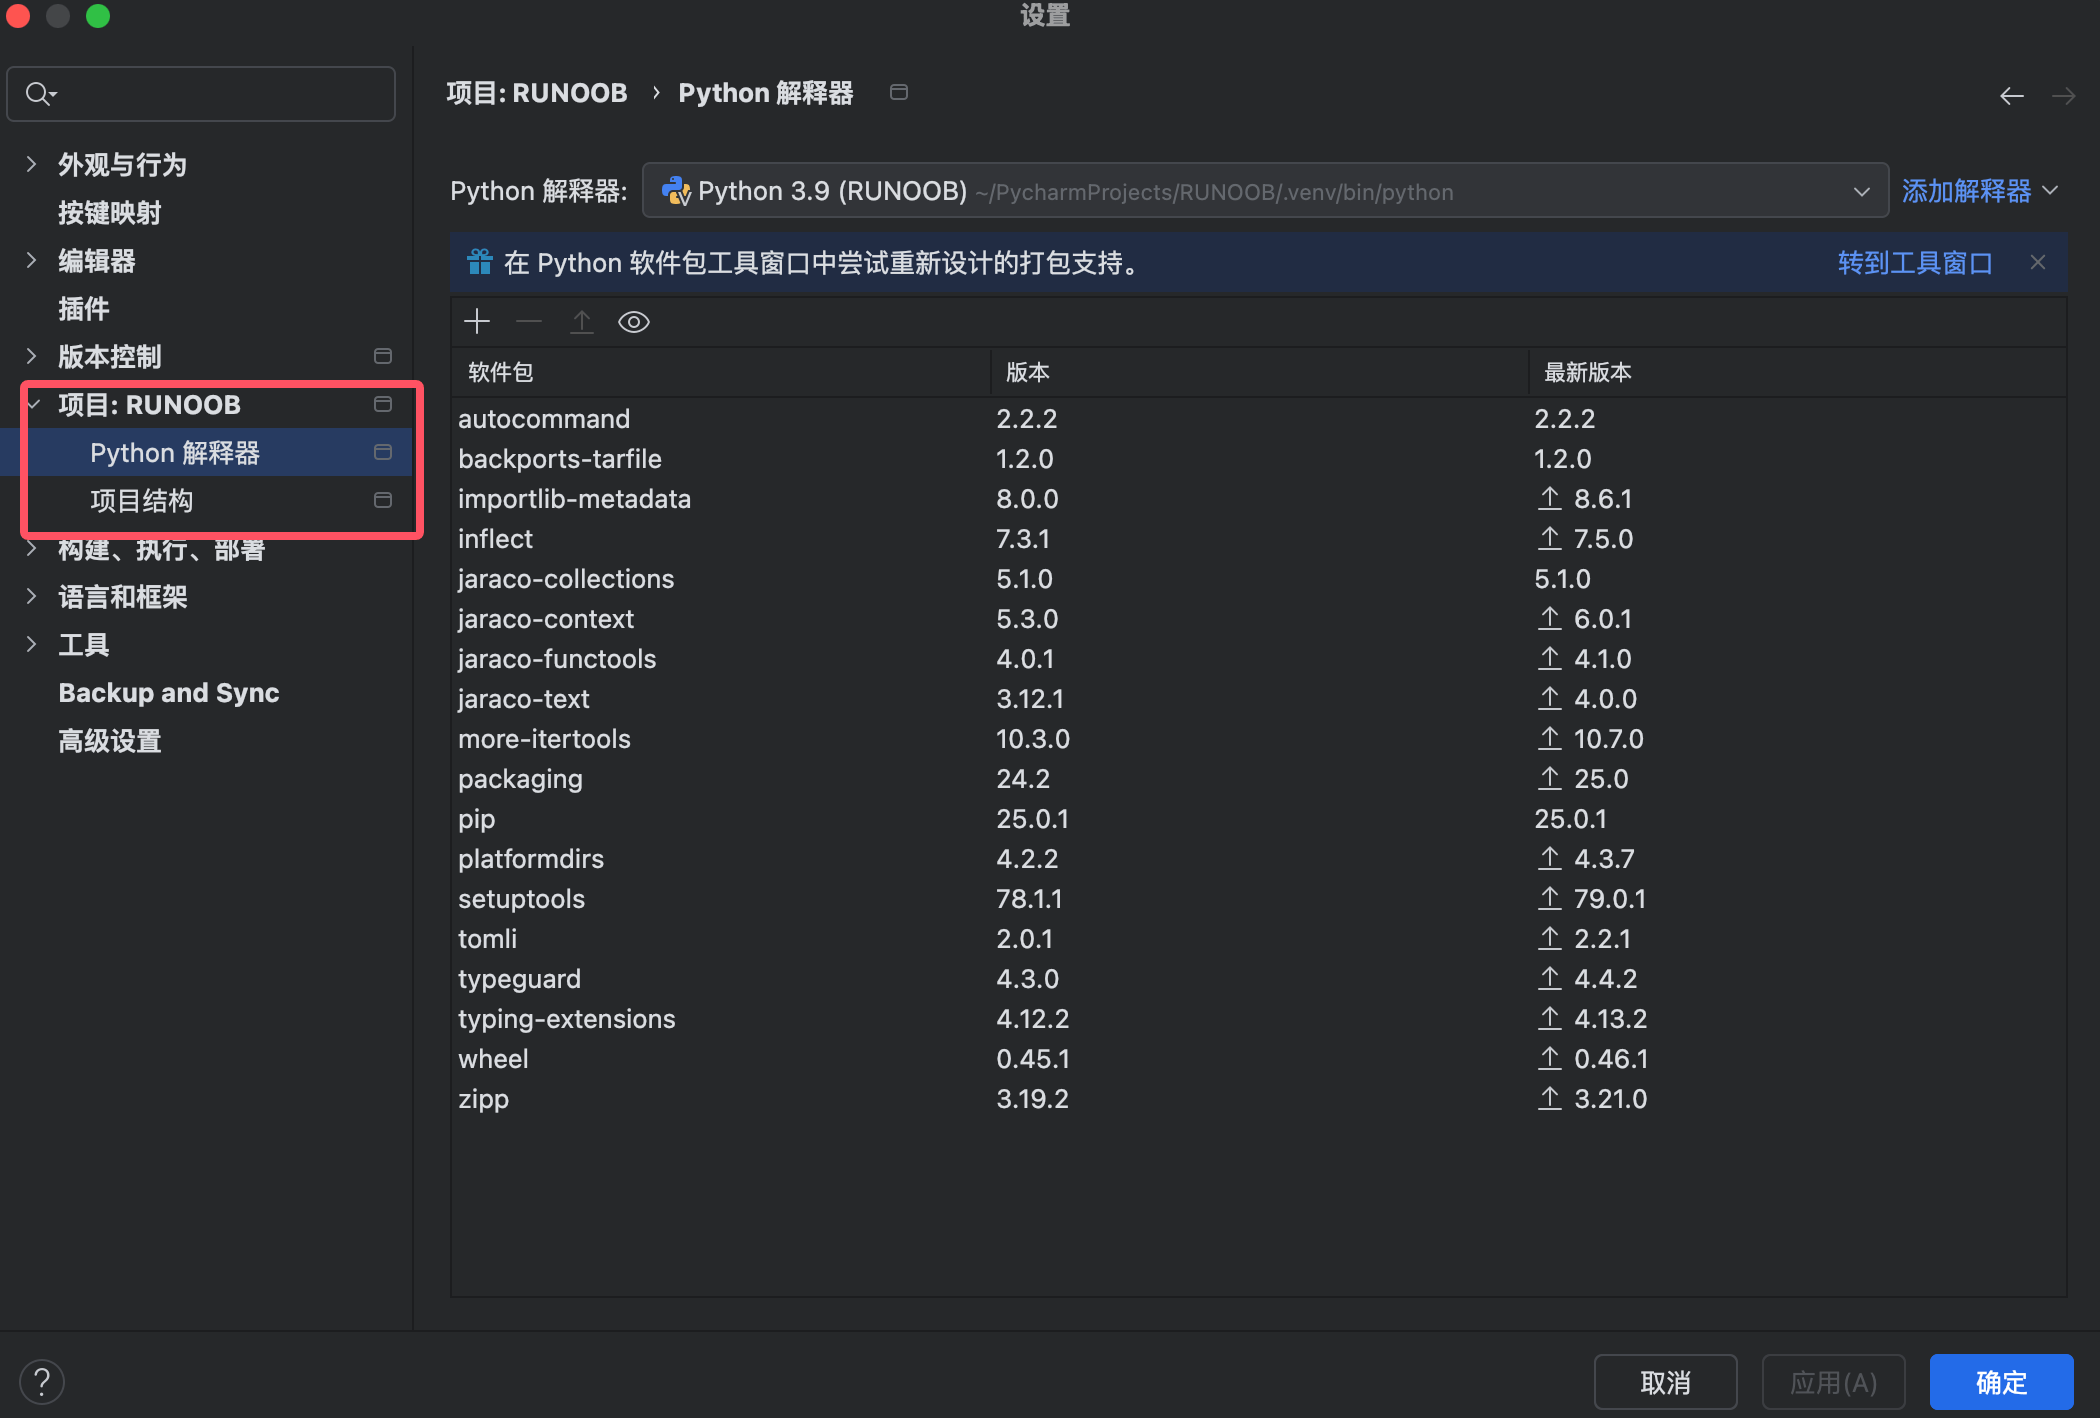
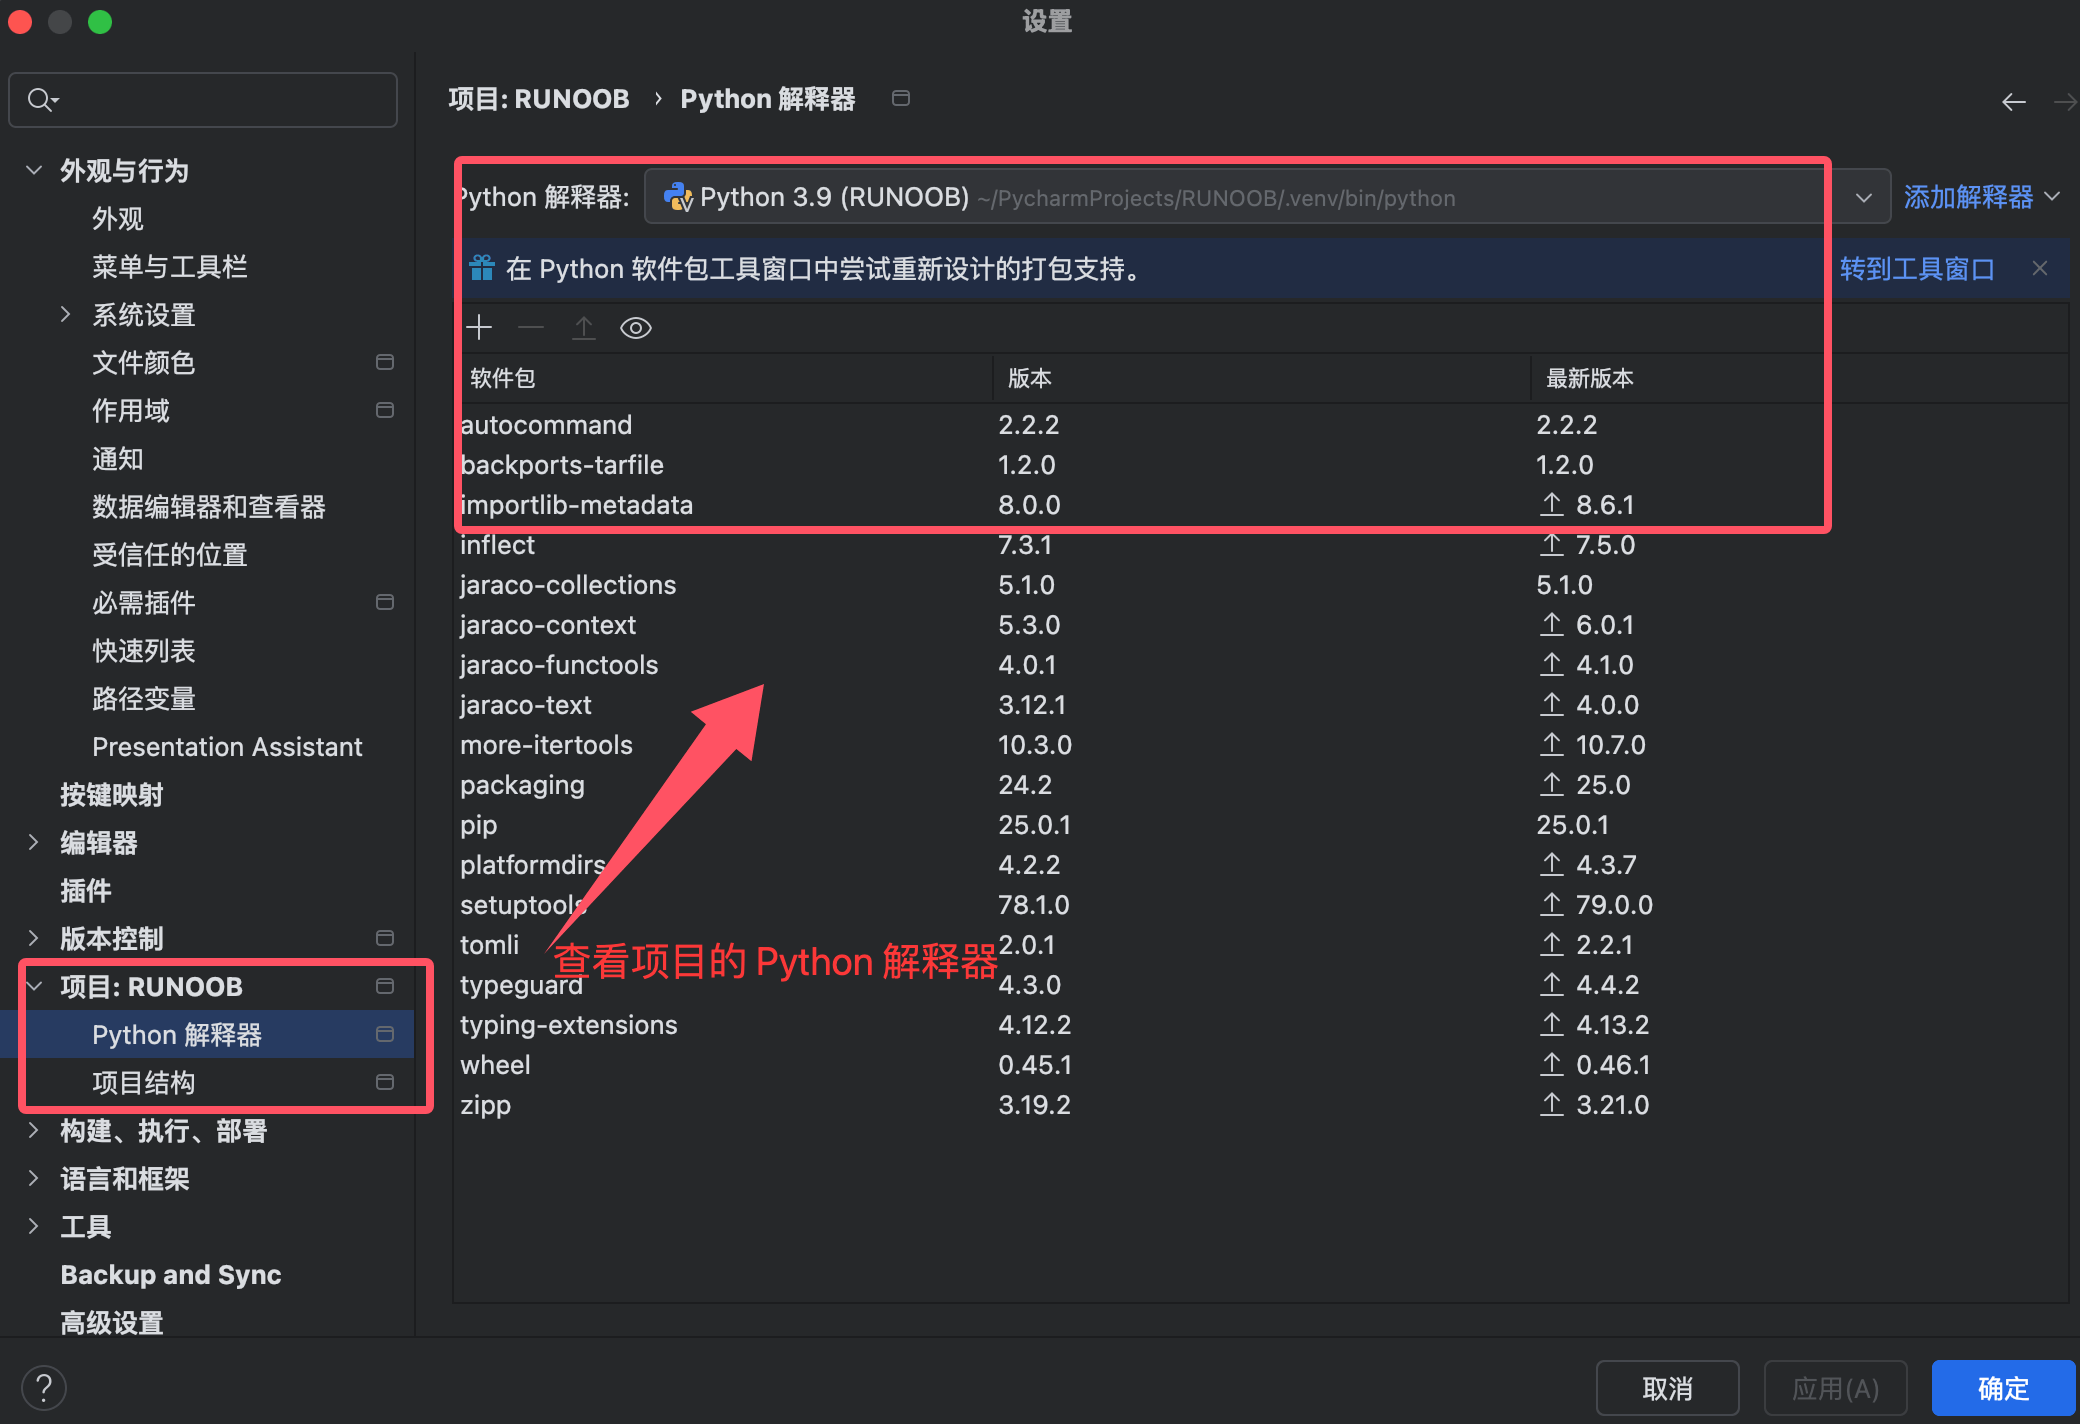
It includes some general editor configurations, and you can also configure the Python interpreter:
FAQ
1. What to do if PyCharm prompts "No Python interpreter configured" at startup?
This means PyCharm did not detect the Python interpreter. You can manually add the interpreter:
- Open "File -> Settings" (Windows/Linux) or "PyCharm -> Settings" (macOS).
- In the left menu, select "Project: <project name> -> Python Interpreter".
- Click "Add Interpreter" in the top-right corner.
- Select the path of the installed Python interpreter.
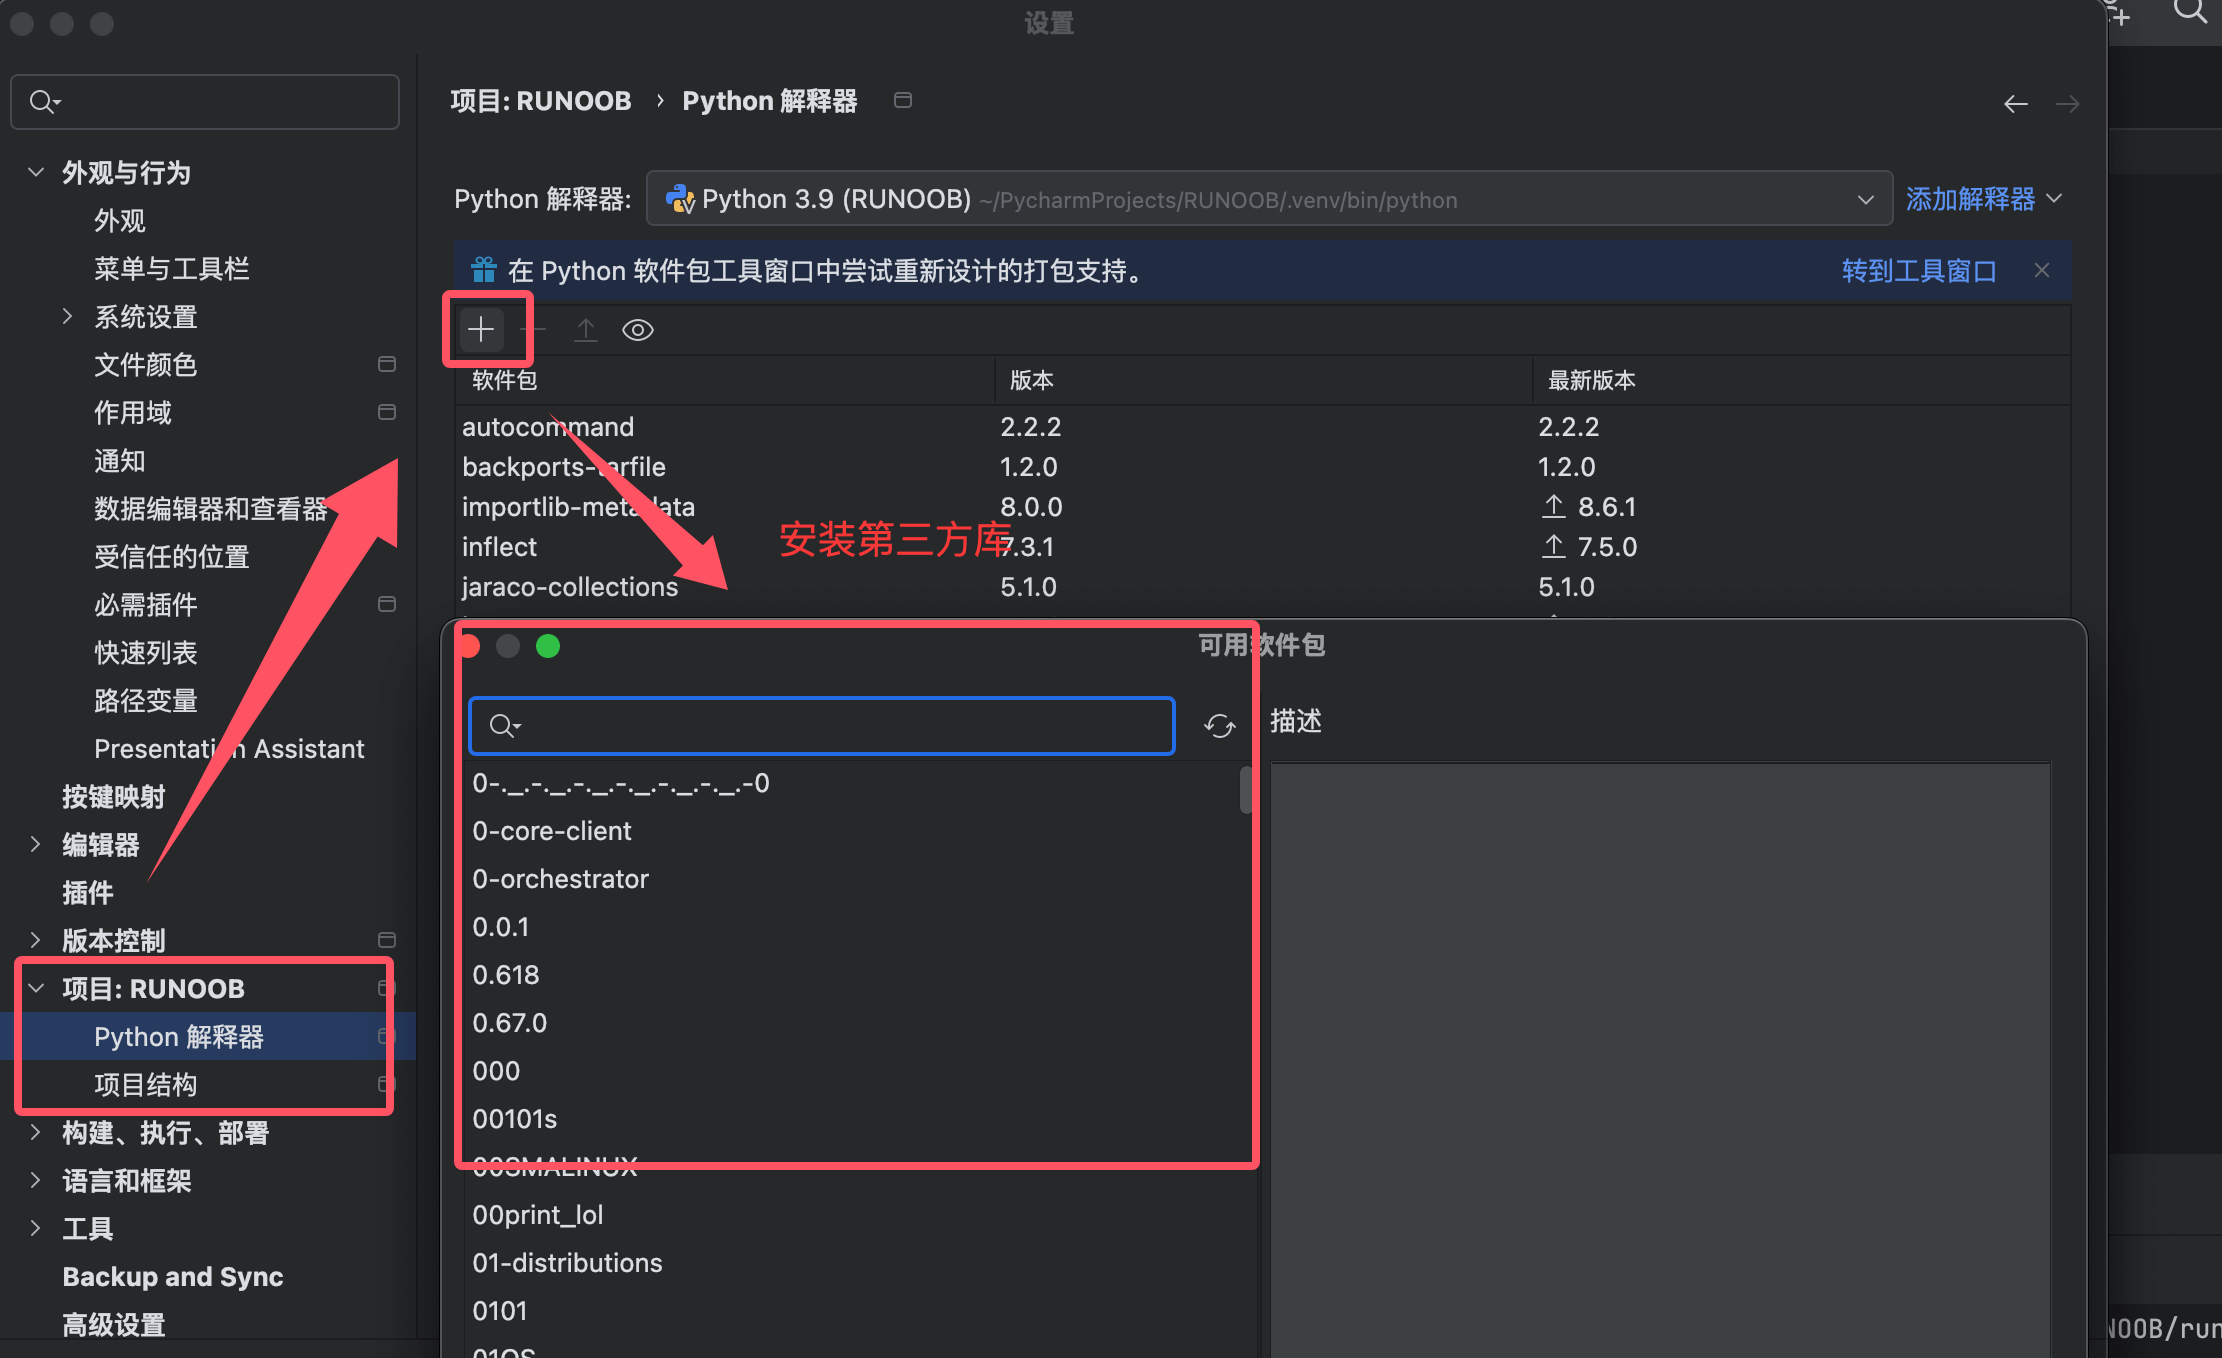
2. How to install third-party libraries?
In PyCharm, you can install third-party libraries by following these steps:
- Open "File -> Settings" (Windows/Linux) or "PyCharm -> Preferences" (macOS).
- In the left menu, select "Project: <project name> -> Python Interpreter".
- Click the "+" button in the bottom-right corner to search for and install the required library.