PyCharm Version Control Integration
PyCharm provides complete Git/GitHub integration, allowing developers to perform version control operations directly in the IDE.
Configure Git/GitHub
-
Open
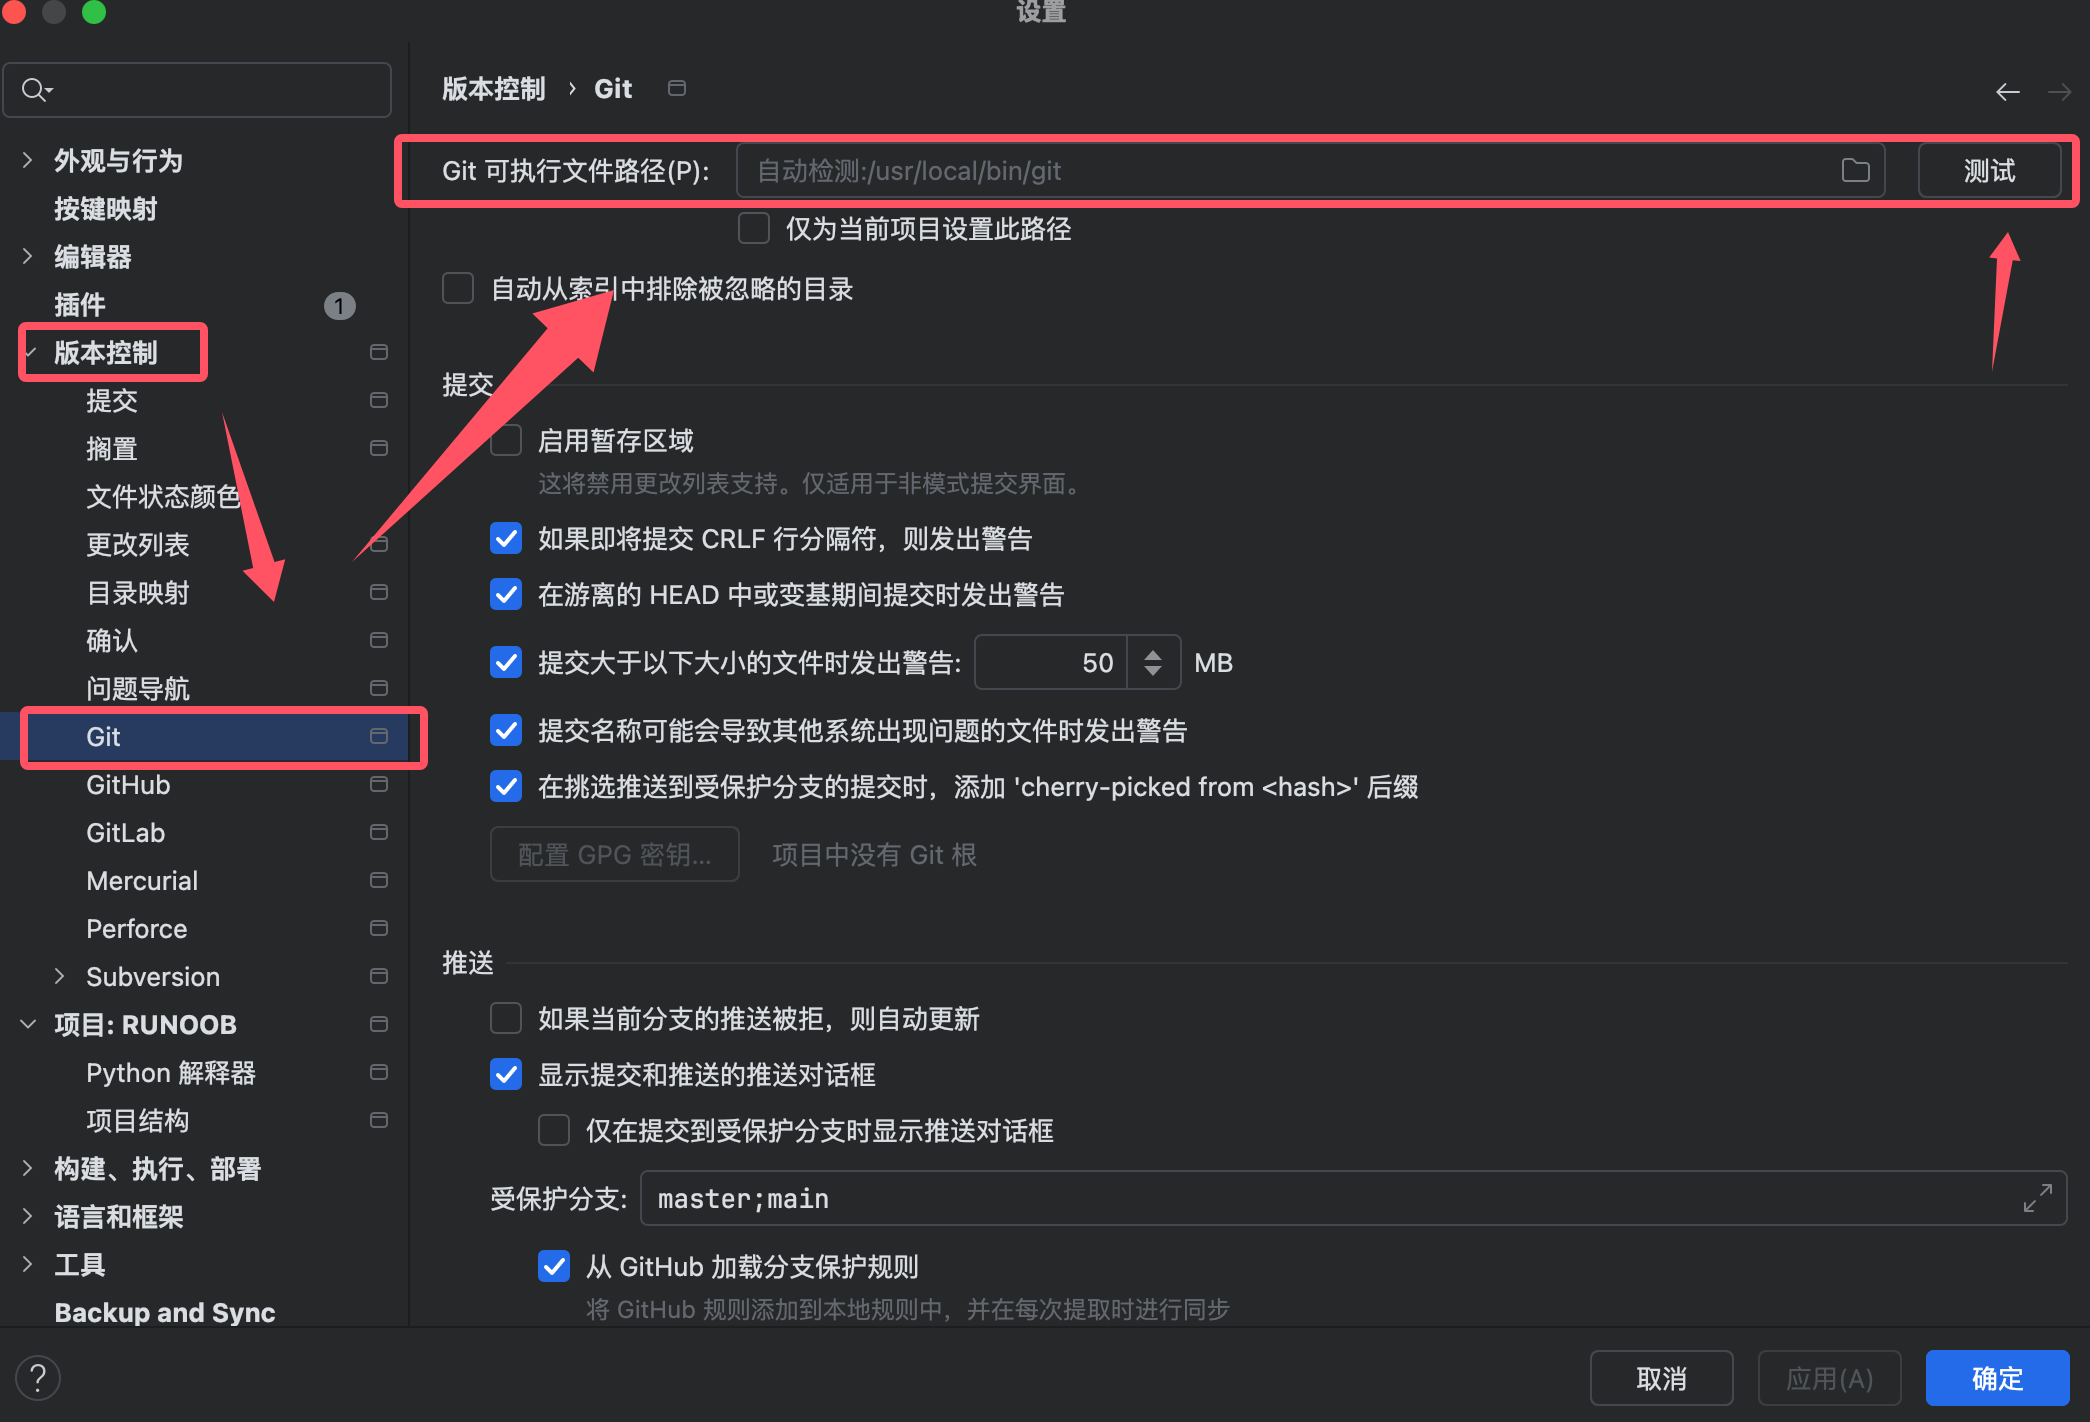
文件/PyCharm → 设置 → 版本控制 → Git -
In "Git executable path", confirm that PyCharm has automatically detected Git
-
ClickTestbutton to verify whether Git is available
Configure User Information
Run in the terminal:
git config --global user.name "Your Name"
git config --global user.email "your.email@example.com"
Integrate GitHub
1. Add a GitHub account:
-
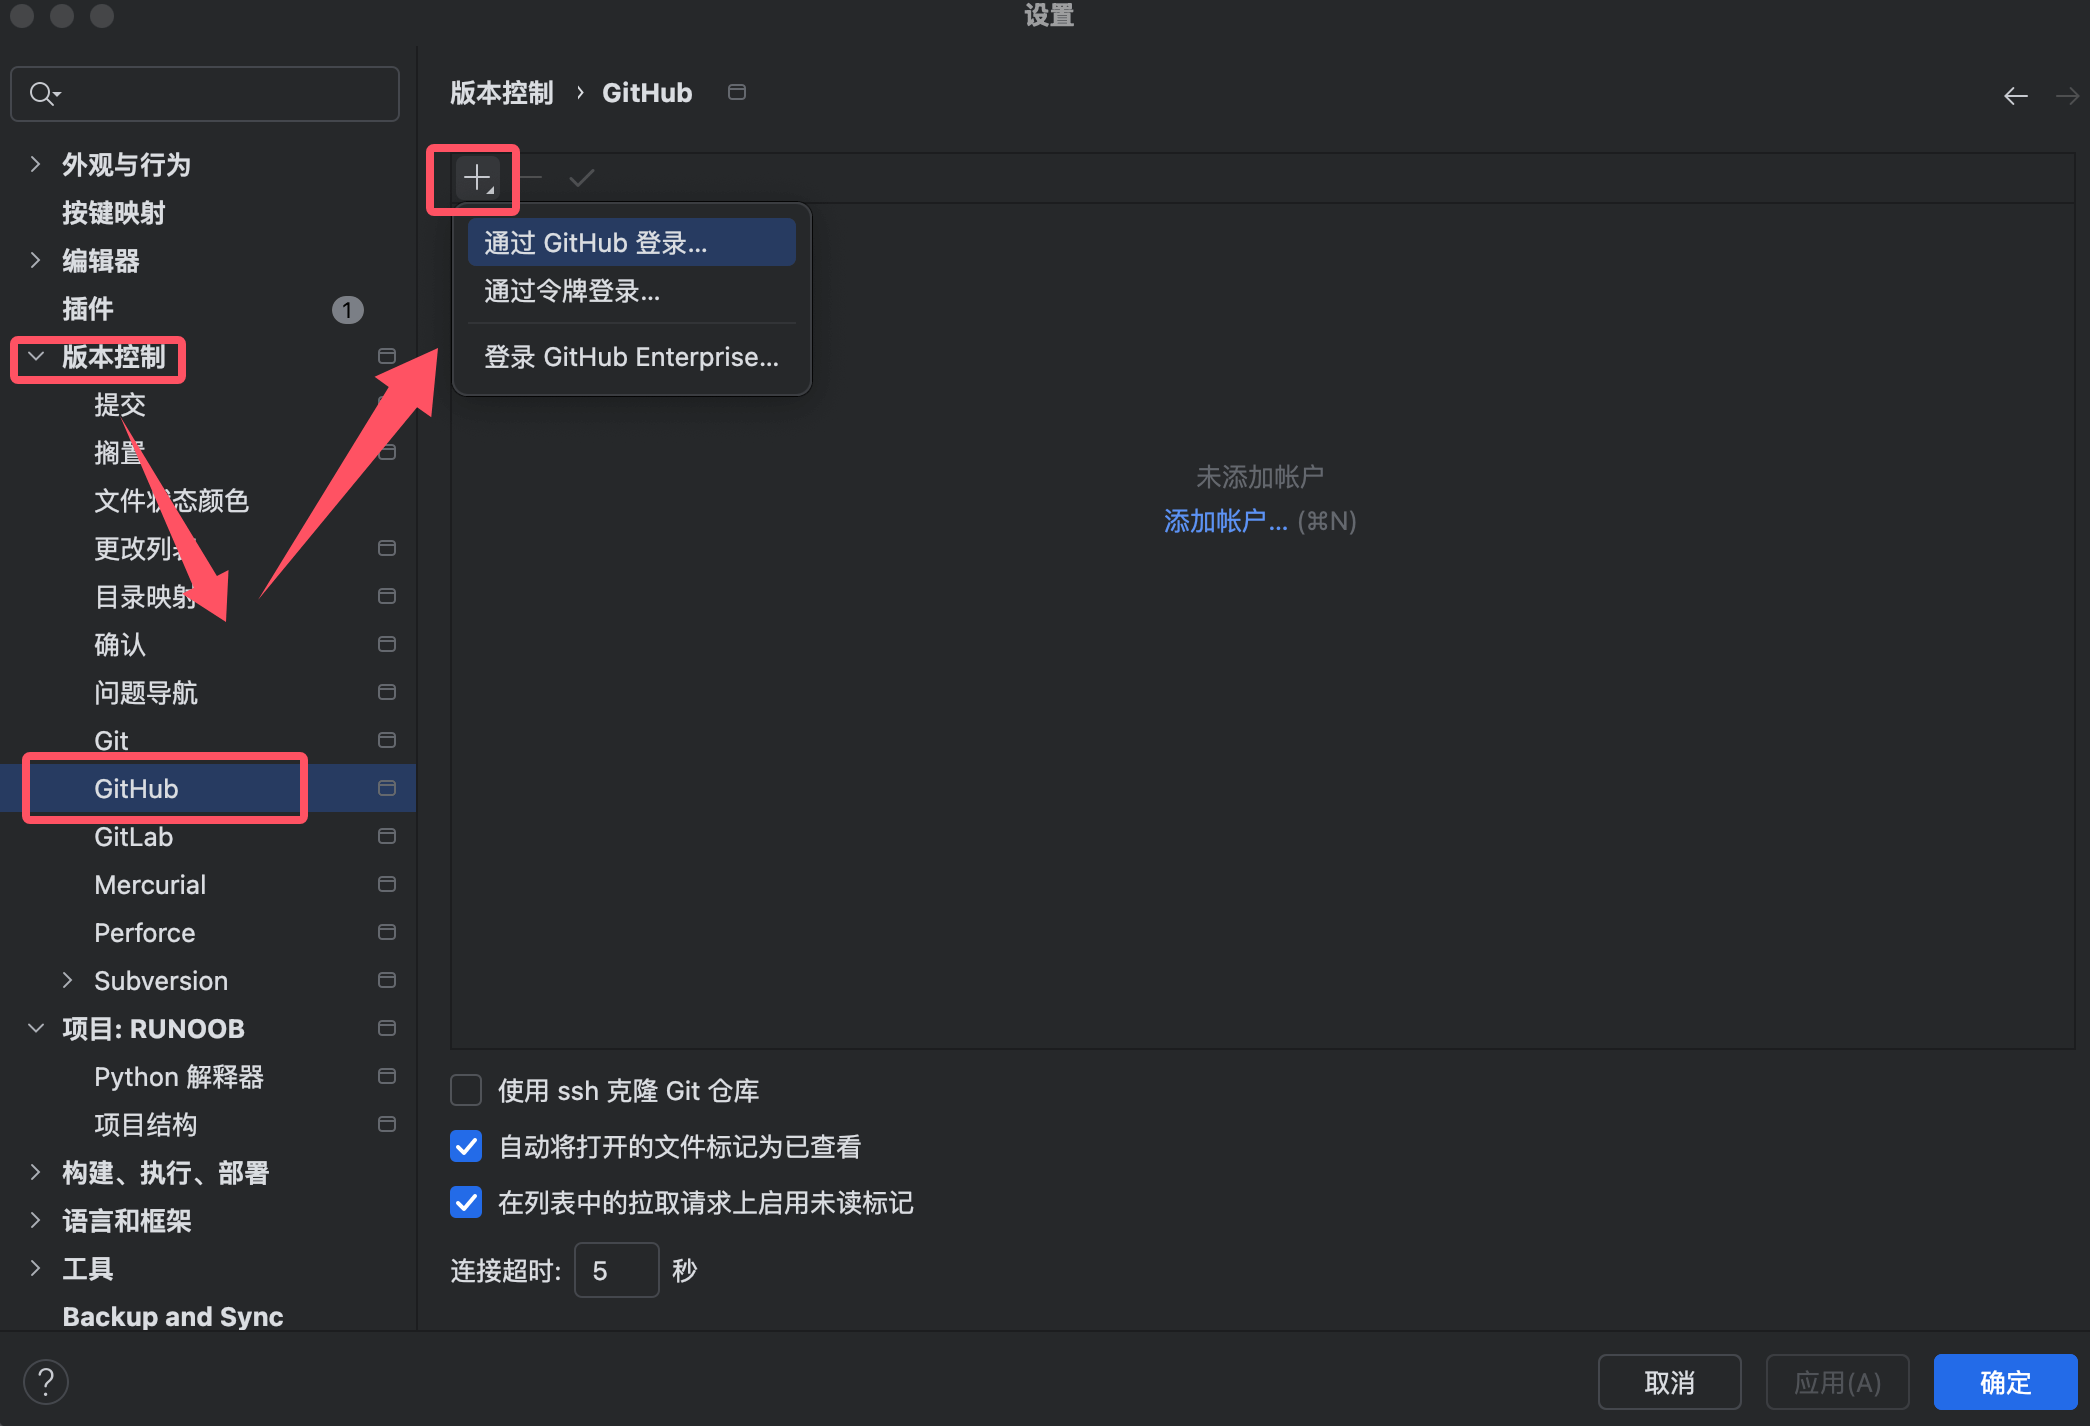
文件/PyCharm → 设置 → 版本控制 → GitHub -
Click+Add Account
-
Select login method:
-
Log in via GitHub: Log in through browser authorization
-
Log in via token: Use a personal access token
-
2. SSH configuration (optional):
-
Generate SSH key:
ssh-keygen -t ed25519 -C "your_email@example.com" -
Add the public key to the SSH keys settings of the GitHub account
Basic Operations
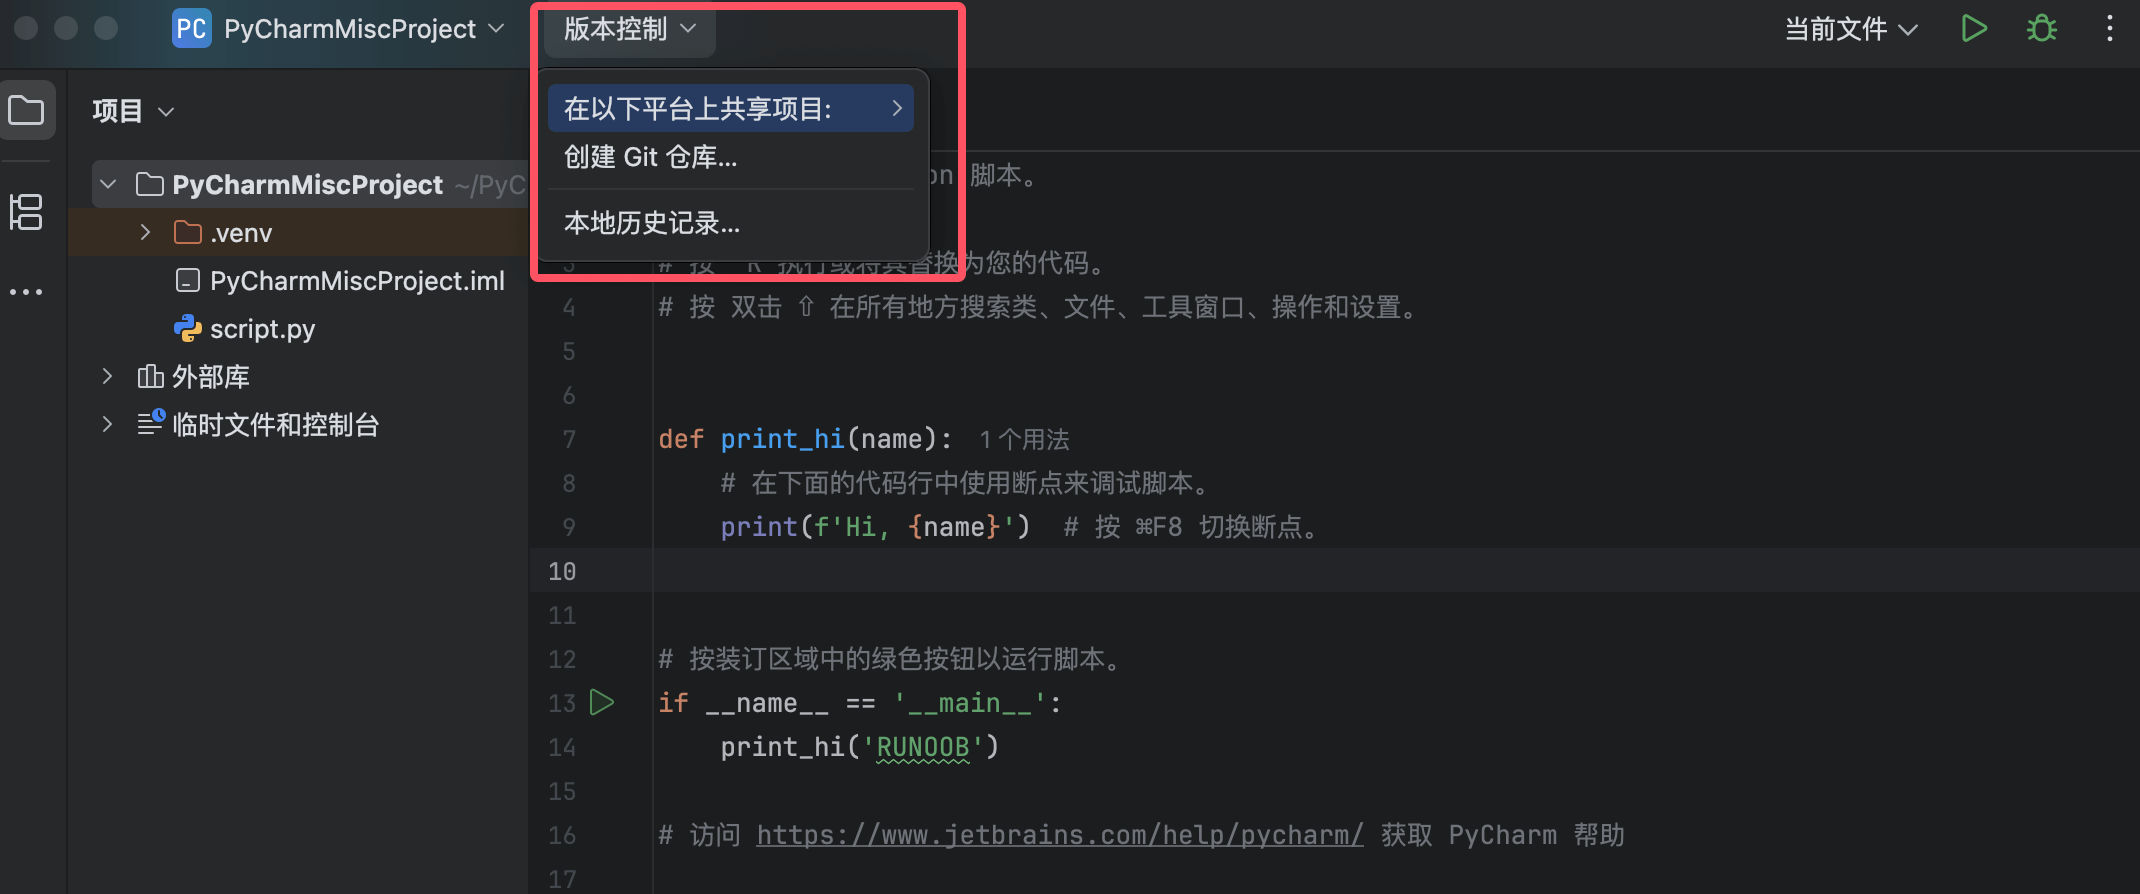
We can create a Git repository using the version control button on the toolbar:
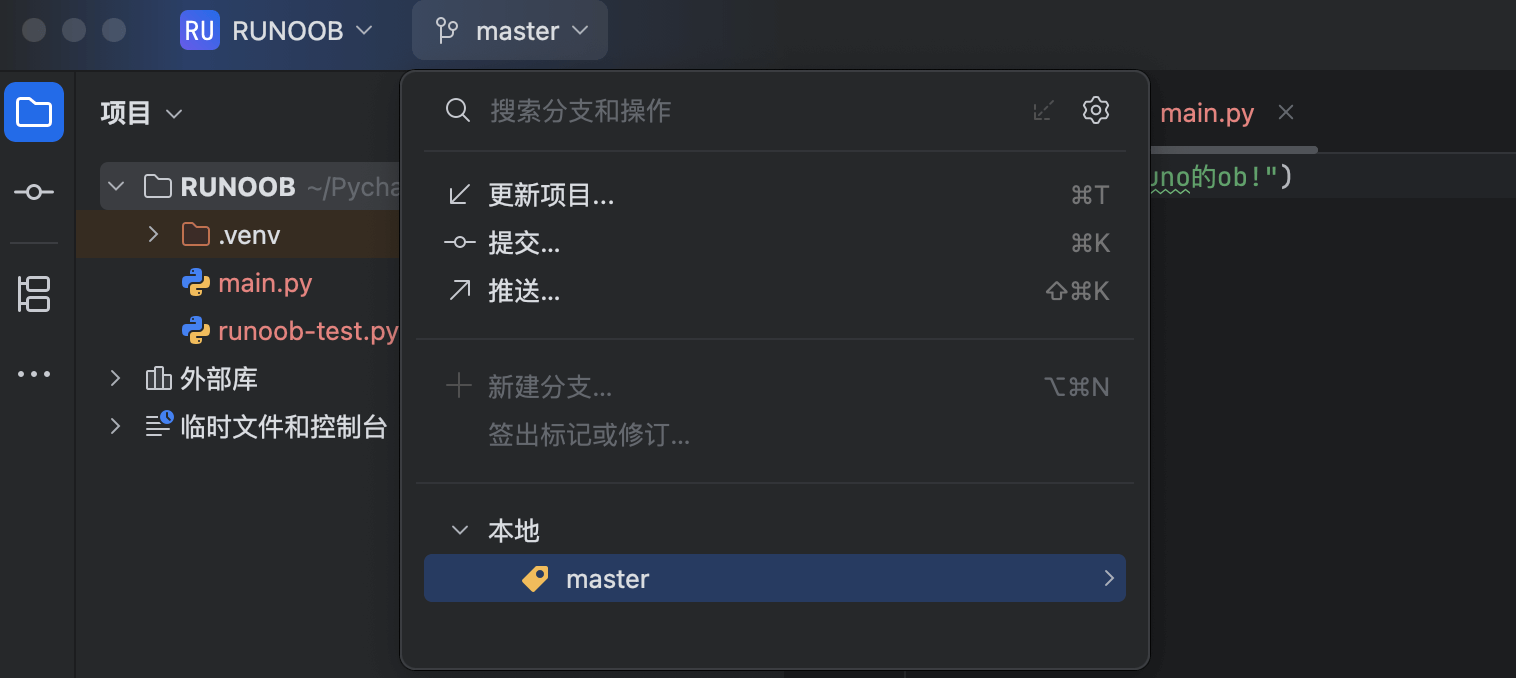
After that, the version control button on the project will change to master (main branch):
Commit and Push
Commit Code
InCommit Tool Window(Commit Tool Window):
-
Check the files to commit
-
Enter the commit message
-
Select an operation:
-
Commit(Commit): Commit locally only
-
Commit and Push(Commit and Push): Push to remote immediately after committing
-
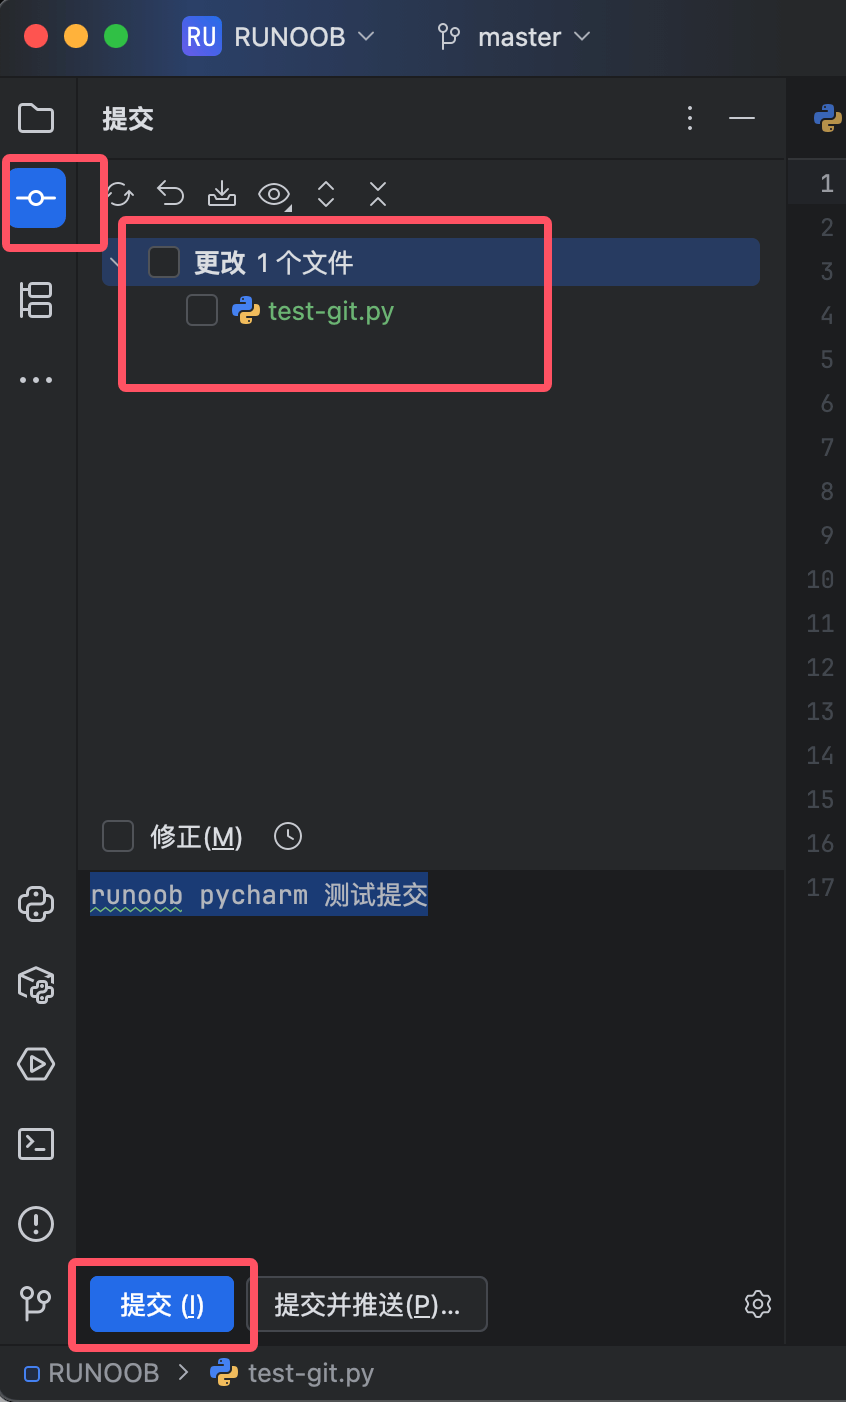
Shortcut Keys:
-
Commit:
Ctrl+K(Win/Linux) /⌘K(Mac) -
Push:
Ctrl+Shift+K(Win/Linux) /⌘⇧K(Mac)
View Changes
File status color markers:
-
Blue: Modified
-
Green: Added
-
Gray: Untracked
-
Red: Conflict
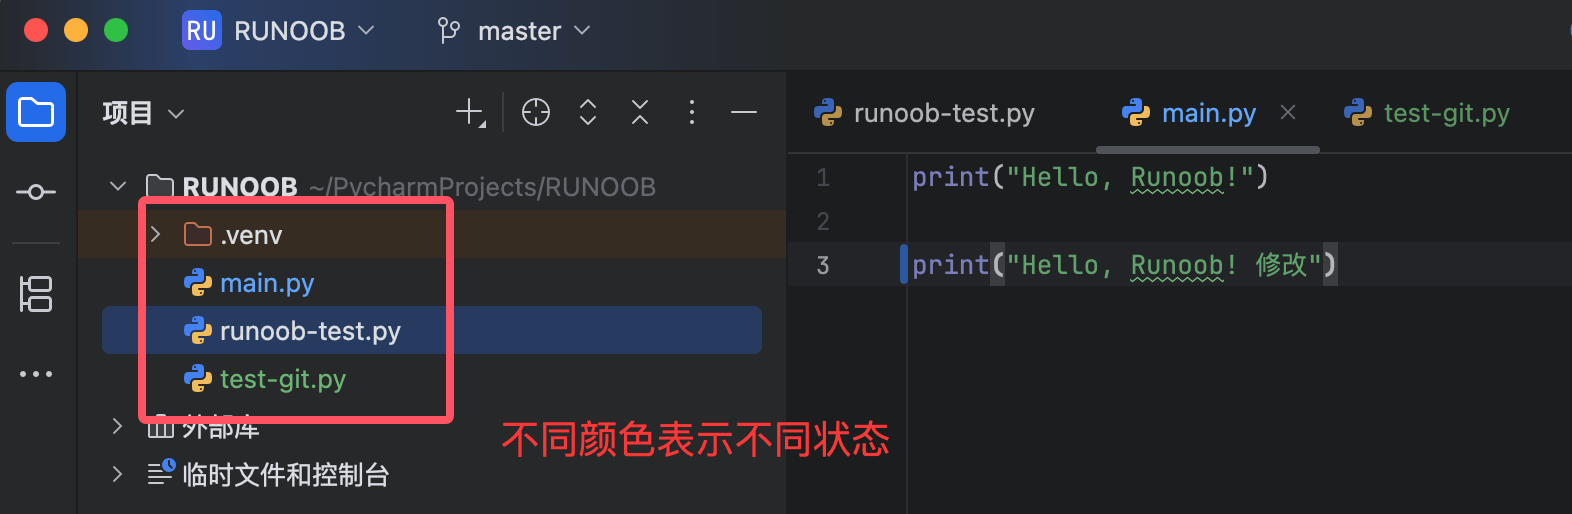
Pull and Merge
Pull the latest code
-
Git → PullorCtrl+T(Win/Linux) /⌘T(Mac) -
Select merge strategy:
-
Merge: Preserve all commit history
-
Rebase: Linear history
-
Merge branches
-
Git → 分支 → 合并分支 -
Select the target branch to merge
-
Resolve possible conflicts (see Section 6.3)
View History and Differences
View commit history
-
Git → 显示历史orAlt+9 -
Features:
-
View file/project history
-
Compare different versions
-
Roll back to a specific version
-
Compare Differences
-
File differences:
-
Right-click file →
Git → 比较与当前分支 -
or
Ctrl+D(Win/Linux) /⌘D(Mac)
-
-
Inline differences:
-
Modified lines display colored markers
-
Click the marker to view the specific changes
-
6.3 Resolving Conflicts
1. Conflict Scenarios
-
Multiple people modify the same area of the same file
-
Conflicts occur when merging branches
-
Conflict prompt when pulling code
2. Resolution Steps
Open the merge tool
-
A merge dialog will automatically pop up when there is a conflict
-
Or open manually:
Git → 解决冲突
Three-pane comparison interface
-
Left side: Your version (current branch)
-
Right side: Other's version (merged branch)
-
Middle: Merge result editing area
Handle conflicts
-
Click>>Accept left-side changes
-
Click<<Accept right-side changes
-
Manually edit the merge content in the middle area
Mark as resolved
-
After finishing editing, clickApply
-
Right-click file →
Git → 标记冲突为已解决
Commit the merge result
-
Commit the resolved file
3. Advanced Conflict Resolution
Use an external merge tool
-
Configure in settings
文件 → 设置 → 版本控制 → Git → 合并工具
Completely accept a certain version
-
Right-click file →
Git → 接受他们的orAccept our
Practical Tips
Partial Commit
-
In the commit window, you can:
-
Select specific changes of a file to commit
-
Right-click code block →
Submit selected row
-
Stash Changes
-
Temporarily save unfinished changes:
-
Git → 储藏 -
Restore:
Git → 取消储藏
-
Interactive Rebase
-
Git → 交互式变基 -
You can:
-
Reorder commits
-
Squash commits
-
Modify commit messages
-