TensorFlow Example - Image Classification Project
Image classification is one of the most fundamental and important tasks in computer vision. This project will use the TensorFlow framework to build a deep learning model that can recognize different categories of images.
What is Image Classification
Image classification is a technique that enables computers to automatically identify the category to which the main object in an image belongs. For example:
- Recognizing whether a photo contains a cat or a dog
- Distinguishing between different types of flowers
- Determining lesion types in medical images
Technology Selection
We will use the following technology stack:
- TensorFlow: Google's mainstream deep learning framework
- Keras: TensorFlow's high-level API, simplifies model building
- Matplotlib: Used for visualizing the training process and results
Environment Setup
Install Required Libraries
pip install tensorflow matplotlib numpy
Verify Installation
import tensorflow as tf
print(f"TensorFlow 版本: {tf.__version__}")
Dataset Preparation
We will use the classic CIFAR-10 dataset, which contains 60,000 32x32 color images in 10 categories.
Load Dataset
Example
# Load data
(train_images, train_labels), (test_images, test_labels) = cifar10.load_data()
# Class names
class_names = ['airplane', 'automobile', 'bird', 'cat', 'deer',
'dog', 'frog', 'horse', 'ship', 'truck']
3.2 Data Preprocessing
Example
train_images = train_images / 255.0
test_images = test_images / 255.0
# View data shape
print("Training set image shape:", train_images.shape)
print("Training set label shape:", train_labels.shape)
4. Build the Model
4.1 Model Architecture
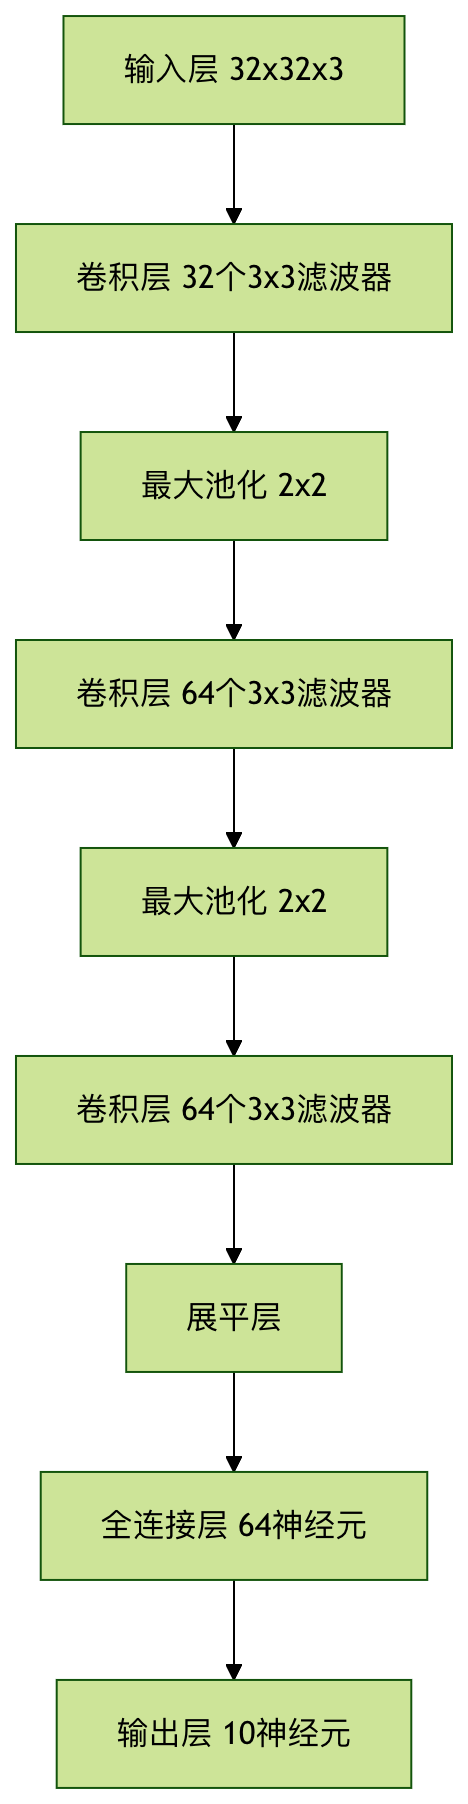
We will build a Convolutional Neural Network (CNN), which is a classic architecture for image tasks.
Example
model = models.Sequential([
# Convolutional layer 1
layers.Conv2D(32, (3, 3), activation='relu', input_shape=(32, 32, 3)),
layers.MaxPooling2D((2, 2)),
# Convolutional layer 2
layers.Conv2D(64, (3, 3), activation='relu'),
layers.MaxPooling2D((2, 2)),
# Convolutional layer 3
layers.Conv2D(64, (3, 3), activation='relu'),
# Fully connected layer
layers.Flatten(),
layers.Dense(64, activation='relu'),
layers.Dense(10) # Output layer, 10 classes
])
Model Structure Visualization
Train the Model
Compile the Model
Example
loss=tf.keras.losses.SparseCategoricalCrossentropy(from_logits=True),
metrics=['accuracy'])
Start Training
Example
validation_data=(test_images, test_labels))
Training Process Visualization
Example
plt.plot(history.history['accuracy'], label='Training accuracy')
plt.plot(history.history['val_accuracy'], label='Validation accuracy')
plt.xlabel('Epoch')
plt.ylabel('Accuracy')
plt.ylim([0, 1])
plt.legend(loc='lower right')
plt.show()
Model Evaluation and Prediction
Evaluate Test Set Performance
Example
print(f'\nTest accuracy: {test_acc}')
Make Predictions
Example
# Add softmax layer to make output probabilities
probability_model = tf.keras.Sequential([model, layers.Softmax()])
# Make predictions on the first 5 images of the test set
predictions = probability_model.predict(test_images[:5])
# Display prediction results
for i in range(5):
predicted_label = np.argmax(predictions[i])
true_label = test_labels[i][0]
print(f"Prediction: {class_names[predicted_label]} | Actual: {class_names[true_label]}")
Project Expansion Suggestions
Methods to Improve Model Performance
- Increase network depth (more convolutional layers)
- Use data augmentation techniques
- Try different optimizers and learning rates
- Add batch normalization layers
Practical Application Directions
- Medical image analysis
- Object recognition in autonomous driving
- Industrial quality inspection systems
- Security surveillance systems
8. Frequently Asked Questions
Q1: Why choose CNN instead of a regular neural network?
A: With local connections and weight sharing, CNN can better capture spatial features of images and has fewer parameters.
Q2: How to choose the appropriate number of epochs?
A: Monitor the validation accuracy and stop training when it stops improving to avoid overfitting.
Q3: What to do if you encounter an out-of-memory error?
A: You can reduce the batch size or use smaller image dimensions.
Other Extensions