Ollama Version Upgrade and Migration
How to safely upgrade Ollama, move the model library to a new disk or new machine, and back up and restore custom models.
Do these three things well, and your local model assets will truly belong to you, immune to any hardware or version changes.
Safe Upgrade: Strategy Before Action
The upgrade itself is simple; the hard part is "not messing up." Recommended three-step upgrade strategy:
Step 1, check the release notes: Release Notes will highlight new features, fixes, and known issues, especially model support and interface changes.
Step 2, back up critical assets: export the custom model recipes in use (see method below), and confirm the model directory location.
Step 3, test before rollout: for production servers, verify the upgrade on a test machine first, then roll out on a broader scale.
| Platform | Upgrade Method |
|---|---|
| macOS / Windows | Automatically download updates, click "Restart to update" in the menu bar or system tray |
| Linux (script installation) | Re-run the official installation script |
| Linux (manual installation) | First delete the old library directory, then extract the new package |
| Docker | After pulling the new image, rebuild the container; the data volume retains all models |
If you encounter compatibility issues and need to roll back, or want to try the pre-release version, use the version number variable for precise control, install the specified version (see version numbers in GitHub Releases):
curl -fsSL https://ollama.com/install.sh | OLLAMA_VERSION=0.5.7 sh
Pre-release versions are also installed via version numbers.
Before manual upgrade on Linux, first delete the old library directory (sudo rm -rf /usr/lib/ollama); mixing old and new inference libraries is the number one cause of "weird behavior after upgrade."
Model Library Migration: Changing Disks and Machines
Models are often tens of GB; the essence of migration is just one sentence: move the models directory away, then tell Ollama where the new location is.
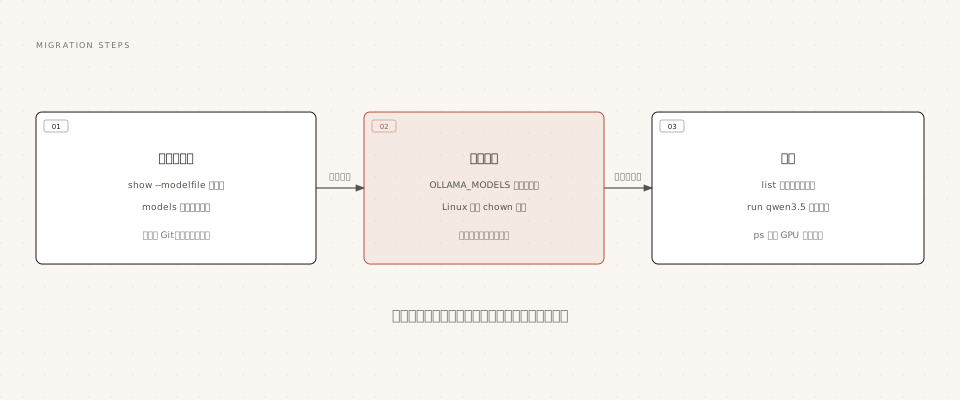
Scenario 1: Replacing Disk on Same Machine
Example
sudo mv /usr/share/ollama/.ollama/models /data/ollama-models
# 2. Point the environment variable to the new location (see configuration chapter for three platform setup methods)
OLLAMA_MODELS=/data/ollama-models ollama serve
# 3. Standard Linux installation requires transferring ownership to the ollama user
sudo chown -R ollama:ollama /data/ollama-models
Scenario 2: Migrating to a New Machine
Example
tar czf models-backup.tar.gz -C ~/.ollama models
# New machine: install the same version of Ollama, then extract to the corresponding location
mkdir -p ~/.ollama
tar xzf models-backup.tar.gz -C ~/.ollama
# Verify the model list is complete
ollama list
Two details determine the success or failure of migration: the Ollama version on the new machine should be as consistent as possible with the old machine; the blobs and manifests structure under the models directory must be preserved as-is, don't copy only individual model files.
Backup and Restore of Custom Models
Custom models (products built from Modelfile) have two backup methods; it is recommended to do both.
Method 1: Export Recipe to Git
Example
ollama show --modelfile example-coder > example-coder.modelfile
Note one detail: the FROM line in the exported recipe points to the local blob file path, so it cannot be used directly after changing machines. When restoring, change FROM back to the base model name (e.g., FROM qwen3.5:9b) and rebuild.
Example
ollama create example-coder -f example-coder.modelfile
Method 2: Push to Model Library for Cloud Backup
Example
ollama cp example-coder myteam/example-coder:v1
ollama push myteam/example-coder:v1
Recommended organization: put all Modelfiles into one Git repository for management, combined with a script to rebuild the environment from scratch — hardware will be replaced, systems will be reinstalled, but with the recipes in hand, all custom models can be restored in ten minutes.
Other Extensions