MongoDB Shell
MongoDB Shell is the official interactive interface provided by MongoDB, allowing users to interact with MongoDB databases, execute commands, and perform database operations.
MongoDB Shell is based on JavaScript, allowing users to use JavaScript directly in the command line or in scripts to operate MongoDB databases.
Installing MongoDB Shell
MongoDB Shell is part of the MongoDB database installation package; therefore, installing the MongoDB database will also automatically install MongoDB Shell.
Installing MongoDB Shell on macOS
Install using Homebrew:
If you use Homebrew to manage software packages on macOS, you can install MongoDB with the following command:
brew tap mongodb/brew
brew install mongodb-community-shell
This will install the latest version of MongoDB and its related tools, including MongoDB Shell.
Manual download and installation:
Another method is to download the MongoDB Shell for macOS from the MongoDB official website. Download address:https://www.mongodb.com/try/download/shell :
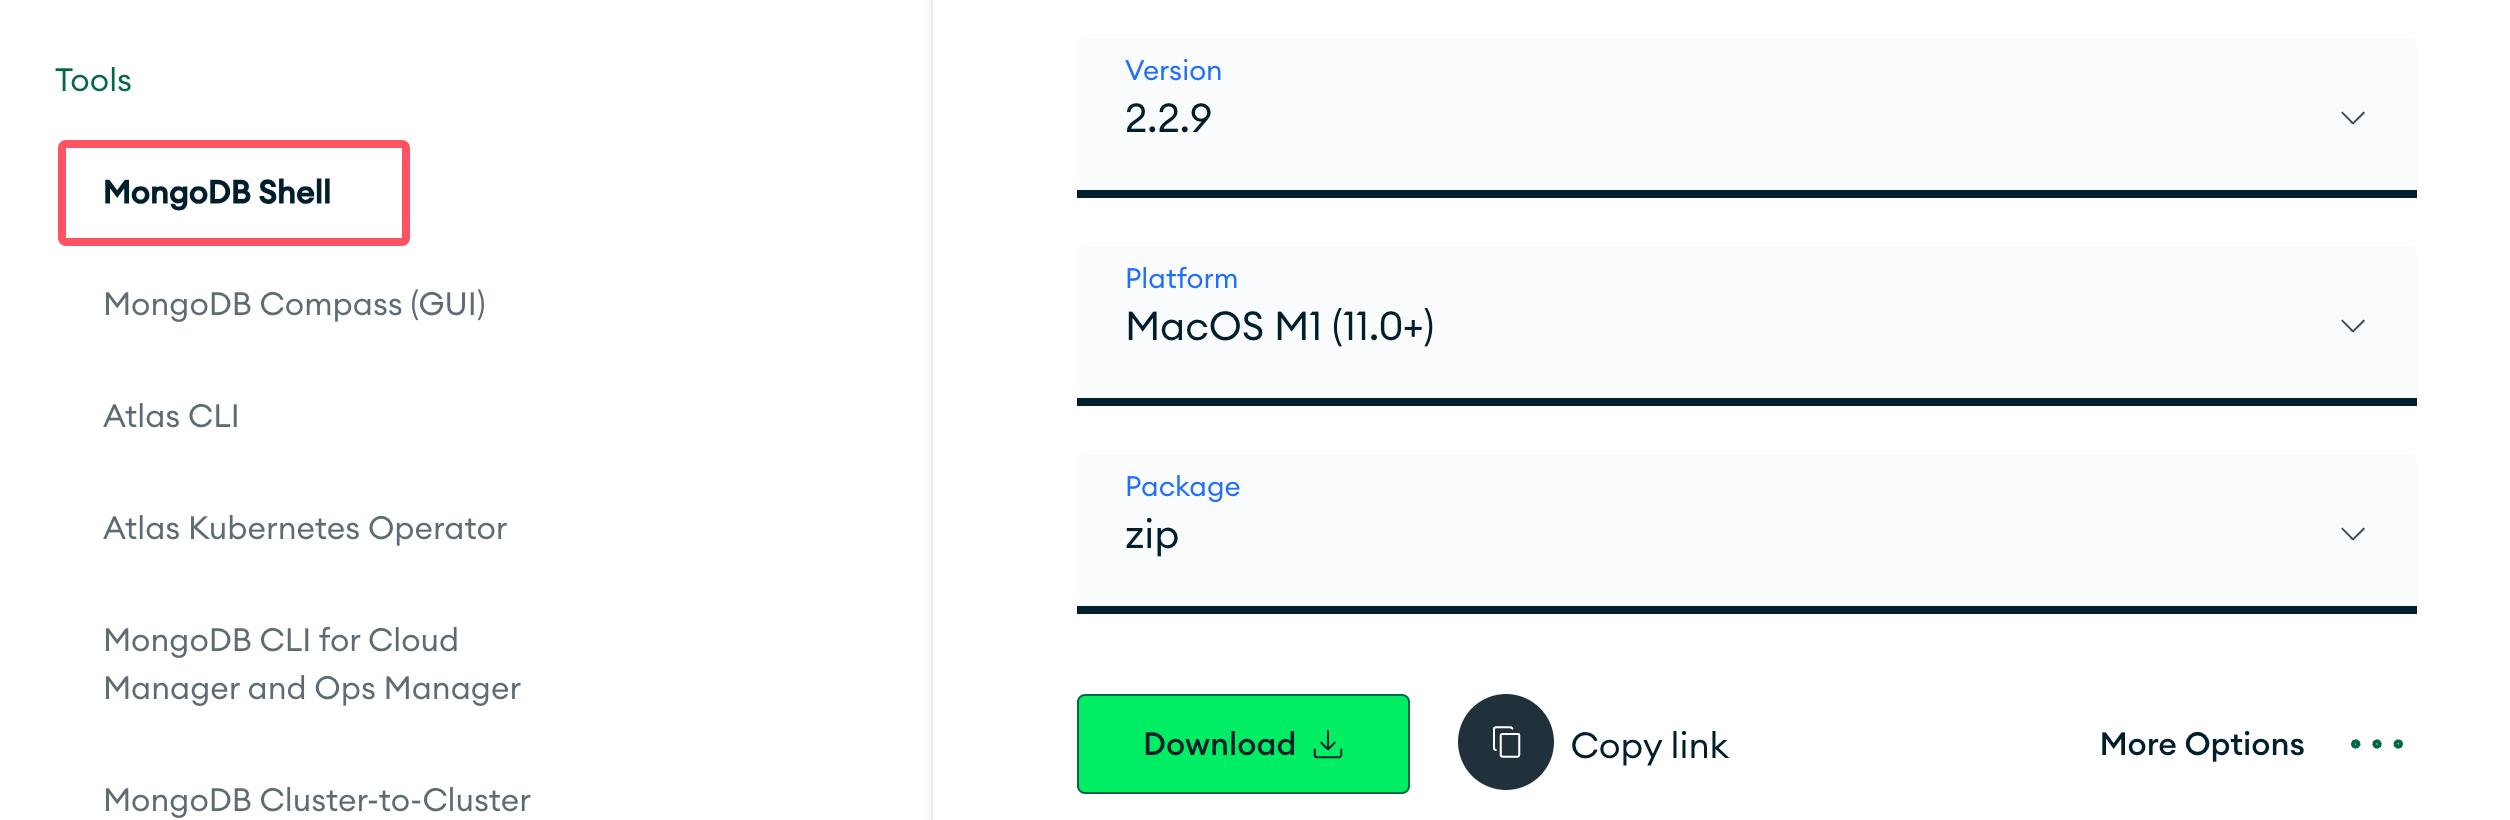
After downloading, extract the installation package and copy the mongosh binary file in the bin directory to a directory listed in the PATH variable, such as /usr/local/bin:
sudo cp mongosh /usr/local/bin/
sudo cp mongosh_crypt_v1.so /usr/local/lib/
After installation is complete, MongoDB Shell can be launched in the command line using:mongoshcommand.
If macOS blocks mongosh from running, open "Security & Privacy" in "System Preferences" to allow it to run.
Installing MongoDB Shell on Linux
On most Linux distributions, MongoDB Shell can be installed via the package manager. For example, on Ubuntu you can use the apt package manager:
Create the /etc/apt/sources.list.d/mongodb-org-7.0.list file for Ubuntu 22.04 (Jammy):
echo "deb [ arch=amd64,arm64 ] https://repo.mongodb.org/apt/ubuntu jammy/mongodb-org/7.0 multiverse" | sudo tee /etc/apt/sources.list.d/mongodb-org-7.0.list
sudo apt update
sudo apt install mongodb-shell
After installation is complete, MongoDB Shell can be launched in the command line using:mongoshcommand.
Another method is to download the MongoDB Shell for Linux from the MongoDB official website. Download address:https://www.mongodb.com/try/download/shell :
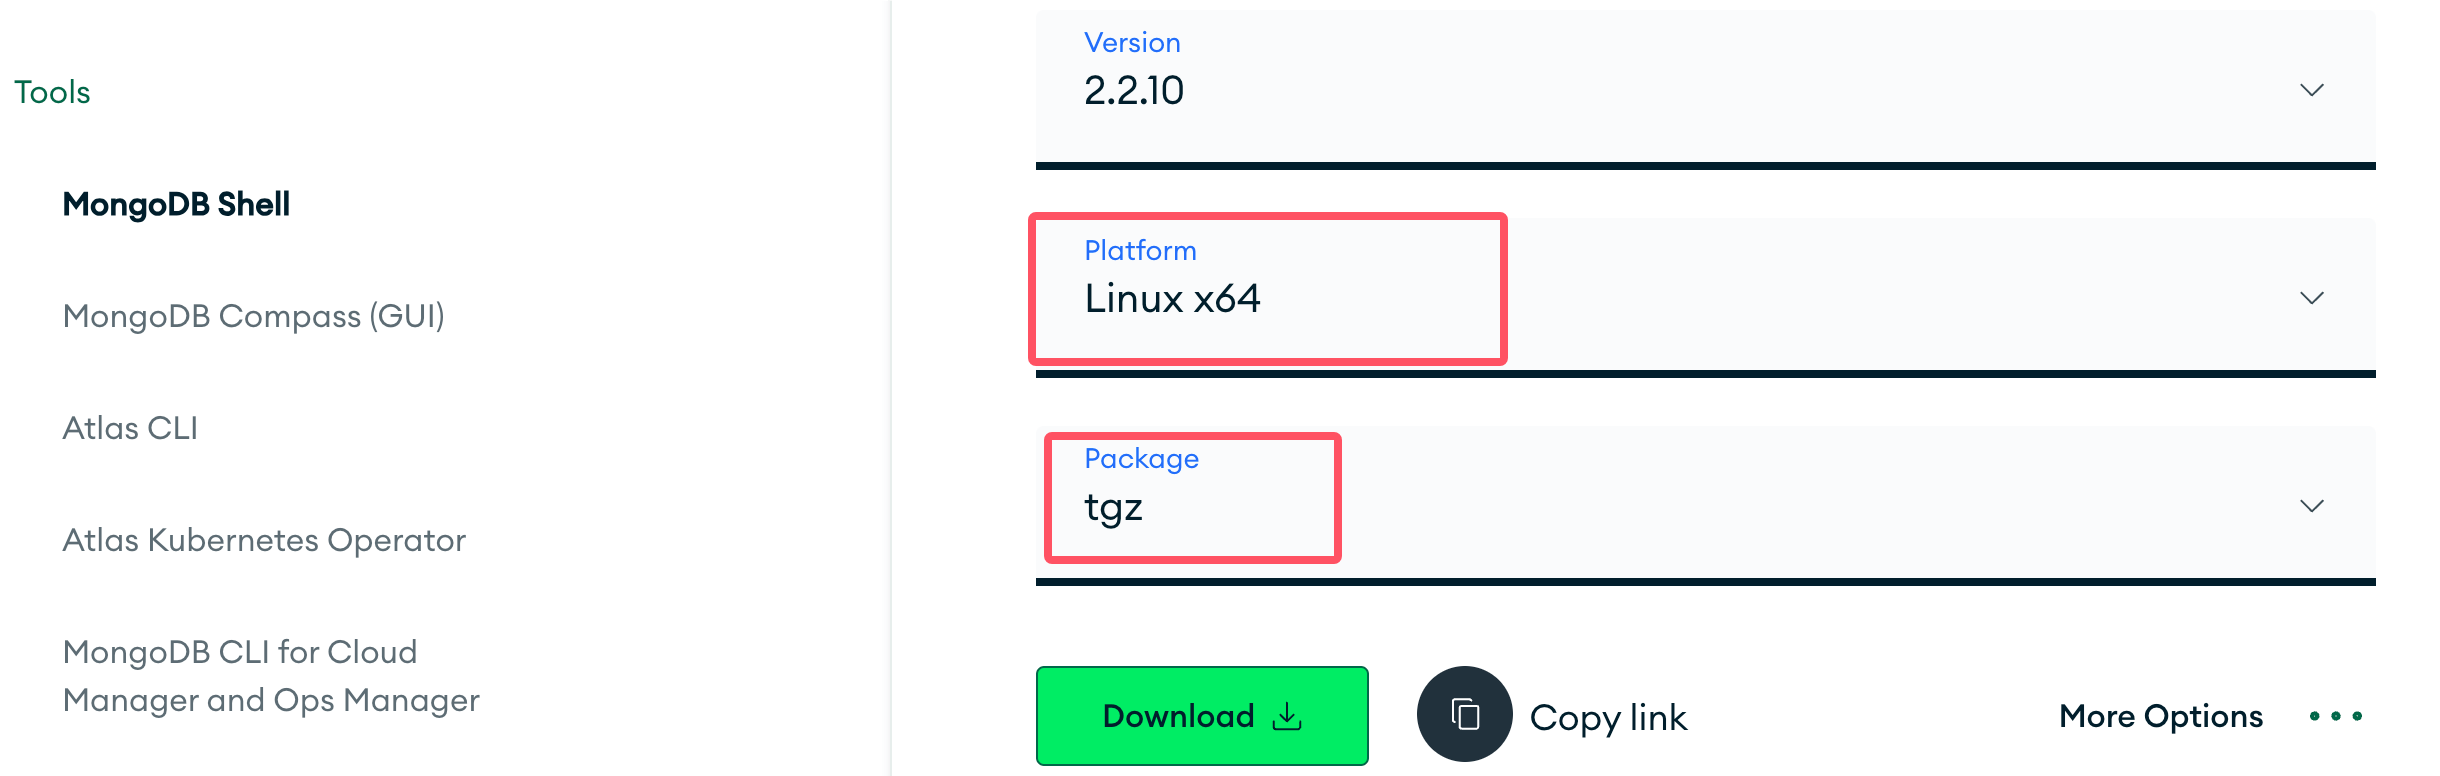
After downloading, extract the installation package and copy the mongosh binary file in the bin directory to a directory listed in the PATH variable, such as /usr/local/bin:
sudo cp mongosh /usr/local/bin/
sudo cp mongosh_crypt_v1.so /usr/local/lib/
After installation is complete, MongoDB Shell can be launched in the command line using:mongoshcommand.
Installing MongoDB Shell on Windows
Visit the MongoDB official website download page (https://www.mongodb.com/try/download/shell), select the MongoDB Shell version suitable for Windows, and download the installer.
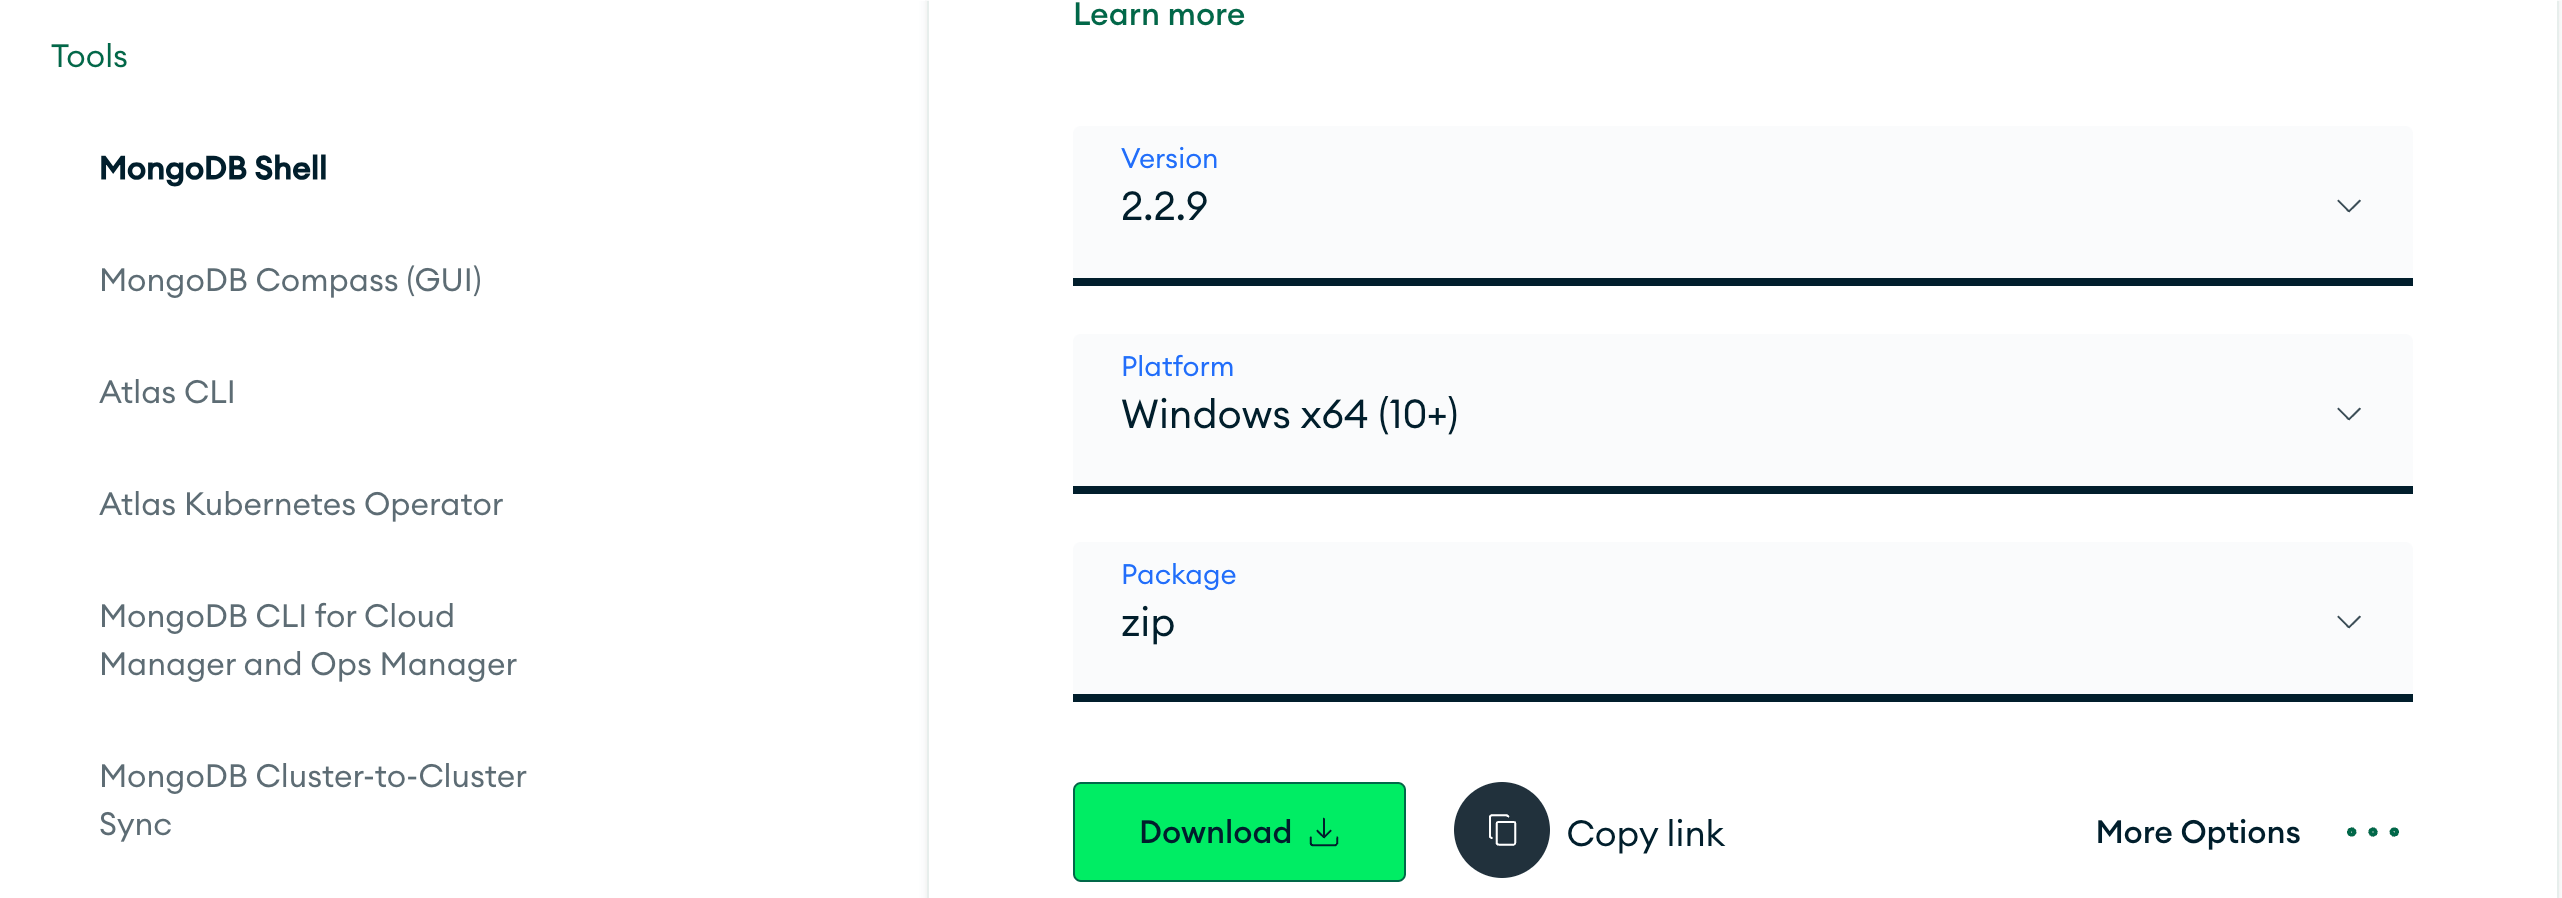
Run the downloaded installer and follow the instructions to install. During the installation process, make sure to select the MongoDB Shell component (it is included in the installation by default).
You can choose to configure environment variables during installation, so that you can run the mongosh command directly in the command line to start MongoDB Shell.
Using MongoDB Shell
After installation is complete, you can use the following steps to connect MongoDB Shell to a MongoDB database and perform operations.
Start MongoDB Shell:
Enter the mongosh command in the command line to start MongoDB Shell. If the MongoDB server is running on the local default port (27017), you can connect directly.
mongosh
View the version:
mongosh --version
2.2.9
Connect to a MongoDB server:
If the MongoDB server is running on a non-default port or on a remote server, you can connect using the following command:
mongosh --host <hostname>:<port>
Where<hostname>is the hostname or IP address of the MongoDB server,<port>is the port number of the MongoDB server.
Perform basic operations:
After connecting successfully, you can perform various MongoDB database operations. For example:
- View the current database:
db - Display the list of databases:
show dbs - Switch to the specified database:
use <database_name> - Perform a query operation:
db.<collection_name>.find() - Insert a document:
db.<collection_name>.insertOne({ ... }) - Update a document:
db.<collection_name>.updateOne({ ... }) - Delete a document:
db.<collection_name>.deleteOne({ ... }) - Exit MongoDB Shell:
quit()Orexit
Examples
The following is an example of using MongoDB Shell to connect to a local MongoDB server and perform some basic operations:
Examples
mongosh
# Connect to the local MongoDB server
test> show dbs
admin 40.00 KiB
config 72.00 KiB
local 40.00 KiB
example 72.00 KiB
test> use example
switched to db example
# Insert a document
example> db.mycollection.insertOne({ name: "Alice", age: 30 })
{
acknowledged: true,
insertedId: ObjectId('667cd8789a69705686ed70f2')
}
# Query documents
example> db.mycollection.find()
[
{ _id: ObjectId('667cd8789a69705686ed70f2'), name: 'Alice', age: 30 }
]
# Update a document
example> db.mycollection.updateOne({ name: "Alice" }, { $set: { age: 31 } })
{
acknowledged: true,
insertedId: null,
matchedCount: 1,
modifiedCount: 1,
upsertedCount: 0
}
# Delete a document
example> db.mycollection.deleteOne({ name: "Alice" })
{ acknowledged: true, deletedCount: 1 }
# Exit MongoDB Shell
example> quit()
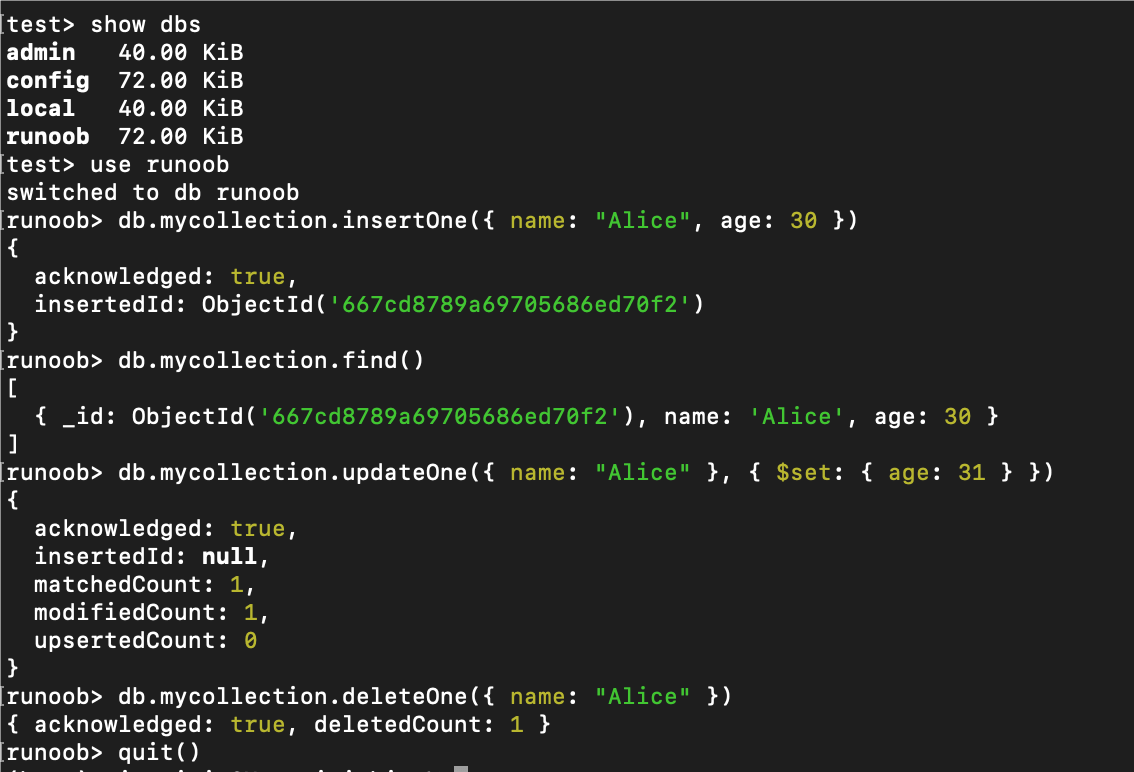
With the above steps and examples, you can start using MongoDB Shell to manage and operate MongoDB databases.
Official installation instructions:https://www.mongodb.com/zh-cn/docs/mongodb-shell/install/
Other extensions