Android Services
A service is a component that runs in the background to perform long-running tasks that do not require user interaction. It can continue to work even if the application is destroyed. A service essentially has two states -
| State | Description |
|---|---|
| Started | When an Android application component, such as an activity, starts a service using startService(), the service is in the Started state. Once started, the service can run indefinitely in the background, even if the component that started it is destroyed. |
| Bound | When an Android application component binds to a service using bindService(), the service is in the Bound state. A service in the Bound state provides a client-server interface that allows components to interact with the service, such as sending requests, getting results, and even performing cross-process communication via IPC. |
Services have lifecycle methods that allow you to monitor changes in the service state and perform work at appropriate stages. The left diagram below shows the lifecycle of a service when it is created via startService(), while the right diagram shows the lifecycle when the service is created via bindService():
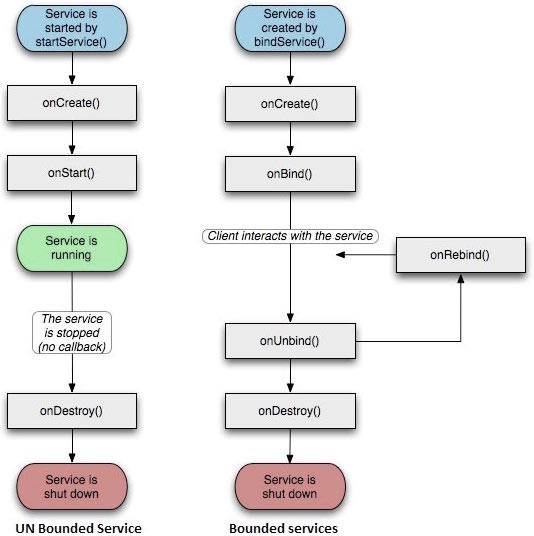
To create a service, you need to create a Java class that extends the Service base class or one of its known subclasses. The Service base class defines various callback methods and most of the important methods. You don't need to implement all callback methods. However, it is still very important to understand all of them. Implementing these callbacks ensures that your application behaves in the way users expect.
| Callback | Description |
|---|---|
| onStartCommand() | When other components (such as activities) request to start a service by calling startService(), the system calls this method. If you implement this method, you are responsible for stopping the service when its work is done, using stopSelf() or stopService(). |
| onBind | When other components want to bind to a service using bindService(), the system calls this method. If you implement this method, you need to return an IBinder object to provide an interface that clients can use to communicate with the service. You must implement this method; if you don't want to allow binding, simply return null. |
| onUnbind() | When a client disconnects from all interfaces published by the service, the system calls this method. |
| onRebind() | When a new client connects to the service, after it has previously been notified of disconnection via onUnbind(Intent), the system calls this method. |
| onCreate() | When the service is first created via onStartCommand() and onBind(), the system calls this method. This call is used to perform one-time setup. |
| onDestroy() | When the service is no longer in use or is being destroyed, the system calls this method. Your service should implement this method to clean up any resources, such as threads, registered listeners, receivers, etc. |
The following main service demonstrates the lifecycle of each method -
package com.example.androidservices;

import android.app.Service;
import android.os.IBinder;
import android.content.Intent;
import android.os.Bundle;

public class HelloService extends Service {

    /** 标识服务如果被杀死之后的行为 */
    int mStartMode;

    /** 绑定的客户端接口 */
    IBinder mBinder;

    /** 标识是否可以使用onRebind */
    boolean mAllowRebind;

    /** 当服务被创建时调用. */
    @Override
    public void onCreate() {

    }

    /** 调用startService()启动服务时回调 */
    @Override
    public int onStartCommand(Intent intent, int flags, int startId) {
        return mStartMode;
    }

    /** 通过bindService()绑定到服务的客户端 */
    @Override
    public IBinder onBind(Intent intent) {
        return mBinder;
    }

    /** 通过unbindService()解除所有客户端绑定时调用 */
    @Override
    public boolean onUnbind(Intent intent) {
        return mAllowRebind;
    }

    /** 通过bindService()将客户端绑定到服务时调用*/
    @Override
    public void onRebind(Intent intent) {

    }

    /** 服务不再有用且将要被销毁时调用 */
    @Override
    public void onDestroy() {

    }
}
Example
This example will show you how to create your own Android service through simple steps. Follow the steps below to modify the Android application created earlier in the Hello World example chapter:
| Step | Description |
|---|---|
| 1 | Use the Android Studio IDE to create an Android application named androidservices under the package com.example.androidservices. Similar to the Hello World example chapter. |
| 2 | Modify the main activity file MainActivity.java to add the startService() and stopService() methods. |
| 3 | Create a new Java file MyService.java under the package com.example.androidservices. This file will implement methods related to the Android service. |
| 4 | Use the <service.../> tag in the AndroidManifest.xml file to define the service. An application can have one or more services without any restrictions. |
| 5 | Modify the default layout in the res/layout/activity_main.xml file to include two buttons in a linear layout. |
| 6 | Do not modify any constants in the res/values/strings.xml file. Android Studio will handle the string values. |
| 7 | Start the Android emulator to run the application and verify the results of the changes made to the application. |
The following is the modified content of the main activity file src/com.example.androidservices/MainActivity.java. This file contains all the basic lifecycle methods. We added the startService() and stopService() methods to start and stop the service.
package com.example.androidservices;

import android.app.Activity;
import android.os.Bundle;
import android.view.Menu;


import android.content.Intent;
import android.view.View;

public class MainActivity extends Activity {

    @Override
    public void onCreate(Bundle savedInstanceState) {
        super.onCreate(savedInstanceState);
        setContentView(R.layout.activity_main);
    }

    @Override
    public boolean onCreateOptionsMenu(Menu menu) {
        getMenuInflater().inflate(R.menu.menu_main, menu);
        return true;
    }

    // Method to start the service
    public void startService(View view) {
        startService(new Intent(getBaseContext(), MyService.class));
    }

    // Method to stop the service
    public void stopService(View view) {
        stopService(new Intent(getBaseContext(), MyService.class));
    }
}
Below is the content of src/com.example.androidservices/MyService.java. This file can implement one or more service-related methods based on requirements. For beginners, we only implement onStartCommand() and onDestroy() -
package com.example.androidservices;

import android.app.Service;
import android.content.Intent;
import android.os.IBinder;
import android.widget.Toast;

public class MyService extends Service {

    @Override
    public IBinder onBind(Intent arg0) {
        return null;
    }

    @Override
    public int onStartCommand(Intent intent, int flags, int startId) {
        // Let it continue running until it is stopped.
        Toast.makeText(this, "服务已经启动", Toast.LENGTH_LONG).show();
        return START_STICKY;
    }

    @Override
    public void onDestroy() {
        super.onDestroy();
        Toast.makeText(this, "服务已经停止", Toast.LENGTH_LONG).show();
    }
}
Next, we will modify the AndroidManifest.xml file. Here we add the <service.../> tag to include our service:
<?xml version="1.0" encoding="utf-8"?>
<manifest xmlns:android="http://schemas.android.com/apk/res/android"
    package="com.example.androidservices"
    android:versionCode="1"
    android:versionName="1.0">

    <uses-sdk
        android:minSdkVersion="13"
        android:targetSdkVersion="22" />

    <application
        android:icon="@drawable/ic_launcher"
        android:label="@string/app_name"
        android:theme="@style/AppTheme" >

        <activity
            android:name=".MainActivity"
            android:label="@string/title_activity_main" >

            <intent-filter>
                <action android:name="android.intent.action.MAIN" />
                <category android:name="android.intent.category.LAUNCHER"/>
            </intent-filter>

        </activity>

        <service android:name=".MyService" />

    </application>

</manifest>
The following is the content of the res/layout/activity_main.xml file, which contains two buttons:
<RelativeLayout xmlns:android="http://schemas.android.com/apk/res/android"
    xmlns:tools="http://schemas.android.com/tools" android:layout_width="match_parent"
    android:layout_height="match_parent" android:paddingLeft="@dimen/activity_horizontal_margin"
    android:paddingRight="@dimen/activity_horizontal_margin"
    android:paddingTop="@dimen/activity_vertical_margin"
    android:paddingBottom="@dimen/activity_vertical_margin" tools:context=".MainActivity">

    <TextView
        android:id="@+id/textView1"
        android:layout_width="wrap_content"
        android:layout_height="wrap_content"
        android:text="Android 服务实例"
        android:layout_alignParentTop="true"
        android:layout_centerHorizontal="true"
        android:textSize="30dp" />

    <TextView
        android:id="@+id/textView2"
        android:layout_width="wrap_content"
        android:layout_height="wrap_content"
        android:text="www.example.com"
        android:textColor="#ff87ff09"
        android:textSize="30dp"
        android:layout_above="@+id/imageButton"
        android:layout_centerHorizontal="true"
        android:layout_marginBottom="40dp" />

    <ImageButton
        android:layout_width="wrap_content"
        android:layout_height="wrap_content"
        android:id="@+id/imageButton"
        android:src="@drawable/ic_launcher.html"
        android:layout_centerVertical="true"
        android:layout_centerHorizontal="true" />

    <Button
        android:layout_width="wrap_content"
        android:layout_height="wrap_content"
        android:id="@+id/button2"
        android:text="启动服务"
        android:onClick="startService"
        android:layout_below="@+id/imageButton"
        android:layout_centerHorizontal="true" />

    <Button
        android:layout_width="wrap_content"
        android:layout_height="wrap_content"
        android:text="停止服务"
        android:id="@+id/button"
        android:onClick="stopService"
        android:layout_below="@+id/button2"
        android:layout_alignLeft="@+id/button2"
        android:layout_alignStart="@+id/button2"
        android:layout_alignRight="@+id/button2"
        android:layout_alignEnd="@+id/button2" />

</RelativeLayout>
Below is the content of res/values/strings.xml, defining two new constants:
<?xml version="1.0" encoding="utf-8"?>
<resources>

    <string name="app_name">Android Services</string>
    <string name="title_activity_main">MainActivity</string>
    <string name="menu_settings">Settings</string>
    <string name="action_settings">Settings</string>

</resources>
Let's run the just modified My Application app. I assume you have already created an AVD while setting up the environment. Open the activity file in your project and click the icon to run the application in Android Studio. Android Studio installs the application on the AVD and launches it. If everything goes well, the following will be displayed on the emulator window:
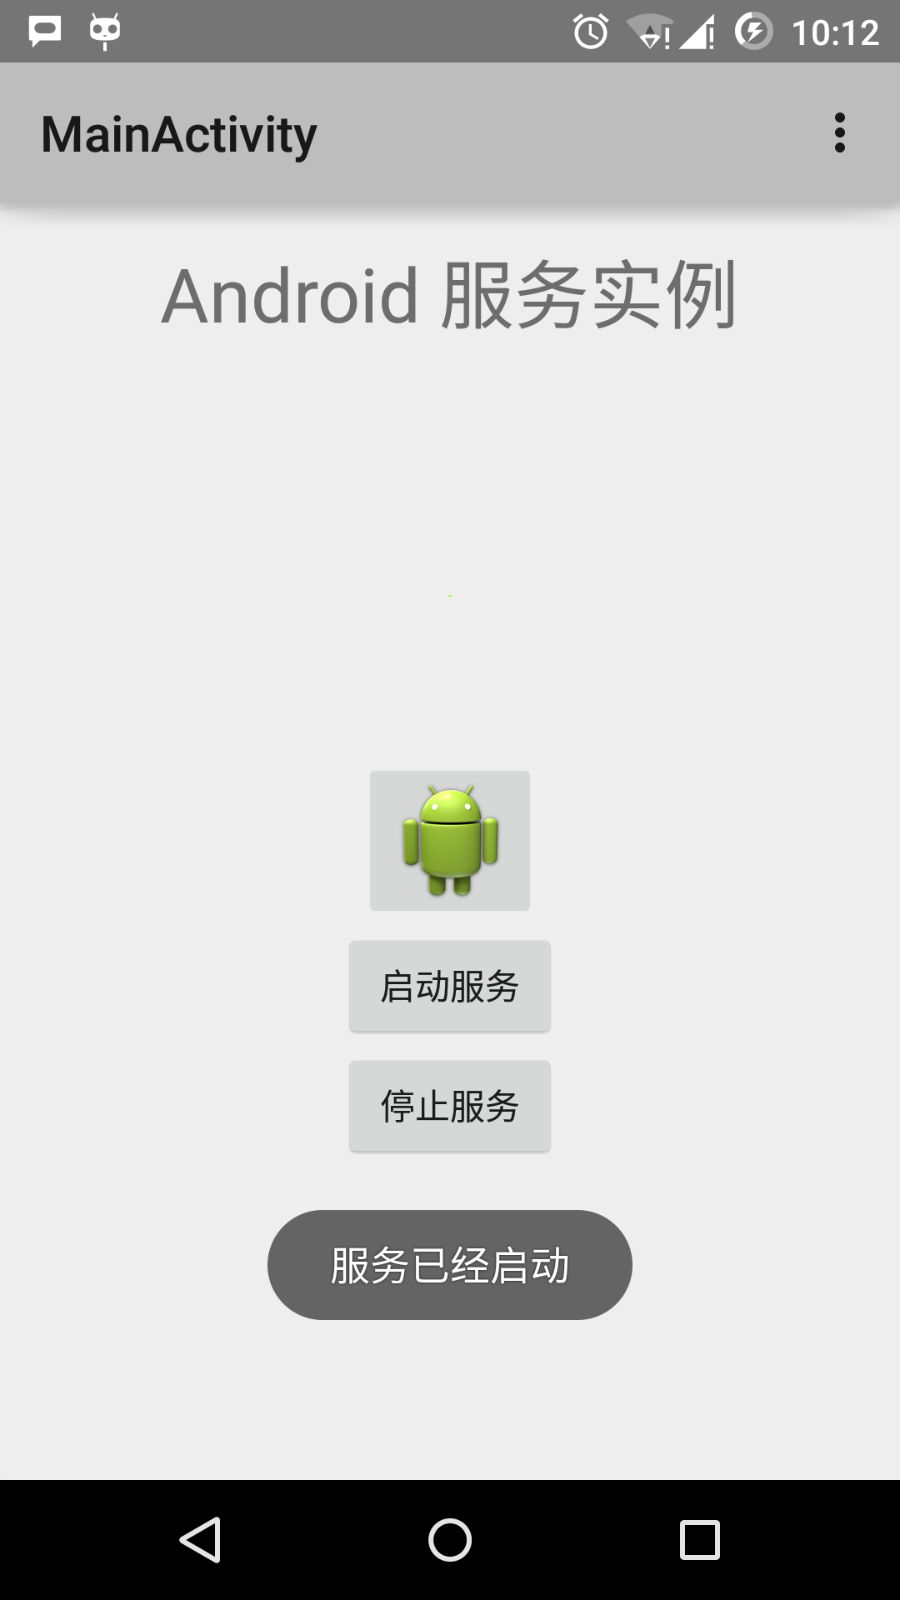
Now click the "Start Service" button to start the service. This will execute the onStartCommand() method we wrote, and a "Service started" message appears at the bottom of the emulator, as follows:
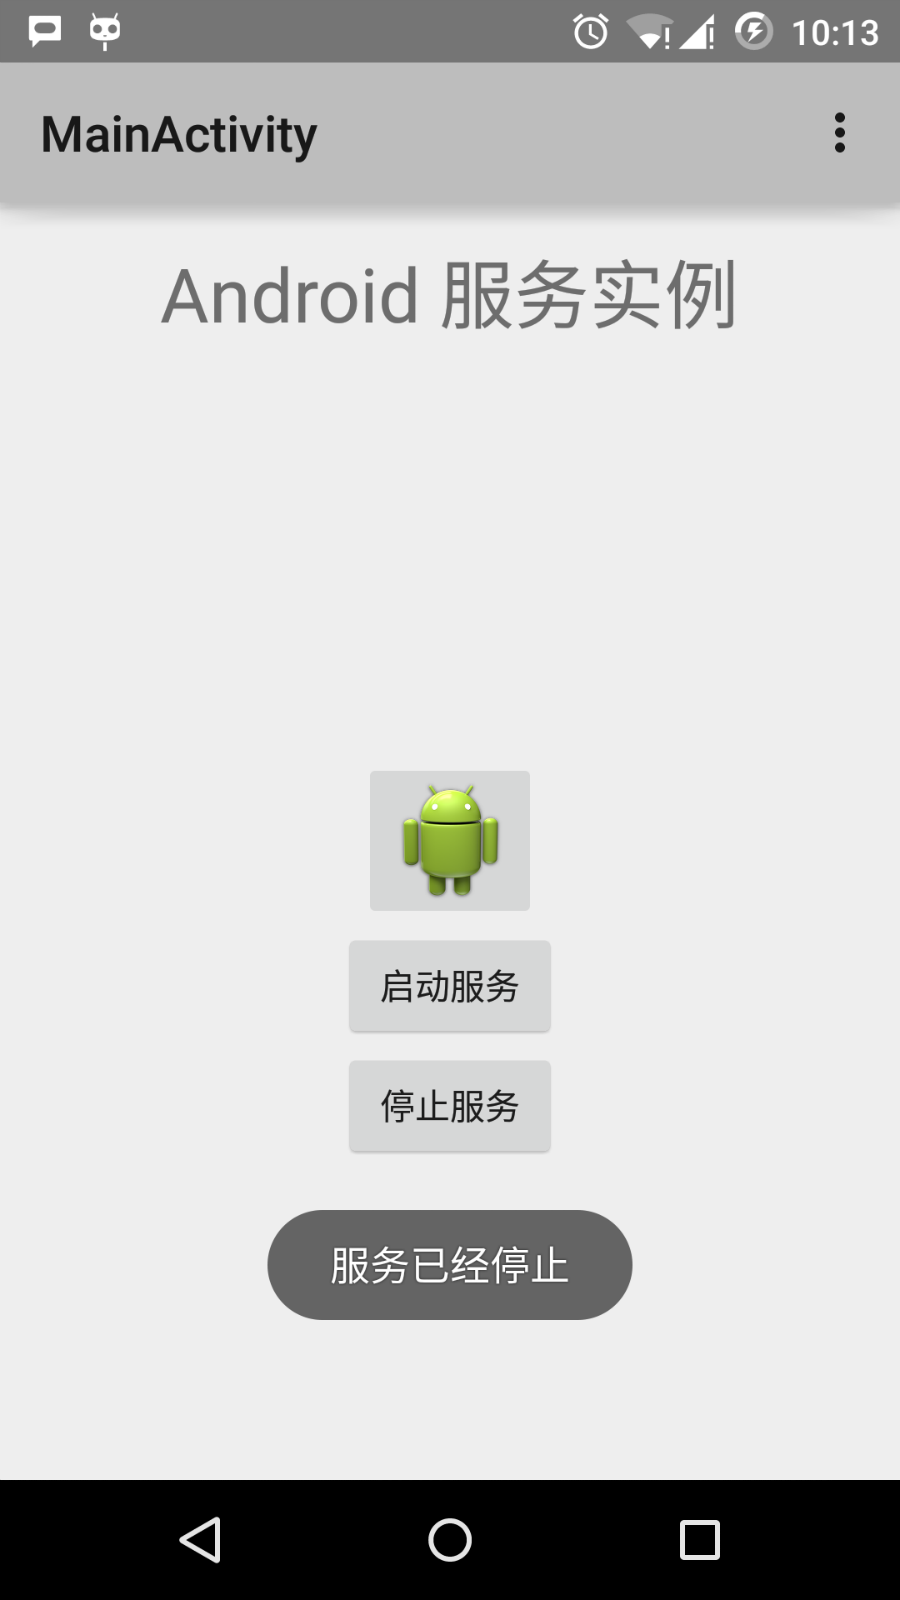
Click the "Stop Service" button at the bottom to stop the service.
Other extensions