Android Eclipse Integrated Environment Setup
Install Android SDK
You can from the official website,Android SDK DownloadDownload the latest version of the Android SDK. If you install the SDK on a Windows machine, you will find an installer_rXX windows.exe file. Just download and run this exe, it will launch the Android SDK Tools installation wizard to guide you through the entire installation. So just follow the instructions to install the Android SDK tools on your machine.
This tutorial assumes you will install the development environment on the Windows 7 operating system.
Therefore, let's open the Android SDK Manager option: All Programs > Android SDK Tools > SDK Manager. The following window will pop up:
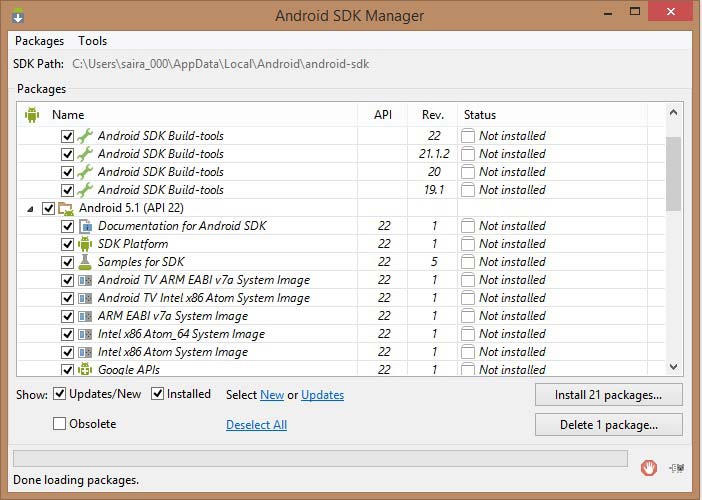
Once the SDK Manager is open, you can start installing other required packages. By default, it will list 7 packages to install, but it is recommended to uncheck Android SDK Documentation and SDK Samples to reduce installation time. Next, click the Install button, and the following dialog box will appear:
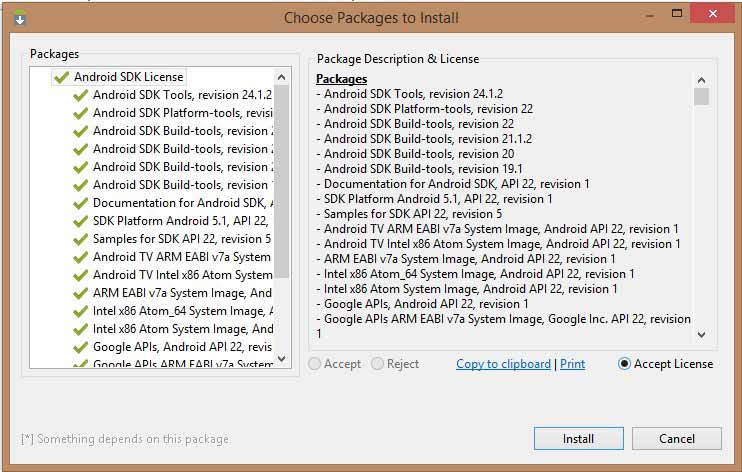
If you agree to install these packages, select the "Accept All" radio button and click the "Install" button. Then you can let the SDK Manager work on its own until all packages are installed. This may take some time, depending mainly on your network connection. When all packages are installed, close the SDK Manager using the button in the upper-right corner.
Install Eclipse IDE
All examples in this tutorial are written in the Eclipse IDE. Therefore, it is recommended to install the latest version of Eclipse on your machine.
Inhttps://www.eclipse.org/downloads/Download the latest Eclipse binary file to install. Once the installation package is downloaded, extract it to a convenient location. For example, C:\eclipse on Windows, or /usr/local/eclipse on Linux, and set the appropriate PATH environment variable.
On a Windows machine, you can start Eclipse by executing the following command, or simply double-click eclipse.exe.
%C:\eclipse\eclipse.exeOn Linux, use the following command:
$/usr/local/eclipse/eclipse
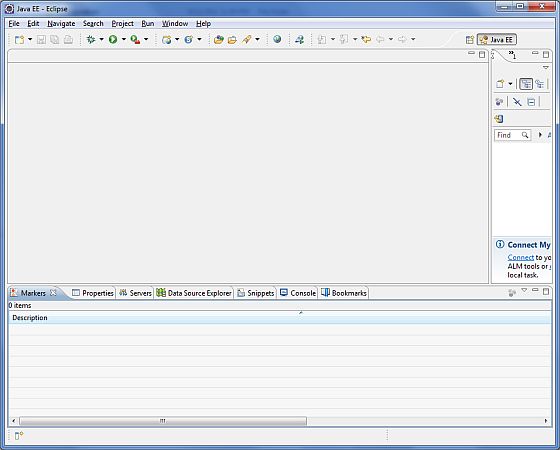
After successful installation, if everything goes well, the following result will be displayed:
Install Android Development Tools (ADT) Plugin
This step will help you install the Android Development Tools (ADT) plugin for Eclipse. Open Eclipse and select "Help" > "Software Updates" > "Install New Software". This will show the following dialog:
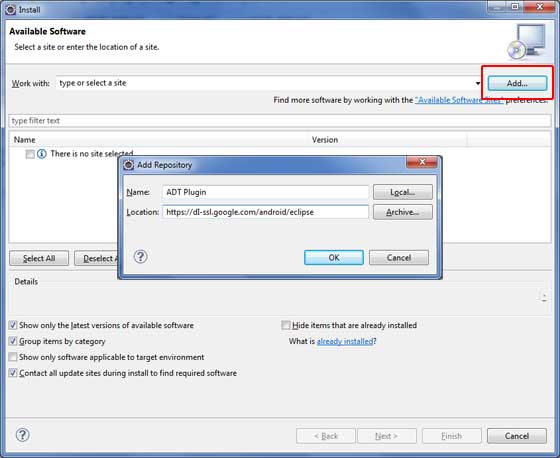
Now use the "Add" button to add the ADT plugin as the name, and enter https://dl-ssl.google.com/android/eclipse/ in the location. Then click "OK" to add this location. When you click "OK", Eclipse starts searching for plugins at the given location and eventually lists the plugins found.
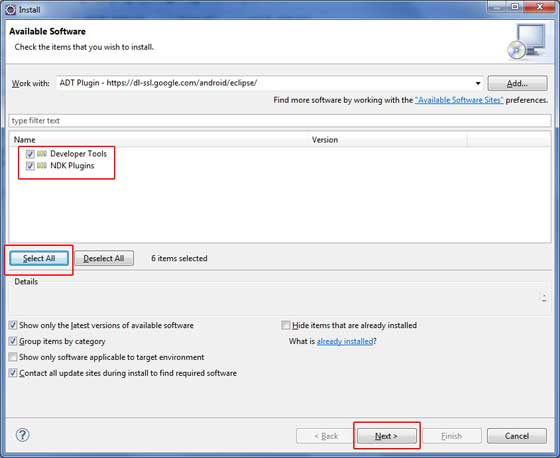
Click "Select All" to select all listed plugins, and click the "Next" button to guide you through installing the ADT tools and other required plugins.
Create Android Virtual Device
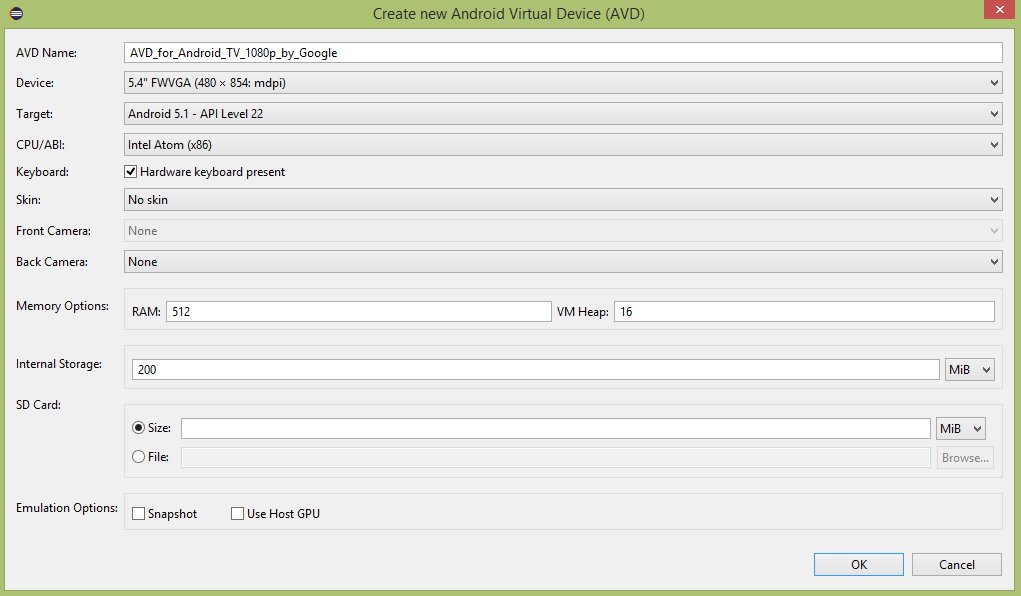
If the AVD is created successfully, it means your Android application development environment is ready. If you like, close the window using the button in the upper-right corner. Finally, restart your computer. When you complete the last step, you are ready to develop your first Android example. But before that, we will first look at some important concepts related to Android application development.
Other Extensions