Android Intent and Filter
An Android intent is an abstract description of an operation to be performed. It can start an activity via startActivity, send a broadcast to any broadcast receiver component interested in it via broadcastIntent, and communicate with a background service via startService(Intent) or bindService(Intent, ServiceConnection, int).
The intent itself (an Intent object) is a passive data structure that holds an abstract description of the operation to be performed.
For example, you have an activity that needs to open an email client and send an email through an Android device. For this purpose, your activity needs to send an ACTION_SEND with an appropriate selector to the Android intent handler. The specified selector provides a suitable interface for the user to decide how to send his email data.
Intent email = new Intent(Intent.ACTION_SEND, Uri.parse("mailto:"));
email.putExtra(Intent.EXTRA_EMAIL, recipients);
email.putExtra(Intent.EXTRA_SUBJECT, subject.getText().toString());
email.putExtra(Intent.EXTRA_TEXT, body.getText().toString());
startActivity(Intent.createChooser(email, "Choose an email client from..."));
The above syntax calls the startActivity method to open the email activity, and the code execution result looks like this:
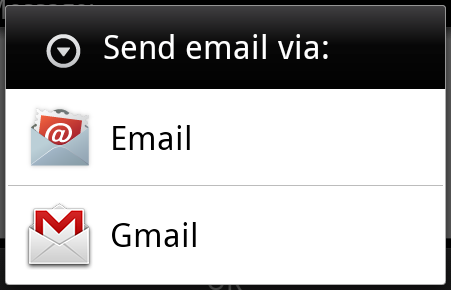
For example, you have an activity that needs to open a URL in a browser on an Android device. For this purpose, your activity sends an ACTION_WEB_SEARCH intent to the Android intent handler to open the given URL in the browser. The intent handler parses a series of activities and selects the one that best matches your intent; in this example, it is the web browser activity. The intent handler passes your web address to the web browser and opens the web browser activity.
String q = "https://www.example.com";
Intent intent = new Intent(Intent.ACTION_WEB_SEARCH );
intent.putExtra(SearchManager.QUERY, q);
startActivity(intent);
The above example will search for "www.example.com" on the Android search engine and present the keyword results in an activity.
For each component - activity, service, and broadcast receiver - there are independent mechanisms for delivering intents.
| No. | Method and Description |
|---|---|
| 1 | Context.startActivity(): The intent is passed to this method to start a new activity or have an existing activity do something new. |
| 2 | Context.startService(): The intent is passed to this method to initialize a service or pass new information to an already running service. |
| 3 | Context.sendBroadcast(): The intent is passed to this method, and the information will be delivered to all broadcast receivers interested in it. |
Intent Object
An Intent object is a bundle of information. The intent received by a component is akin to the information received by the Android system.
An Intent object includes the following components, depending on what is to be communicated or performed.
Action
This is a mandatory part of the intent object, expressed as a string. In a broadcast intent, the action will be reported once it occurs. The action largely determines how the other parts of the intent are organized. The Intent class defines a set of action constants corresponding to different intents. Here is aAndroid Intent standard actionslist.
The action in an intent object can be set via the setAction() method and read via the getAction() method.
Data
Add data specifications to the intent filter. This specification can be just a data type (such as a MIME type attribute), a URI, or both a data type and a URI. The URI is specified by attributes of different parts.
These attributes specifying the URI format are optional, but they are also independent of each other -
- If the intent filter does not specify a scheme, all other URI attributes will be ignored.
- If no host is specified for the filter, the port attribute and all path attributes will be ignored.
The setData() method can only specify data as a URI, setType() can only specify data as a MIME type, and setDataAndType() can specify both a URI and a MIME type. The URI is read via getData(), and the type is read via getType().
The following are some examples of action/data pairs -
| No. | Action/Data Pair and Description |
|---|---|
| 1 | ACTION_VIEW content://contacts/people/1: Displays the information of the user with ID 1. |
| 2 | ACTION_DIAL content://contacts/people/1: Displays the phone dialer and fills in the data of user 1. |
| 3 | ACTION_VIEW tel:123: Displays the phone dialer and fills in the given number. |
| 4 | ACTION_DIAL tel:123: Displays the phone dialer and fills in the given number. |
| 5 | ACTION_EDIT content://contacts/people/1: Edits the information of the user with ID 1. |
| 6 | ACTION_VIEW content://contacts/people/: Displays the list of users for viewing. |
| 7 | ACTION_SET_WALLPAPER: Displays the wallpaper picker settings. |
| 8 | ACTION_SYNC: Synchronizes data. The default value is: android.intent.action.SYNC |
| 9 | ACTION_SYSTEM_TUTORIAL: Starts a platform-defined tutorial (default tutorial or startup tutorial) |
| 10 | ACTION_TIMEZONE_CHANGED: Notifies when the time zone has changed. |
| 11 | ACTION_UNINSTALL_PACKAGE: Runs the default uninstaller. |
Category
Categories are optional parts of an intent, a string containing additional information about the type of component that should handle the intent. The addCategory() method adds a category to the intent object, the removeCategory() method removes a previously added category, and getCategories() retrieves all categories set on the intent object. Here is theAndroid Intent standard categorieslist.
Refer to the intent filters in the following section to understand how we use categories to select the appropriate activity for a corresponding intent.
Extras
These are additional pieces of information in key-value pairs passed to the component that will handle the intent. They are set via the putExtras() method and read via the getExtras() method. Here is theAndroid Intent standard extraslist.
Flags
These flags are optional parts of an intent, indicating how the Android system should launch an activity and how to handle it after it is launched.
| No. | Flags and Descriptions |
|---|---|
| 1 | FLAG_ACTIVITY_CLEAR_TASK: If set in the intent and passed via Context.startActivity, this flag will cause all existing tasks associated with the activity to be cleared before the activity is started. The activity becomes the root of an empty task, and all old activities are finished. This flag can be used in combination with FLAG_ACTIVITY_NEW_TASK. |
| 2 | FLAG_ACTIVITY_CLEAR_TOP: If this flag is set, the activity will be launched in the currently running task. This does not launch a new instance of the activity; all activities above it are closed, and this intent is passed as a new intent to the existing (currently at the top) activity. |
| 3 | FLAG_ACTIVITY_NEW_TASK: This flag is generally used to give the activity "launcher" style behavior: to provide the user with data that can run independently and to launch a complete and independent activity. |
Component Name
The component name object is an optional field representing an activity, service, or broadcast receiver class. If set, the intent object is passed to an instance of the designed class; otherwise, Android uses other information in the intent to locate a suitable target. The component name is set via setComponent(), setClass(), or setClassName(), and retrieved via getComponent().
Types of Intents
Android supports two types of intents.
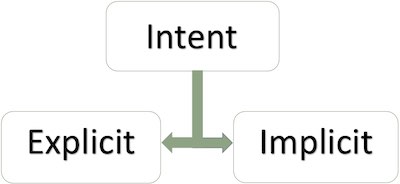
Explicit Intent
Explicit intents are used to connect the internal world of an application. Suppose you need to connect one activity to another; we can use an explicit intent. The following figure shows connecting the first activity to the second activity by clicking a button.
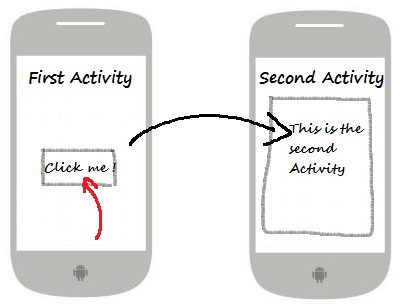
These intents specify the target component by name, typically used for messaging within an application—for example, an activity launching a subordinate activity or a sibling activity. For example:
// 通过指定类名的显式意图
Intent i = new Intent(FirstActivity.this, SecondAcitivity.class);

// 启动目标活动
startActivity(i);
Implicit Intent
These intents do not name a target, and the component name field is empty. Implicit intents are often used to activate components of other applications. For example:
Intent read1=new Intent();
read1.setAction(android.content.Intent.ACTION_VIEW);
read1.setData(ContactsContract.Contacts.CONTENT_URI);
startActivity(read1);
The above code will produce the following result:
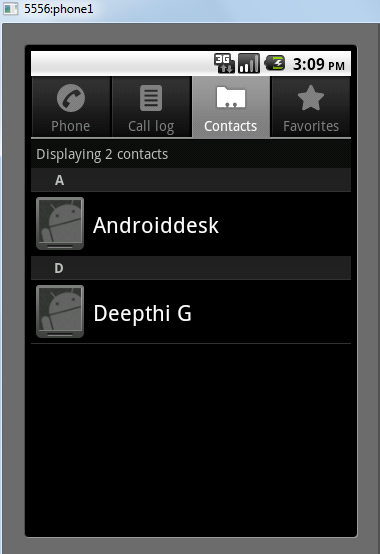
When the target component receives the intent, it can use the getExtras() method to obtain the additional data sent by the source component. For example:
// 在代码中的合适位置获取包对象
Bundle extras = getIntent().getExtras();

// 通过键解压数据
String value1 = extras.getString("Key1");
String value2 = extras.getString("Key2");
Example
The following example demonstrates using Android intents to launch the functionality of various built-in Android applications.
| Steps | Description |
|---|---|
| 1 | Create an Android application using Android Studio IDE, name it Intent filter, with the package name com.example.intentfilter. When creating the project, make sure the target SDK and compilation use the latest Android SDK to take advantage of advanced APIs. |
| 2 | Modify the src/com.example.intentfilter/MainActivity.java file and add code to define two listeners corresponding to the two buttons "Launch Browser" and "Launch Phone". |
| 3 | Modify the res/layout/activity_main.xml layout file, adding three buttons in a linear layout. |
| 4 | Launch the Android emulator to run the application and verify the results of the changes made to the application. |
The following is the content of the src/com.example.intentfilter/MainActivity.java file:
package com.example.intentfilter;

import android.content.Intent;
import android.net.Uri;
import android.support.v7.app.ActionBarActivity;
import android.os.Bundle;
import android.view.Menu;
import android.view.MenuItem;
import android.view.View;
import android.widget.Button;


public class MainActivity extends ActionBarActivity {
    Button b1,b2;

    @Override
    protected void onCreate(Bundle savedInstanceState) {
        super.onCreate(savedInstanceState);
        setContentView(R.layout.activity_main);

        b1=(Button)findViewById(R.id.button);
        b1.setOnClickListener(new View.OnClickListener() {

            @Override
            public void onClick(View v) {
                Intent i = new Intent(android.content.Intent.ACTION_VIEW, Uri.parse("https://www.example.com"));
                startActivity(i);
            }
        });

        b2=(Button)findViewById(R.id.button2);
        b2.setOnClickListener(new View.OnClickListener() {
            @Override
            public void onClick(View v) {
                Intent i = new Intent(android.content.Intent.ACTION_VIEW,Uri.parse("tel:9510300000"));
                startActivity(i);
            }
        });
    }

    @Override
    public boolean onCreateOptionsMenu(Menu menu) {
        getMenuInflater().inflate(R.menu.menu_main, menu);
        return true;
    }

    @Override
    public boolean onOptionsItemSelected(MenuItem item) {
        // Handle action bar item clicks here. The action bar will
        // automatically handle clicks on the Home/Up button, so long
        // as you specify a parent activity in AndroidManifest.xml.

        int id = item.getItemId();

        //noinspection SimplifiableIfStatement
        if (id == R.id.action_settings) {
            return true;
        }
        return super.onOptionsItemSelected(item);
    }
}
The following is the content of the res/layout/activity_main.xml file:
<RelativeLayout xmlns:android="http://schemas.android.com/apk/res/android"
    xmlns:tools="http://schemas.android.com/tools"
    android:layout_width="match_parent"
    android:layout_height="match_parent"
    android:paddingLeft="@dimen/activity_horizontal_margin"
    android:paddingRight="@dimen/activity_horizontal_margin"
    android:paddingTop="@dimen/activity_vertical_margin"
    android:paddingBottom="@dimen/activity_vertical_margin"
    tools:context=".MainActivity">

    <TextView
        android:id="@+id/textView1"
        android:layout_width="wrap_content"
        android:layout_height="wrap_content"
        android:text="意图实例"
        android:layout_alignParentTop="true"
        android:layout_centerHorizontal="true"
        android:textSize="30dp" />

    <TextView
        android:id="@+id/textView2"
        android:layout_width="wrap_content"
        android:layout_height="wrap_content"
        android:text="www.example.com"
        android:textColor="#ff87ff09"
        android:textSize="30dp"
        android:layout_below="@+id/textView1"
        android:layout_centerHorizontal="true" />

    <ImageButton
        android:layout_width="wrap_content"
        android:layout_height="wrap_content"
        android:id="@+id/imageButton"
        android:src="@drawable/ic_launcher.html"
        android:layout_below="@+id/textView2"
        android:layout_centerHorizontal="true" />

    <EditText
        android:layout_width="wrap_content"
        android:layout_height="wrap_content"
        android:id="@+id/editText"
        android:layout_below="@+id/imageButton"
        android:layout_alignRight="@+id/imageButton"
        android:layout_alignEnd="@+id/imageButton" />

    <Button
        android:layout_width="wrap_content"
        android:layout_height="wrap_content"
        android:text="启动浏览器"
        android:id="@+id/button"
        android:layout_alignTop="@+id/editText"
        android:layout_alignRight="@+id/textView1"
        android:layout_alignEnd="@+id/textView1"
        android:layout_alignLeft="@+id/imageButton"
        android:layout_alignStart="@+id/imageButton" />

    <Button
        android:layout_width="wrap_content"
        android:layout_height="wrap_content"
        android:text="启动电话"
        android:id="@+id/button2"
        android:layout_below="@+id/button"
        android:layout_alignLeft="@+id/button"
        android:layout_alignStart="@+id/button"
        android:layout_alignRight="@+id/textView2"
        android:layout_alignEnd="@+id/textView2" />
</RelativeLayout>
The following is the content of res/values/strings/xml, defining two new constants.
<?xml version="1.0" encoding="utf-8"?>
<resources>
   <string name="app_name">Intent filter</string>
   <string name="action_settings">Settings</string>
</resources>
The following is the content of the default AndroidManifest.xml:
<?xml version="1.0" encoding="utf-8"?>
<manifest xmlns:android="http://schemas.android.com/apk/res/android"
    package="com.example.intentfilter"
    android:versionCode="1"
    android:versionName="1.0" >

    <uses-sdk
        android:minSdkVersion="8"
        android:targetSdkVersion="22" />

    <application
        android:allowBackup="true"
        android:icon="@drawable/ic_launcher"
        android:label="@string/app_name"
        android:theme="@style/Base.Theme.AppCompat" >

        <activity
            android:name="com.example.intentfilter.MainActivity"
            android:label="@string/app_name" >

            <intent-filter>
                <action android:name="android.intent.action.MAIN" />
                <category android:name="android.intent.category.LAUNCHER" />
            </intent-filter>

        </activity>

    </application>
</manifest>
Let's run the Intent filter application we just modified. I assume you have already created an AVD during environment setup. Open the activity file in your project and click the icon in the toolbar to run the application in Android Studio. Android Studio installs the application on the AVD and launches it. If everything goes well, the following will be displayed on the emulator window:
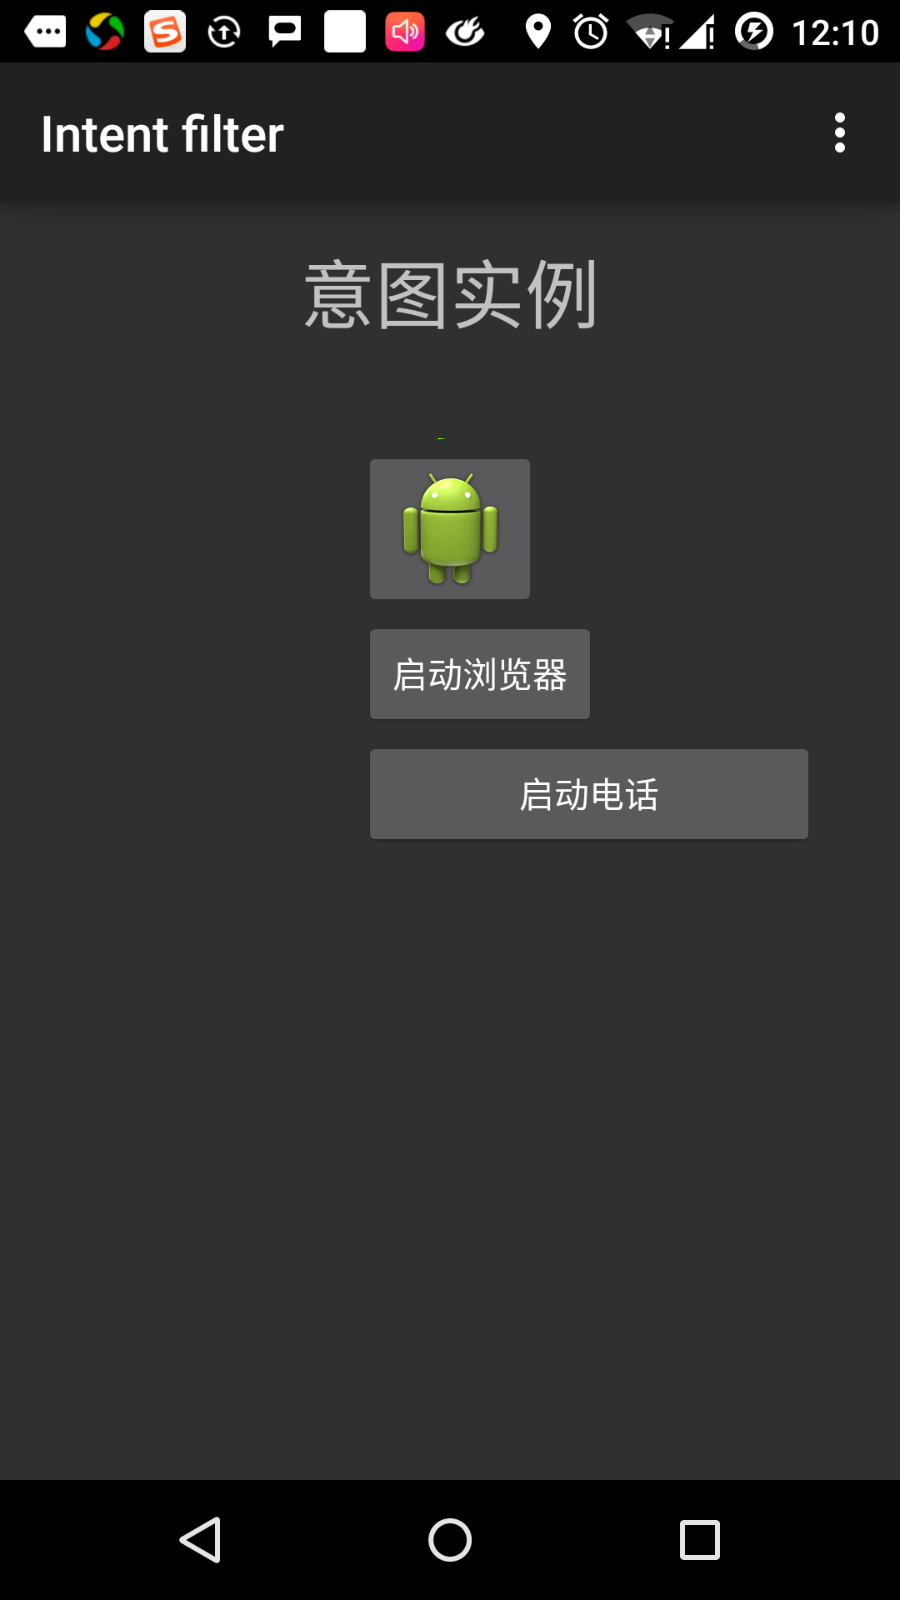
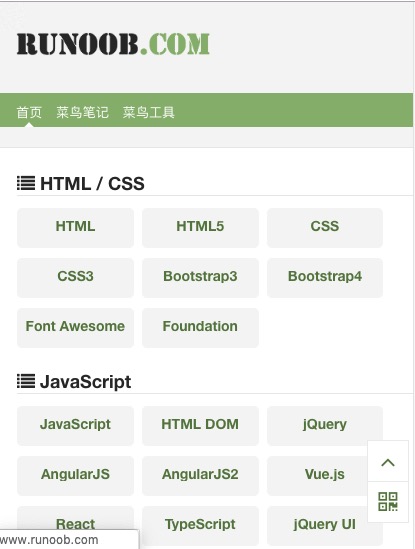
Now click the "Launch Browser" button, which will launch a browser according to the configuration and display https://www.example.com as follows:
In a similar way, you can click the "Launch Phone" button to open the phone interface, which will allow you to dial the phone number already given.
Intent Filter
You have seen how to use intents to invoke another activity. The Android operating system uses filters to specify which activities, services, and broadcast receivers handle intents, based on the action, category, and data pattern specified by the intent. Use the <intent-filter> element in the manifest file to list the corresponding actions, categories, and data types in activities, services, and broadcast receivers.
The following example shows a portion of the AndroidManifest.xml file, specifying that an activity com.example.intentfilter.CustomActivity can be invoked through the set action, category, and data:
<activity android:name=".CustomActivity"
   android:label="@string/app_name">

   <intent-filter>
      <action android:name="android.intent.action.VIEW" />
      <action android:name="com.example.MyApplication.LAUNCH" />
      <category android:name="android.intent.category.DEFAULT" />
      <data android:scheme="http" />
   </intent-filter>

</activity>
When an activity is defined by the above filter, other activities can invoke it in the following ways. Use android.intent.action.VIEW, use the action com.example.intentfilter.LAUNCH, and provide the category android.intent.category.DEFAULT.
The <data> element specifies the data type expected by the activity to be invoked. In the above example, the data expected by the custom activity begins with "http://".
There are cases where an intent will be delivered to multiple activities or services through the filter, and the user will be asked which component to launch. If no target component is found, an exception will occur.
Before invoking an activity, Android performs a series of checks:
- The filter <intent-filter> must list one or more actions and cannot be empty; the filter must contain at least one
element, otherwise it will block all intents. If multiple actions are mentioned, Android tries to match one of the mentioned actions before invoking the activity. - A filter <intent-filter> may list zero, one, or multiple categories. If no categories are mentioned, Android passes this test. If multiple categories are mentioned, the intent passes the category test only if each category of the intent object matches one of the categories in the filter.
- EachAn element can specify a URI and a data type (MIME type). There are separate attributes for each part of the URI: scheme, host, port, and path. An intent contains a URI and a type, and it passes the data type test only if its type matches one of the types listed in the filter.
Example
The following examples are some modifications of the above examples. Here we will see how Android resolves a conflict if an intent calls two defined activities; how to use filters to invoke a custom activity; and what exception occurs if no suitable activity is defined for the intent.
| Steps | Description |
|---|---|
| 1 | Use the Android Studio IDE to create an Android application and name it Intent filter, with package name com.example.intentfilter. When creating the project, make sure the target SDK and compiling with the latest version of the Android SDK use advanced APIs. |
| 2 | Modify the src/com.example.intentfilter/MainActivity.java file, and add code to define three listeners corresponding to the three buttons defined in the layout file. |
| 3 | Add the src/com.example.intentfilter/CustomActivity.java file to contain an activity that can be invoked by different intents. |
| 4 | Modify the res/layout/activity_main.xml file to add three buttons in a linear layout. |
| 5 | Add the res/layout/custom_view.xml layout file, and add a simple |
| 6 | Modify the AndroidManifest.xml file, and add <intent-filter> to define the intent rules for invoking the custom activity. |
| 7 | Launch the Android emulator to run the application and verify the result of the changes made to the application. |
The following is the content of src/com.example.intentfilter/MainActivity.java:
package com.example.intentfilter;

import android.content.Intent;
import android.net.Uri;
import android.support.v7.app.ActionBarActivity;
import android.os.Bundle;
import android.view.Menu;
import android.view.MenuItem;
import android.view.View;
import android.widget.Button;


public class MainActivity extends ActionBarActivity {
    Button b1,b2,b3;

    @Override
    protected void onCreate(Bundle savedInstanceState) {
        super.onCreate(savedInstanceState);
        setContentView(R.layout.activity_main);
        b1=(Button)findViewById(R.id.button);

        b1.setOnClickListener(new View.OnClickListener() {

            @Override
            public void onClick(View v) {
                Intent i = new Intent(android.content.Intent.ACTION_VIEW,Uri.parse("https://www.example.com"));
                startActivity(i);
            }
        });

        b2=(Button)findViewById(R.id.button2);
        b2.setOnClickListener(new View.OnClickListener() {

            @Override
            public void onClick(View v) {
                Intent i = new Intent("com.example.intentfilter.LAUNCH",Uri.parse("https://www.example.com"));
                startActivity(i);
            }
        });

        b3=(Button)findViewById(R.id.button3);
        b3.setOnClickListener(new View.OnClickListener() {

            @Override
            public void onClick(View v) {
                Intent i = new Intent("com.example.intentfilter.LAUNCH",Uri.parse("https://www.example.com"));
                startActivity(i);
            }
        });
    }

    @Override
    public boolean onCreateOptionsMenu(Menu menu) {
        // Inflate the menu; this adds items to the action bar if it is present.
        getMenuInflater().inflate(R.menu.menu_main, menu);
        return true;
    }

    @Override
    public boolean onOptionsItemSelected(MenuItem item) {
        // Handle action bar item clicks here. The action bar will
        // automatically handle clicks on the Home/Up button, so long
        // as you specify a parent activity in AndroidManifest.xml.

        int id = item.getItemId();

        //noinspection SimplifiableIfStatement
        if (id == R.id.action_settings) {
            return true;
        }
        return super.onOptionsItemSelected(item);
    }
}
The following is the content of src/com.example.intentfilter/CustomActivity.java:
package com.example.intentfilter;

import android.app.Activity;
        import android.net.Uri;
        import android.os.Bundle;
        import android.widget.TextView;

public class CustomActivity extends Activity {
    @Override
    public void onCreate(Bundle savedInstanceState) {
        super.onCreate(savedInstanceState);
        setContentView(R.layout.custom_view);
        TextView label = (TextView) findViewById(R.id.show_data);
        Uri url = getIntent().getData();
        label.setText(url.toString());
    }
}
The following is the content of res/layout/activity_main.xml:
<RelativeLayout xmlns:android="http://schemas.android.com/apk/res/android"
    xmlns:tools="http://schemas.android.com/tools"
    android:layout_width="match_parent"
    android:layout_height="match_parent"
    android:paddingLeft="@dimen/activity_horizontal_margin"
    android:paddingRight="@dimen/activity_horizontal_margin"
    android:paddingTop="@dimen/activity_vertical_margin"
    android:paddingBottom="@dimen/activity_vertical_margin"
    tools:context=".MainActivity">

    <TextView
        android:id="@+id/textView1"
        android:layout_width="wrap_content"
        android:layout_height="wrap_content"
        android:text="意图实例"
        android:layout_alignParentTop="true"
        android:layout_centerHorizontal="true"
        android:textSize="30dp" />

    <TextView
        android:id="@+id/textView2"
        android:layout_width="wrap_content"
        android:layout_height="wrap_content"
        android:text="www.example.com"
        android:textColor="#ff87ff09"
        android:textSize="30dp"
        android:layout_below="@+id/textView1"
        android:layout_centerHorizontal="true" />

    <ImageButton
        android:layout_width="wrap_content"
        android:layout_height="wrap_content"
        android:id="@+id/imageButton"
        android:src="@drawable/ic_launcher.html"
        android:layout_below="@+id/textView2"
        android:layout_centerHorizontal="true" />

    <EditText
        android:layout_width="wrap_content"
        android:layout_height="wrap_content"
        android:id="@+id/editText"
        android:layout_below="@+id/imageButton"
        android:layout_alignRight="@+id/imageButton"
        android:layout_alignEnd="@+id/imageButton" />

    <Button
        android:layout_width="wrap_content"
        android:layout_height="wrap_content"
        android:text="通过View动作启动浏览器"
        android:id="@+id/button"
        android:layout_alignTop="@+id/editText"
        android:layout_alignRight="@+id/textView1"
        android:layout_alignEnd="@+id/textView1"
        android:layout_alignLeft="@+id/imageButton"
        android:layout_alignStart="@+id/imageButton" />

    <Button
        android:layout_width="wrap_content"
        android:layout_height="wrap_content"
        android:text="通过Launch动作启动浏览器"
        android:id="@+id/button2"
        android:layout_below="@+id/button"
        android:layout_alignLeft="@+id/button"
        android:layout_alignStart="@+id/button"
        android:layout_alignRight="@+id/textView2"
        android:layout_alignEnd="@+id/textView2" />

    <Button
        android:layout_width="wrap_content"
        android:layout_height="wrap_content"
        android:text="异常情况"
        android:id="@+id/button3"
        android:layout_below="@+id/button2"
        android:layout_alignLeft="@+id/button2"
        android:layout_alignStart="@+id/button2"
        android:layout_alignRight="@+id/textView2"
        android:layout_alignEnd="@+id/textView2" />

</RelativeLayout>
The following is the content of the res/layout/custom_view.xml file:
<?xml version="1.0" encoding="utf-8"?>
<LinearLayout xmlns:android="http://schemas.android.com/apk/res/android"
   android:orientation="vertical"
   android:layout_width="fill_parent"
   android:layout_height="fill_parent">

   <TextView android:id="@+id/show_data"
      android:layout_width="fill_parent"
      android:layout_height="400dp"/>

</LinearLayout>
The following is the content of the res/values/strings.xml file:
<?xml version="1.0" encoding="utf-8"?>
<resources>
   <string name="app_name">My Application</string>
   <string name="action_settings">Settings</string>
</resources>
The following is the content of the AndroidManifest.xml file:
<?xml version="1.0" encoding="utf-8"?>
<manifest xmlns:android="http://schemas.android.com/apk/res/android"
    package="com.example.intentfilter"
    android:versionCode="1"
    android:versionName="1.0" >

    <uses-sdk
        android:minSdkVersion="8"
        android:targetSdkVersion="22" />

    <application
        android:allowBackup="true"
        android:icon="@drawable/ic_launcher"
        android:label="@string/app_name"
        android:theme="@style/Base.Theme.AppCompat" >

        <activity
            android:name="com.example.intentfilter.MainActivity"
            android:label="@string/app_name" >

            <intent-filter>
                <action android:name="android.intent.action.MAIN" />
                <category android:name="android.intent.category.LAUNCHER" />
            </intent-filter>

        </activity>

        <activity android:name="com.example.intentfilter.CustomActivity"
            android:label="@string/app_name">

        <intent-filter>
            <action android:name="android.intent.action.VIEW" />
            <action android:name="com.example.intentfilter.LAUNCH" />
            <category android:name="android.intent.category.DEFAULT" />
            <data android:scheme="http" />
        </intent-filter>

        </activity>

    </application>
</manifest>
Let's run the just-modified Intent filter application. I assume you have created the AVD when setting up the environment. Open the activity file in your project, and click theicon in the toolbar to run the application in Android Studio. Android Studio installs the application on the AVD and launches it. If everything goes well, the following will be displayed on the emulator window:
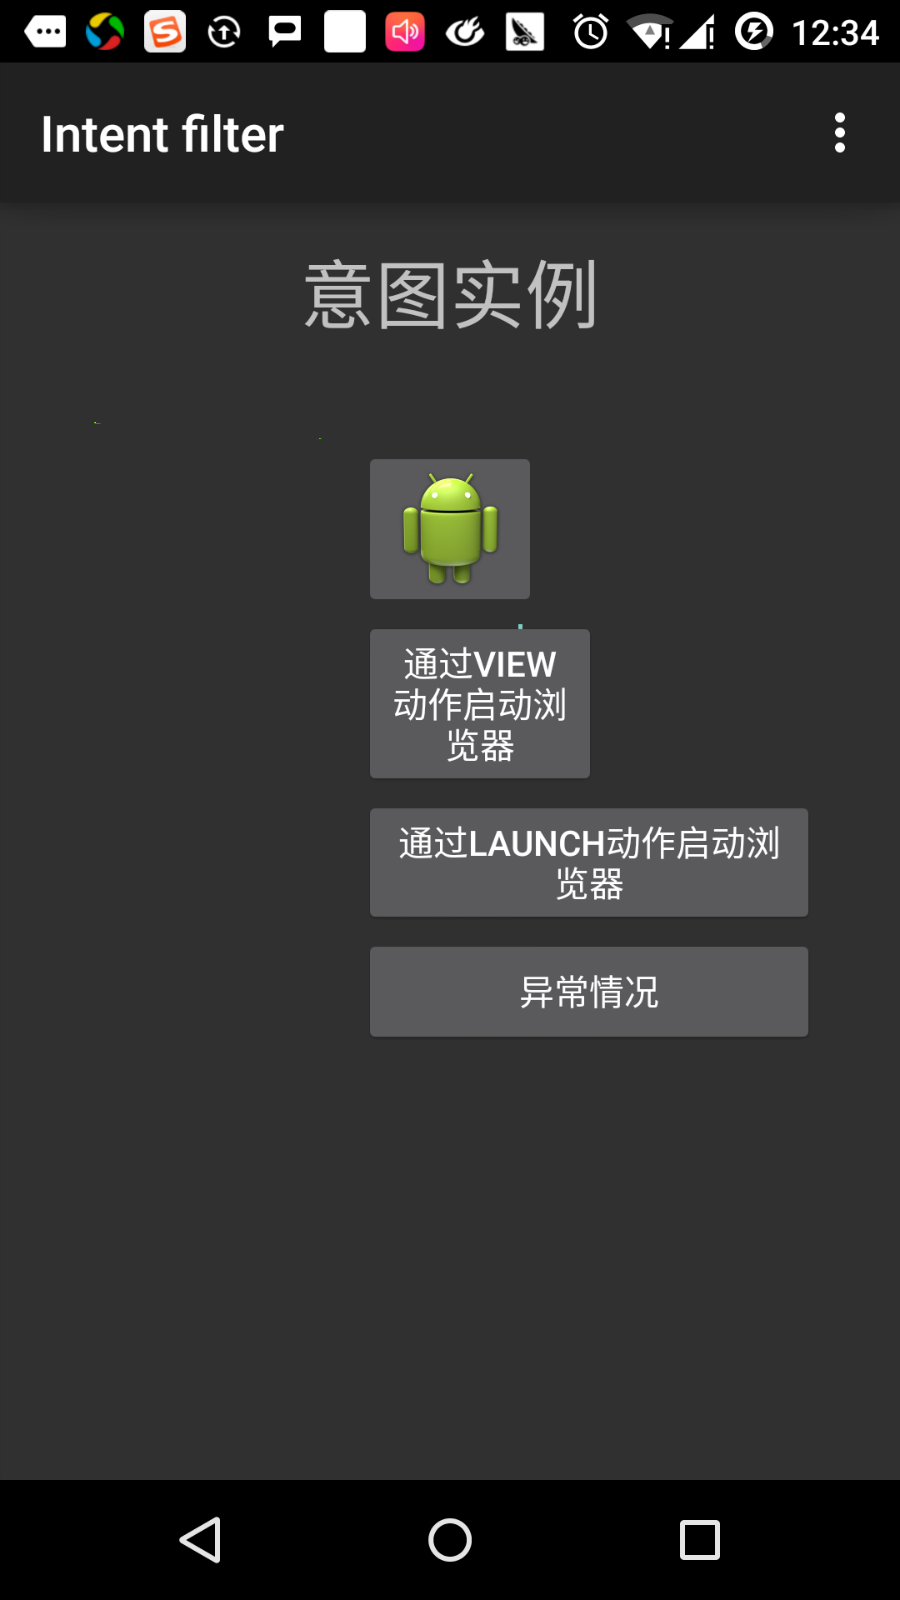
Click the first button "Launch browser with View action". Here we define our custom activity to contain "android.intent.action.VIEW", and the Android system has already defined a default activity corresponding to the VIEW action to launch the web browser, so Android displays the following options for you to choose the activity you want to launch:
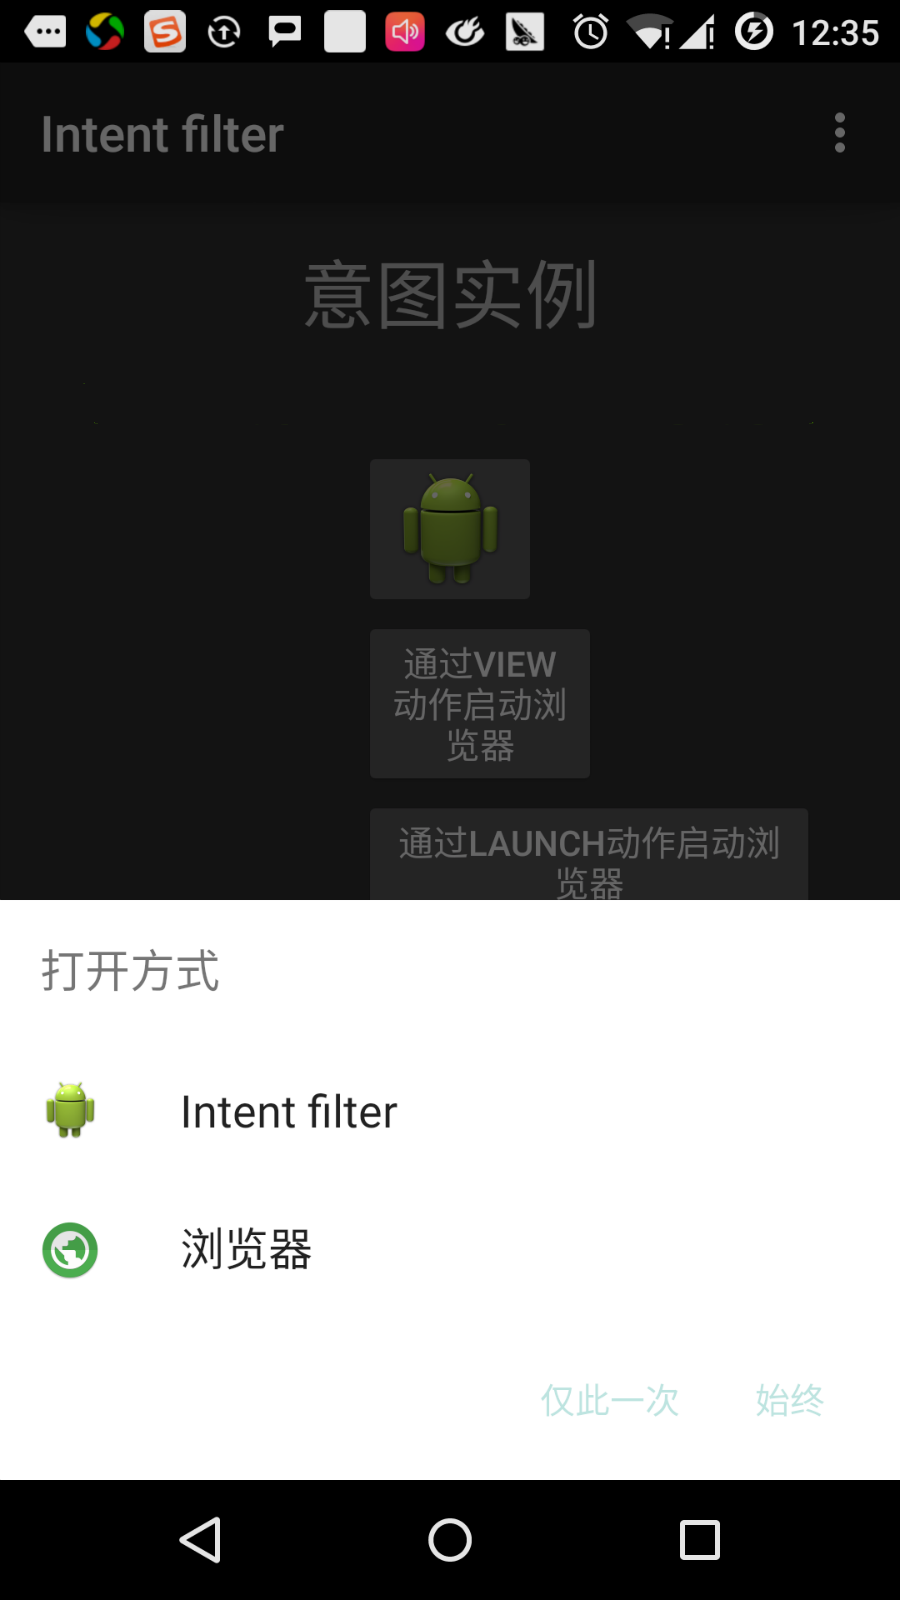
If you choose the browser, Android will launch the web browser and open the website www.example.com. If you choose the IntentDemo option, Android will launch CustomActivity, which does nothing but capture and display the passed data in a TextView.
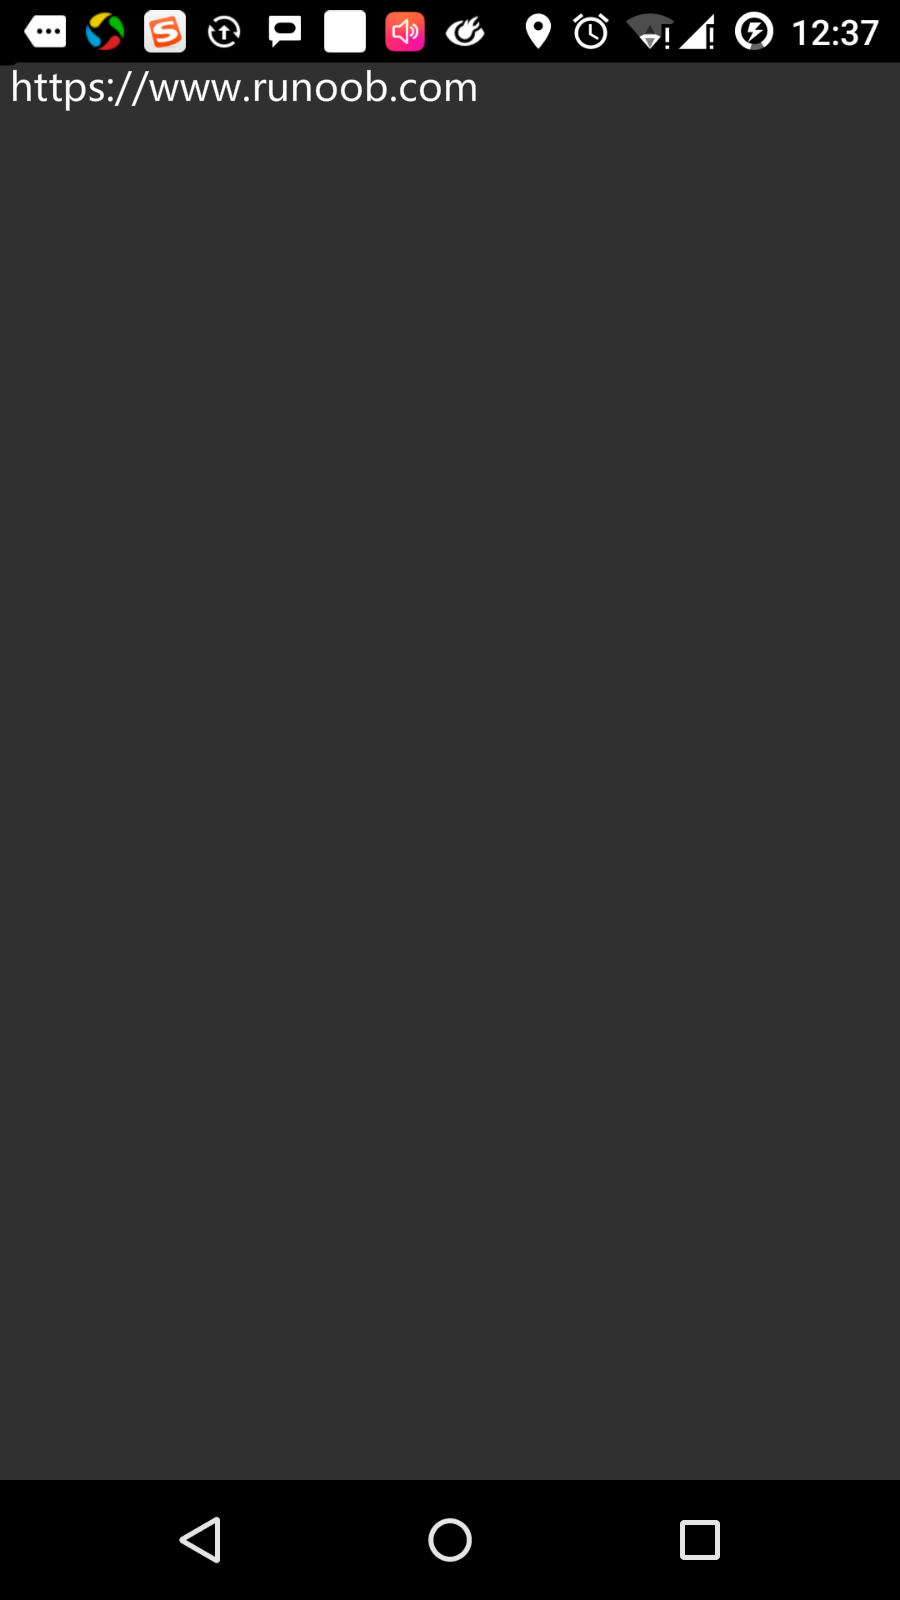
Now, return using the back button and click the "Launch browser with Launch action" button. Here Android applies the filter to choose the defined activity and simply launches the custom activity.
Again use the back button to return, and click the "Exception condition" button. Here Android tries to find a valid filter given by the intent, but does not find a defined valid activity. Because we use https instead of http as the data, and gave the correct action, Android generated an exception. As follows: