Angular 2 TypeScript Environment Setup
This chapter uses TypeScript to create Angular applications, which is also the official recommendation. The examples in this tutorial are also written in TypeScript.
TypeScript is a free and open-source programming language developed by Microsoft. It is a superset of JavaScript and extends JavaScript's syntax.
If you don't know TypeScript, you can refer to the following resources:
Before you start, you need to make sure you have npm installed. If you haven't installed npm or don't understand npm, you can check out our tutorial:Introduction to NPM Usage。
Since the official npm registry is too slow to access in China, here I used Taobao's npm mirror. The installation method is as follows:
$ npm install -g cnpm --registry=https://registry.npmmirror.com
After execution, we can use the cnpm command to install modules:
$ cnpm install
Step 1: Create and Configure the Project
Create a Directory
$ mkdir angular-quickstart
$ cd angular-quickstart
Create Configuration Files
An Angular project requires the following configuration files:
- package.jsonSpecifies the npm dependency packages required by this project.
- tsconfig.jsonDefines how the TypeScript compiler generates JavaScript code from the project's source files.
- typings.jsonProvides additional definition files for libraries that the TypeScript compiler cannot recognize.
- systemjs.config.jsProvides the module loader with information about where to find application modules, and registers all required dependency packages. It also includes packages needed for later examples in this document.
Create the following files in angular-quickstart, as shown in the code below:
package.json file:
tsconfig.json file:
typings.json file:
systemjs.config.js file:
Next, we use the cnpm command to install the dependency packages:
$ cnpm install
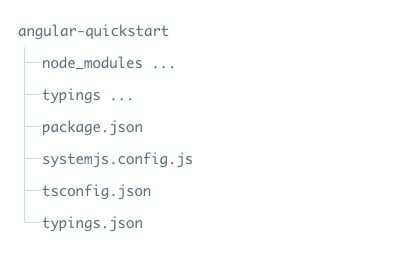
After successful execution, a node_modules directory will be generated in the angular-quickstart directory, which contains the modules needed for this example. We can take a look at the project directory structure:
Step 2: Create the Application
We use NgModules to organize Angular applications into feature-related functional code blocks.
Angular itself is split into separate Angular modules, so in our application we only need to import the parts of Angular we need.
Every Angular application needs at least oneroot module, which in the example is AppModule.
Next, we create an app directory under the angular-quickstart directory:
$ mkdir app
$ cd app
Then create the app.module.ts file in the app directory, as shown in the code below:
app.module.ts file:
Since QuickStart is a web application running in the browser, the root module needs to import BrowserModule from @angular/platform-browser and add it to the imports array.
Create a Component and Add It to the Application
Every Angular application has at least oneroot component, in the example it is AppComponent. The app.component.ts file code is as follows:
app.component.ts file:
Code explanation:
The above code fromangular2/coreimports theComponentpackage.
@Componentis Angular 2'sdecorator, it associates metadata with the AppComponent component class.
my-appis a CSS selector that can be used in HTML tags as a component.
@viewcontains atemplate, telling Angular how to render the component's view.
exportspecifies that the component can be used outside the file.
Next, we reopen the app.module.ts file, import the new AppComponent, and add it to the declarations and bootstrap fields of the NgModule decorator:
app.module.ts file:
Step 4: Start the Application
Next, we need to tell Angular how to start the application.
Create a main.ts file in the angular-quickstart/app directory, with the following code:
main.ts file:
The above code initializes the platform to allow your code to run, then starts your AppModule on that platform.
Define the Host Page for the Application
Create an index.html file in the angular-quickstart directory, with the following code:
index.html file:
Points worth noting here are:
JavaScript libraries:core-jsis a polyfill library for older browsers,zone.jsandreflect-metadatalibrary is required by Angular, while the SystemJS library is used for module loading.
The SystemJS configuration file and script can import and run the app module that we just wrote in the main file.
The <my-app> tag is where the application is loaded.
Add Some Styles
We can set the styles we need in the styles.css file in the angular-quickstart directory:
styles.css file:
Step 6: Compile and Run the Application
Open a terminal window and enter the following command:
npm start
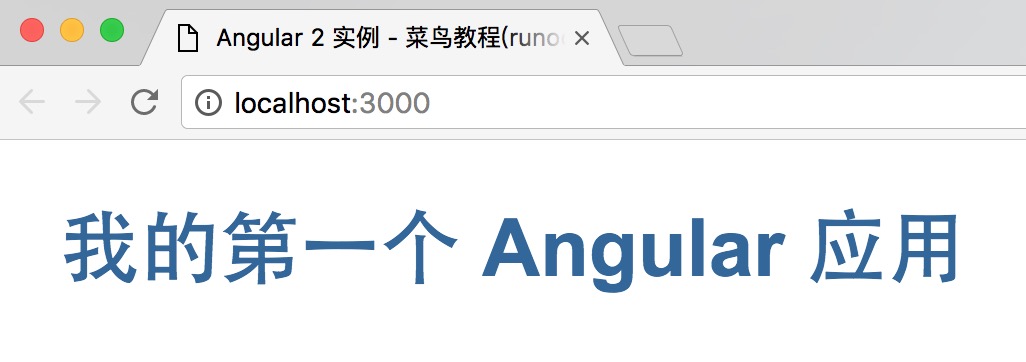
Visit http://localhost:3000/, and the browser displays the following result:
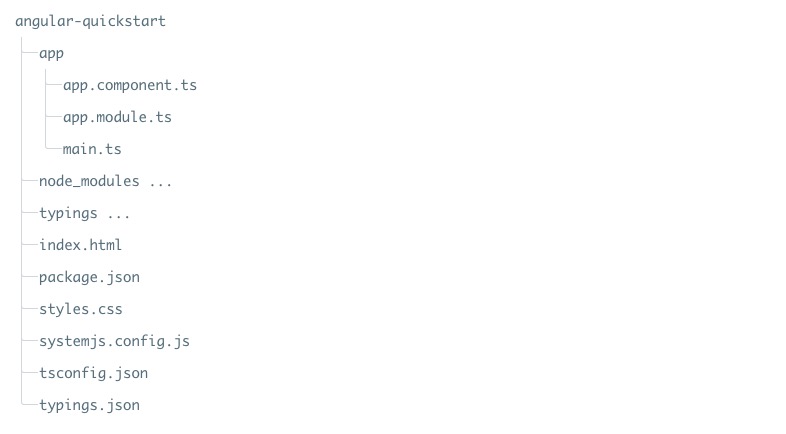
At this point, our first Angular 2 application is created. The final directory structure is:
The source code used in this article can be downloaded via the following method, and does not include the node_modules and typings directories.
Source code download
Other extensions