Angular 2 Forms
In this chapter, we will introduce how to build an Angular form using components and templates.
Using Angular templates, we can create various types of forms, such as login forms, contact forms, product detail forms, etc., and we can also add data validation to the fields of these forms.
Next, we will implement the form functionality step by step.
Create Project
Import the initial project.
For complete project creation, refer to:Angular 2 TypeScript Environment Setup
Or download the source code directly:Click Me to Download
After extracting, rename the directory to angular-forms, and modify the following in the angular-forms/package.json file:"name": "angular-quickstart"is"name": "angular-forms"。
When done, we runcnpm installto load the dependency packages.
Create Site Model
The following creates a simple model class Site, containing three required fields: id, name, url, and one optional field: alexa.
Create the site.ts file in the angular-forms/app directory, with the following code:
app/site.ts file:
In the following code, fields marked as public are public fields, and a question mark (?) added after alexa indicates an optional field.
Create a Form Component
Each Angular form consists of two parts: an HTML-based template and a code-based component, which handles data and user interaction.
Create the site-form.component.ts file in the angular-forms/app directory, with the following code:
app/site-form.component.ts file:
In the example, the Component decorator and Site model are imported.
The @Component selector "site-form" means we can use a<site-form>tag to drop this form into the parent template.
The templateUrl property points to a standalone HTML template file named site-form.component.html.
The diagnostic property is used to return the JSON form of this model.
Define the App Root Module
Modify app.module.ts to define the app's root module, which specifies the external references and declares components that belong to this module, such as SiteFormComponent.
Because template-driven forms have their own module, we need to add FormsModule to the application's imports array so that we can use forms.
The code for the app/app.module.ts file is as follows:
app/app.module.ts file:
Create Root Component
Modify the root component file app.component.ts to place SiteFormComponent in it.
app/app.component.ts file:
Create an Initial HTML Form Template
Create the template file site-form.component.html, with the code as shown below:
app/site-form.component.html file:
The required attribute makes the field required; if not set, it is optional.
Enter the following command in the angular-forms directory:
cnpm install bootstrap --save
Open the index.html file and add the following style links to the <head>:
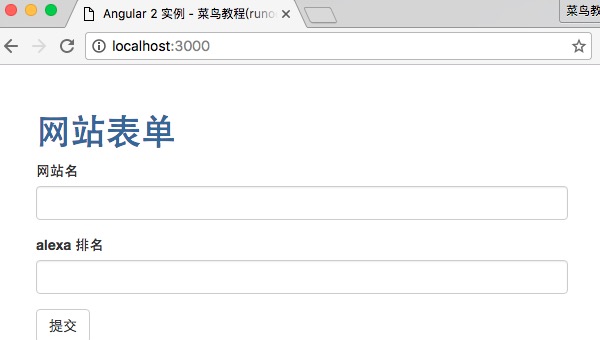
Executenpm startThen visit: http://localhost:3000/, the output is as follows:
Use ngModel for Two-Way Data Binding
Next, we use ngModel for two-way data binding, and update the component's properties by listening to DOM events.
Modify app/site-form.component.html to bind our form to the model using ngModel. The code is shown below:
app/site-form.component.html file:
-
Each input element has an id attribute, which is used by the label element's for attribute to match the label to the corresponding input.
-
Each input element has a name attribute, which Angular's forms module needs in order to register the control for the form.
Run the above example; the output result is as follows:
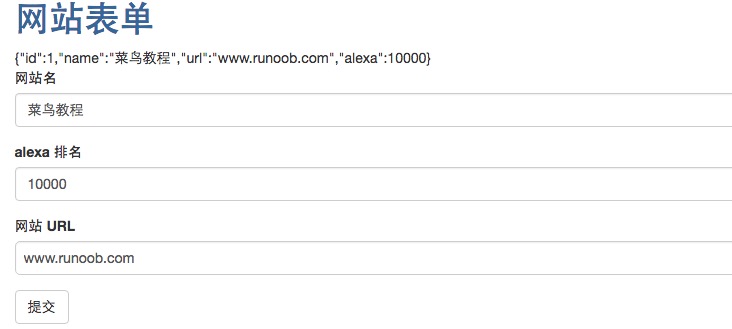
{{diagnostic}} It is only used to output data during testing.
We can also use ngModel to track modification state and validity validation. It uses three CSS classes to update the controls in order to reflect the current state.
| State | Class when true | Class when false |
|---|---|---|
| The control has been visited |
ng-touched
|
ng-untouched
|
| The control value has changed |
ng-dirty
|
ng-pristine
|
| The control value is valid |
ng-valid
|
ng-invalid
|
In this way, we can add custom CSS to reflect the state of the form.
Create the forms.css file in the angular-forms directory. The code is as follows:
forms.css file:
Open the index.html file and add the following style links to the <head>:
Modify app/site-form.component.html. The code is shown below:
app/site-form.component.html file:
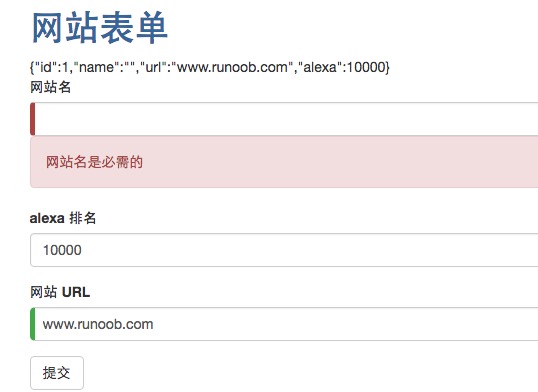
In the template, by binding the hidden attribute of the div element to the properties of the name control, we can control the visibility of the error message for the "name" field.
Delete the data in the name field, and the displayed result is as follows:
Add a Website
Next, we create a form for adding a website. Add a button in app/site-form.component.html:
app/site-form.component.html file:
Bind the above button event to a component method:
app/site-form.component.ts file:
We add an active flag to the component and initialize it to true. When we add a new website, it sets the active flag to false, then quickly sets it back to true via a fast setTimeout function.
Submit Form via ngSubmit
We can use Angular's NgSubmit directive to submit the form, and bind it to the SiteFormComponent.submit() method through the event binding mechanism.
We defined a template reference variable #siteForm and initialized it to "ngForm".
This siteForm variable now references the NgForm directive, which represents the form as a whole.
The complete code of the site-form.component.ts file is as follows:
app/site-form.component.ts file:
app/site-form.component.html complete code is as follows:
app/site-form.component.html file:
In the template, we bind the hidden attribute to the SiteFormComponent.submitted property.
The main form is visible from the start because the submitted property is false. When we submit the form, it hides, and the submitted property is true:
The final directory structure is:
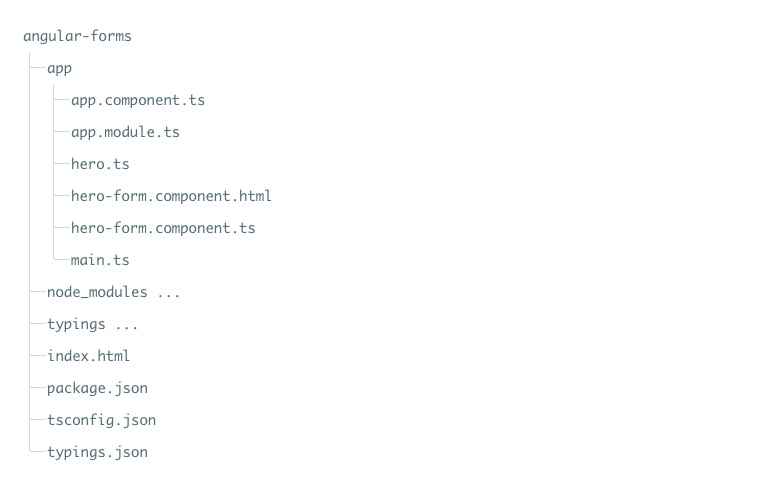
The source code used in this article can be downloaded as follows, excluding the node_modules and typings directories.
Source Code Download
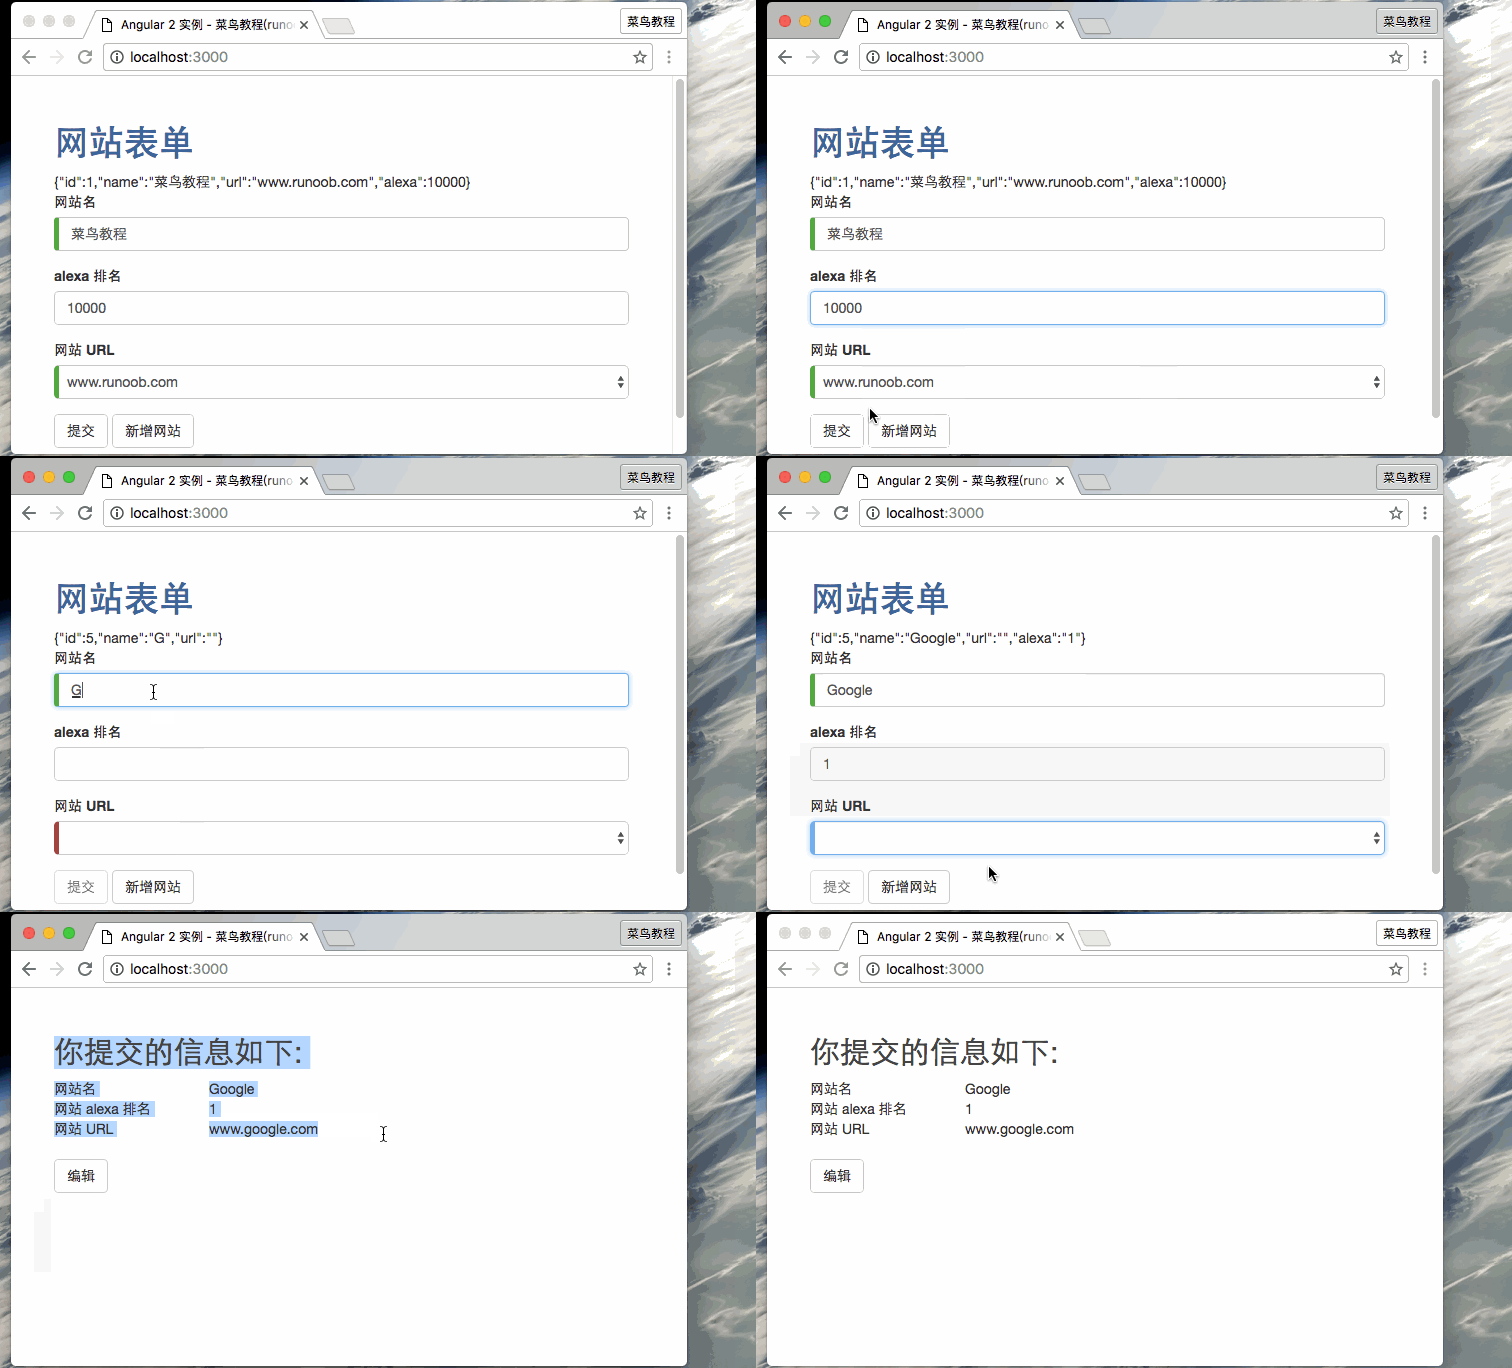
Complete example demo GIF is as follows: