QoderWake Getting Started Tutorial
QoderWake lets you build a team of digital employees (Wakers) on your local machine. Each employee has a role, a name, a persona, and expertise. You can summon them to chat or work, and they can also start automatically based on schedules or events.
Core Product Concept: 7x24 Digital Employees"Always awake, always working."

QoderWake is a digital employee management platform that supports both local and cloud deployment.
Core Features: Secure and Controllable, Production-Ready, Continuously Evolving.
-
Core Concepts: Three levels of progression from Role to Agent to Agent Teams/Organizations.
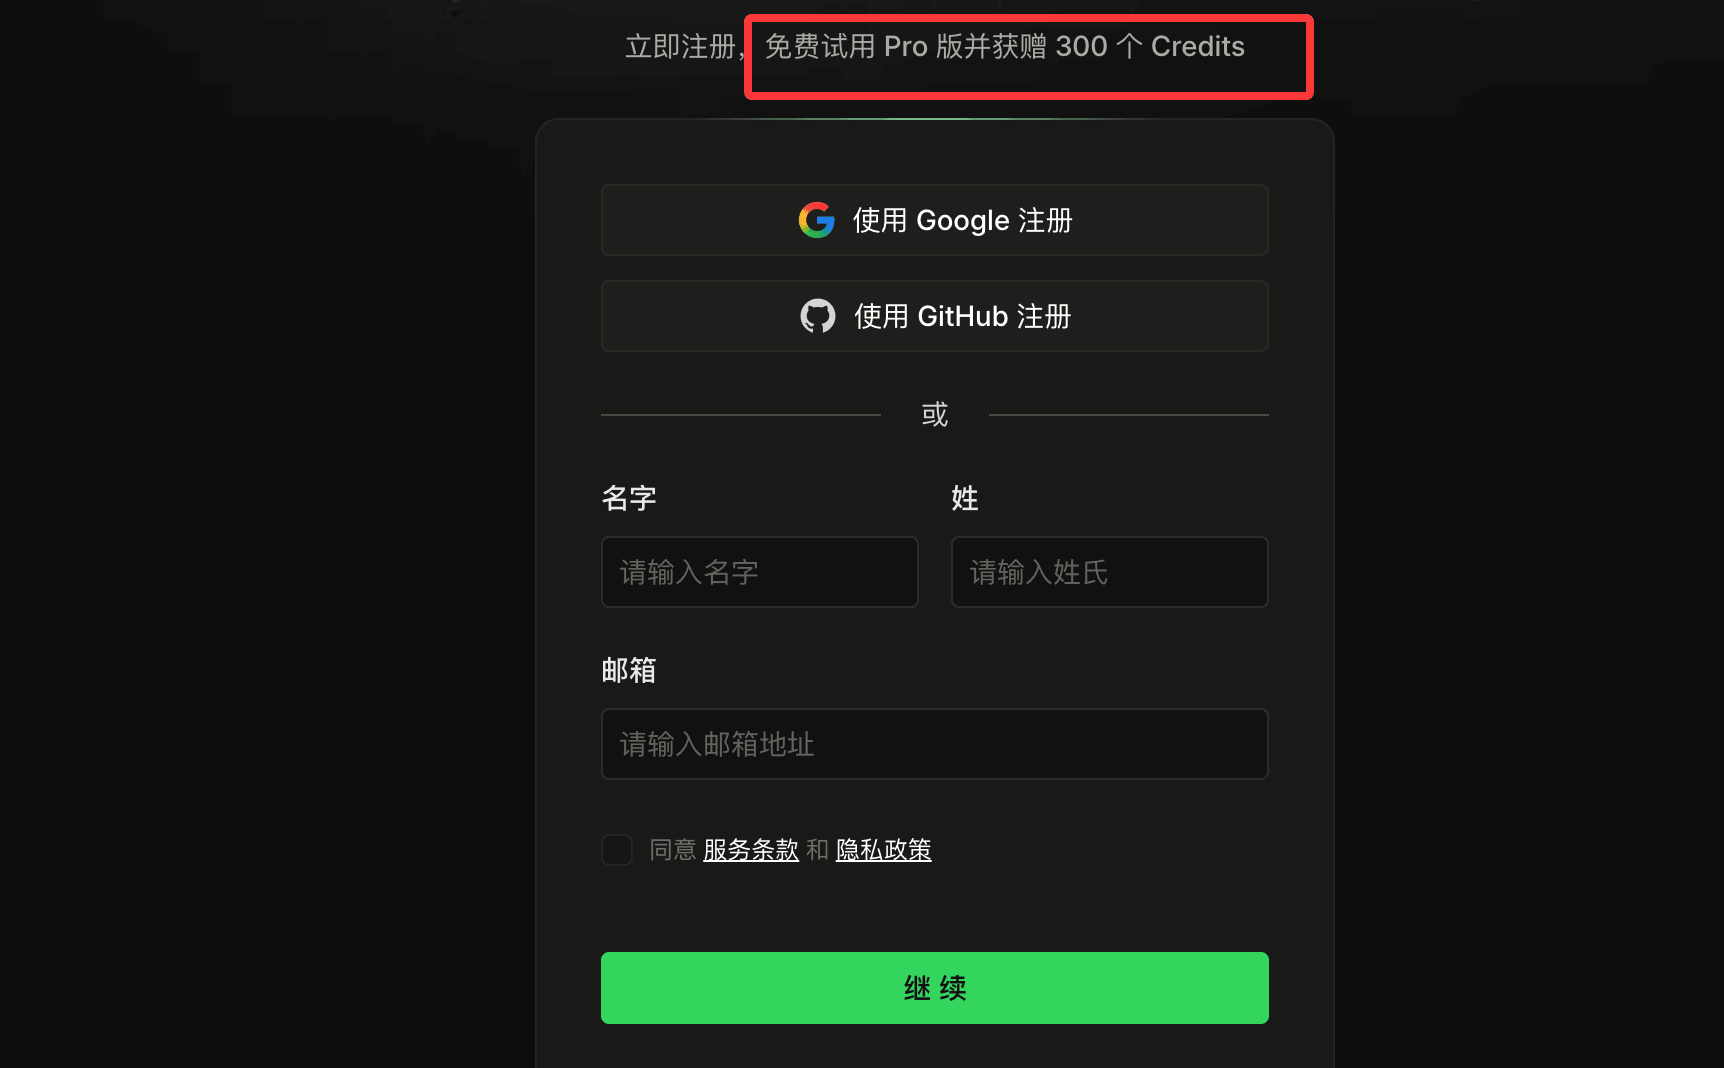
After registration, click the top-rightDownloadbutton:

SelectQoderWakethe option, and download the installer based on your computer system:
After downloading, double-click to install. The installation completion screen is as follows:

The settings button in the lower-left corner allows you to set the language. After switching to Chinese, it looks like this:

List of Available Roles
The current invited beta covers the following roles; choose the one that best fits your needs:
| Role | Role Characteristics |
|---|---|
| Backend Engineer | Focused on API development, data modeling, service integration, performance optimization, and online stability. Follows engineering practices of incremental delivery, test verification, and contract-first design. Automatically analyzes bugs/issues and directly submits PRs after fixing code. |
| Frontend Engineer | Focused on frontend interface design and implementation, skilled in component architecture, visual language polishing, responsive adaptation, accessibility optimization, and performance tuning. Follows incremental delivery, layered verification, and evidence-based validation, balancing user experience and engineering quality. |
| Test Engineer | A quality assurance role for general command-line tools and web products, focused on test plan documentation, end-to-end testing, defect reproduction, and evidence-based reporting; does not run unit tests or fix issues. |
| Product Manager | An AI-native product management role for software products, focused on goal-driven full-lifecycle requirement management, PRD generation, user feedback analysis, competitive research, and release communication, with clear approval gates for external writes. |
| Data Analyst | An AI-native data analyst focused on problem framing, metric definitions, data collection, data diagnosis, market context, and evidence-based recommendations. |
| Content Operations | An AI-native content operations role focused on account positioning, trend insights, content calendars, Xiaohongshu (RED) note creation, visual asset briefs, post-approval publishing, comment interaction, data review, brand compliance, and cross-platform rewriting. |
| Custom | Define your own role's working methods and workflows; you can attach any configuration such as MCP, Skill, etc. |
Installation Environment Instructions
QoderWake supports local deployment and cloud deployment.
It is recommended to deploy on an always-on device or cloud desktop environment with stable internet and good network conditions to ensure digital employees run continuously 24/7.
Windows version is coming soon and is not yet available to the public. Please use it on macOS or Linux for now.
Local Deployment Requirements
It is recommended to deploy on a local device that can run stably for a long time, such as a Mac mini, for a better 24/7 running experience.
| System | Version Requirements |
|---|---|
| macOS | 13.0 and above |
| Linux | Recommended Ubuntu 22.04 LTS or above, with a GUI desktop enabled to use the local Web Console |
Cloud Deployment Requirements
Supports mainstream cloud desktops and cloud hosts.
For convenient browser login and local web management, it is recommended to use WuYing Cloud Computer Enterprise Edition or Personal Edition.
Prerequisite Tools
The product comes with multiple pre-configured digital employee roles for software development. Before installation, please prepare a Git environment and confirm that the current account can access the target code repository normally:
- Installedgit
- Repository authentication configuration completed
- Can be executed normallyclone、pull、pushOperation
Both local and cloud deployment environments must support external network access for user login, model invocation, code repository access, etc.
In corporate network, proxy, or firewall environments, please allow necessary HTTPS outbound access in advance.
Step 1: Install QoderWake
Choose the corresponding installation method based on your operating system.
macOS Installation
Method 1: Directly download the installation package.
- Apple Silicon (ARM):Download ARM version
- Intel chip:Download Intel version
Method 2: One-click installation via terminal.
# 一键安装命令,自动检测平台并完成安装
curl -fsSL https://qoder-ide.oss-ap-southeast-1.aliyuncs.com/qoderwake/install.sh | bash
The script will automatically: detect the platform, download and verify the installation package, install the main program and resource files, add the command entry to PATH, launch the browser for login, start the local resident service, and open the Web Console.
After installation, the command entry is:
~/.qoderwake/bin/qoderwake
Linux Installation
Open a terminal and run the same one-click installation command as on macOS.
The installation script will automatically complete the following steps:
- Detect the Linux CPU architecture
- Download and verify the QoderWake installation package for the corresponding platform
- Install the QoderWake main program and resource files
- Create a command entry and attempt to add it to PATH
- Launch the browser for login
- After login, start or restart the local resident service
- Automatically open the local Web Console
Command entry:
~/.qoderwake/bin/qoderwake
Default Web Console address:
http://127.0.0.1:19820
Step 2: Open the Console
Access via browserhttp://127.0.0.1:19820/This is the QoderWake management console on your local machine.
Employee management, task assignment, and permission configuration are all completed here.
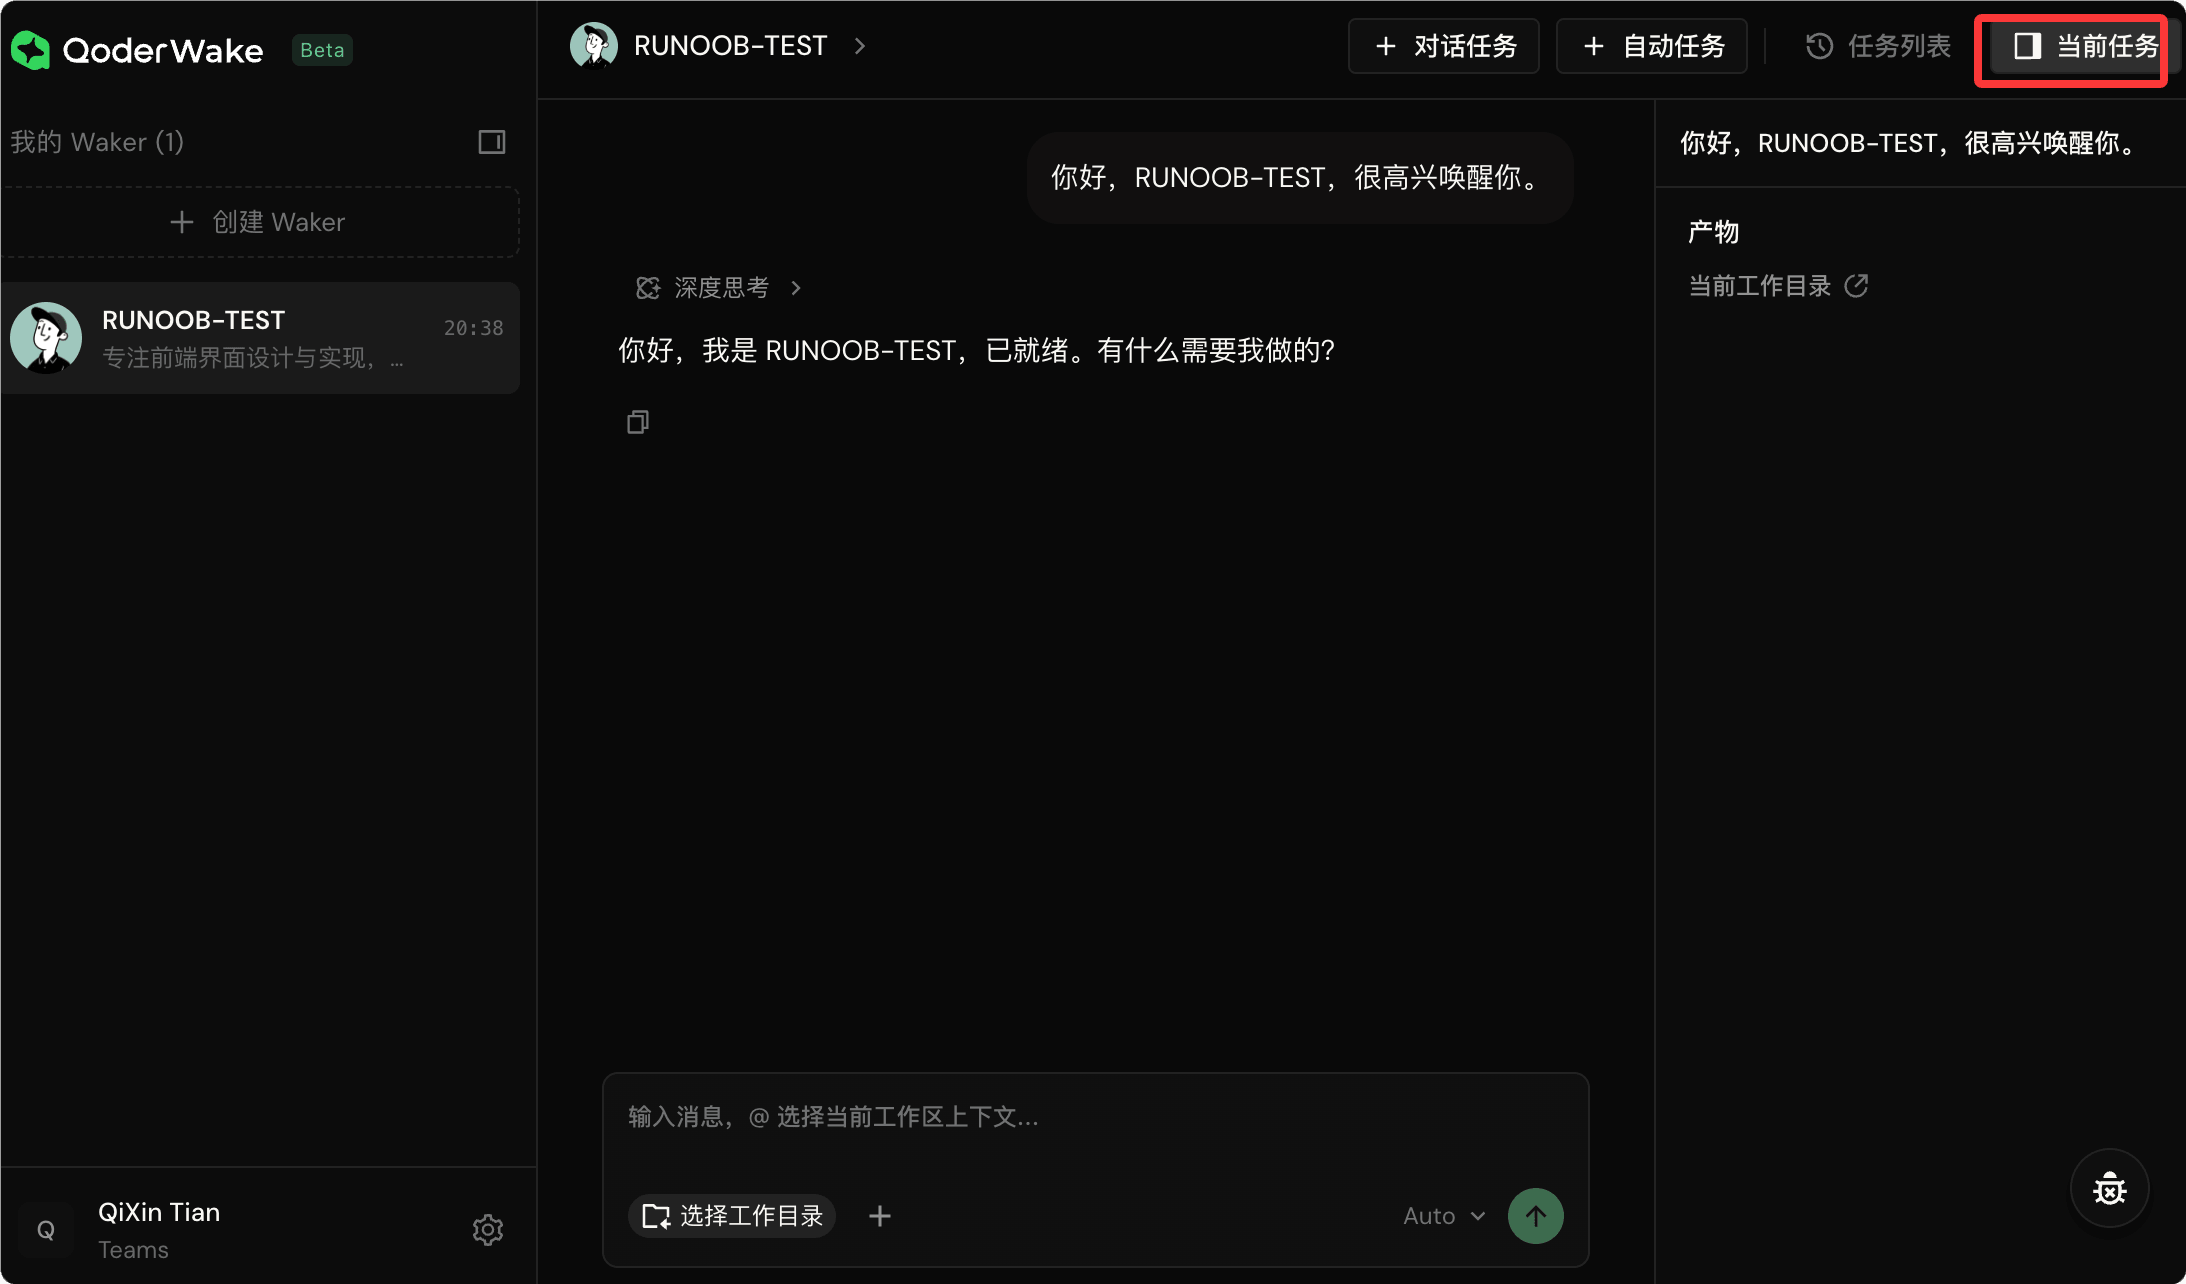
Interface Layout Description
| Area | Function Description |
|---|---|
| Left sidebar | Displays the "My Wakers" list, showing all created employees and their most recent activity time |
| Top buttons | Click "Create Waker" to quickly create an employee; the right side supports creating new tasks |
| Main area | After entering an employee, the chat page opens by default, and you can assign tasks directly. |
| Right sidebar | View details of created tasks and currently running tasks |
On first visit, you'll be guided to log in to your account — just follow the prompts.
Step 3: Create a Digital Employee
Click the"Create Waker"button on the left to enter the creation flow.

Creation Process
- Select a role template:Each role template comes with a built-in persona, typical workflow, core skill set, and default questions. Click "View Details" to preview.
- Or customize a role:If none of the preset roles fit, you can choose "Custom Role" and fully define this employee's persona, expertise, and work style, then configure skills, connectors, and permissions for them.
- Fill in basic information:Fill in the employee's name, avatar, and bio. If you selected a preset role, the content will be filled in automatically and can be adjusted as needed.
- Save:Click Save and the employee is created. A newly created employee will enter guided setup on first creation, recommending which skills to attach and which channels to connect first. You can skip this and configure it later.
To get better results from a custom role, it's recommended to provide complete role information during creation — role positioning, core responsibilities, workflow, required skills, and tool capability configurations such as MCP.
Step 4: Start Working with Your Employee
After a new employee is created, you can choose betweenDirect chatorCreate automated tasksas two ways to assign work.
Conversation Tasks
Simply type your request in the input box and send it, and the employee starts working.

Operations you can perform during the process:
| Operation | Description |
|---|---|
| Follow up, adjust direction | Interject at any time, and the employee continues with the context |
| Attach files/screenshots | You can attach files in any round of the conversation |
| Interrupt | If the employee goes off track, you can make them stop |
| Approval operations | When the employee needs to touch files, run commands, or go online, they will pause to ask for consent — you click "Allow" or "Deny" |
| Answer employee questions | When they encounter a choice, they'll come back to ask you; select directly on the card |
| Switch AI model | If you feel mid-conversation that it's not smart enough or want to save money, use the dropdown at the top to switch models and continue |
| View thinking process | See the employee's reasoning in real time before they make decisions |
| View outputs | The right panel displays the employee's outputs in real time, such as code patches and newly generated files |
| Select working directory | At the bottom of the conversation, you can select the local directory where the employee works |
Automated Tasks
Suitable for scenarios like "run once a day" or "automatically respond when a repository changes."
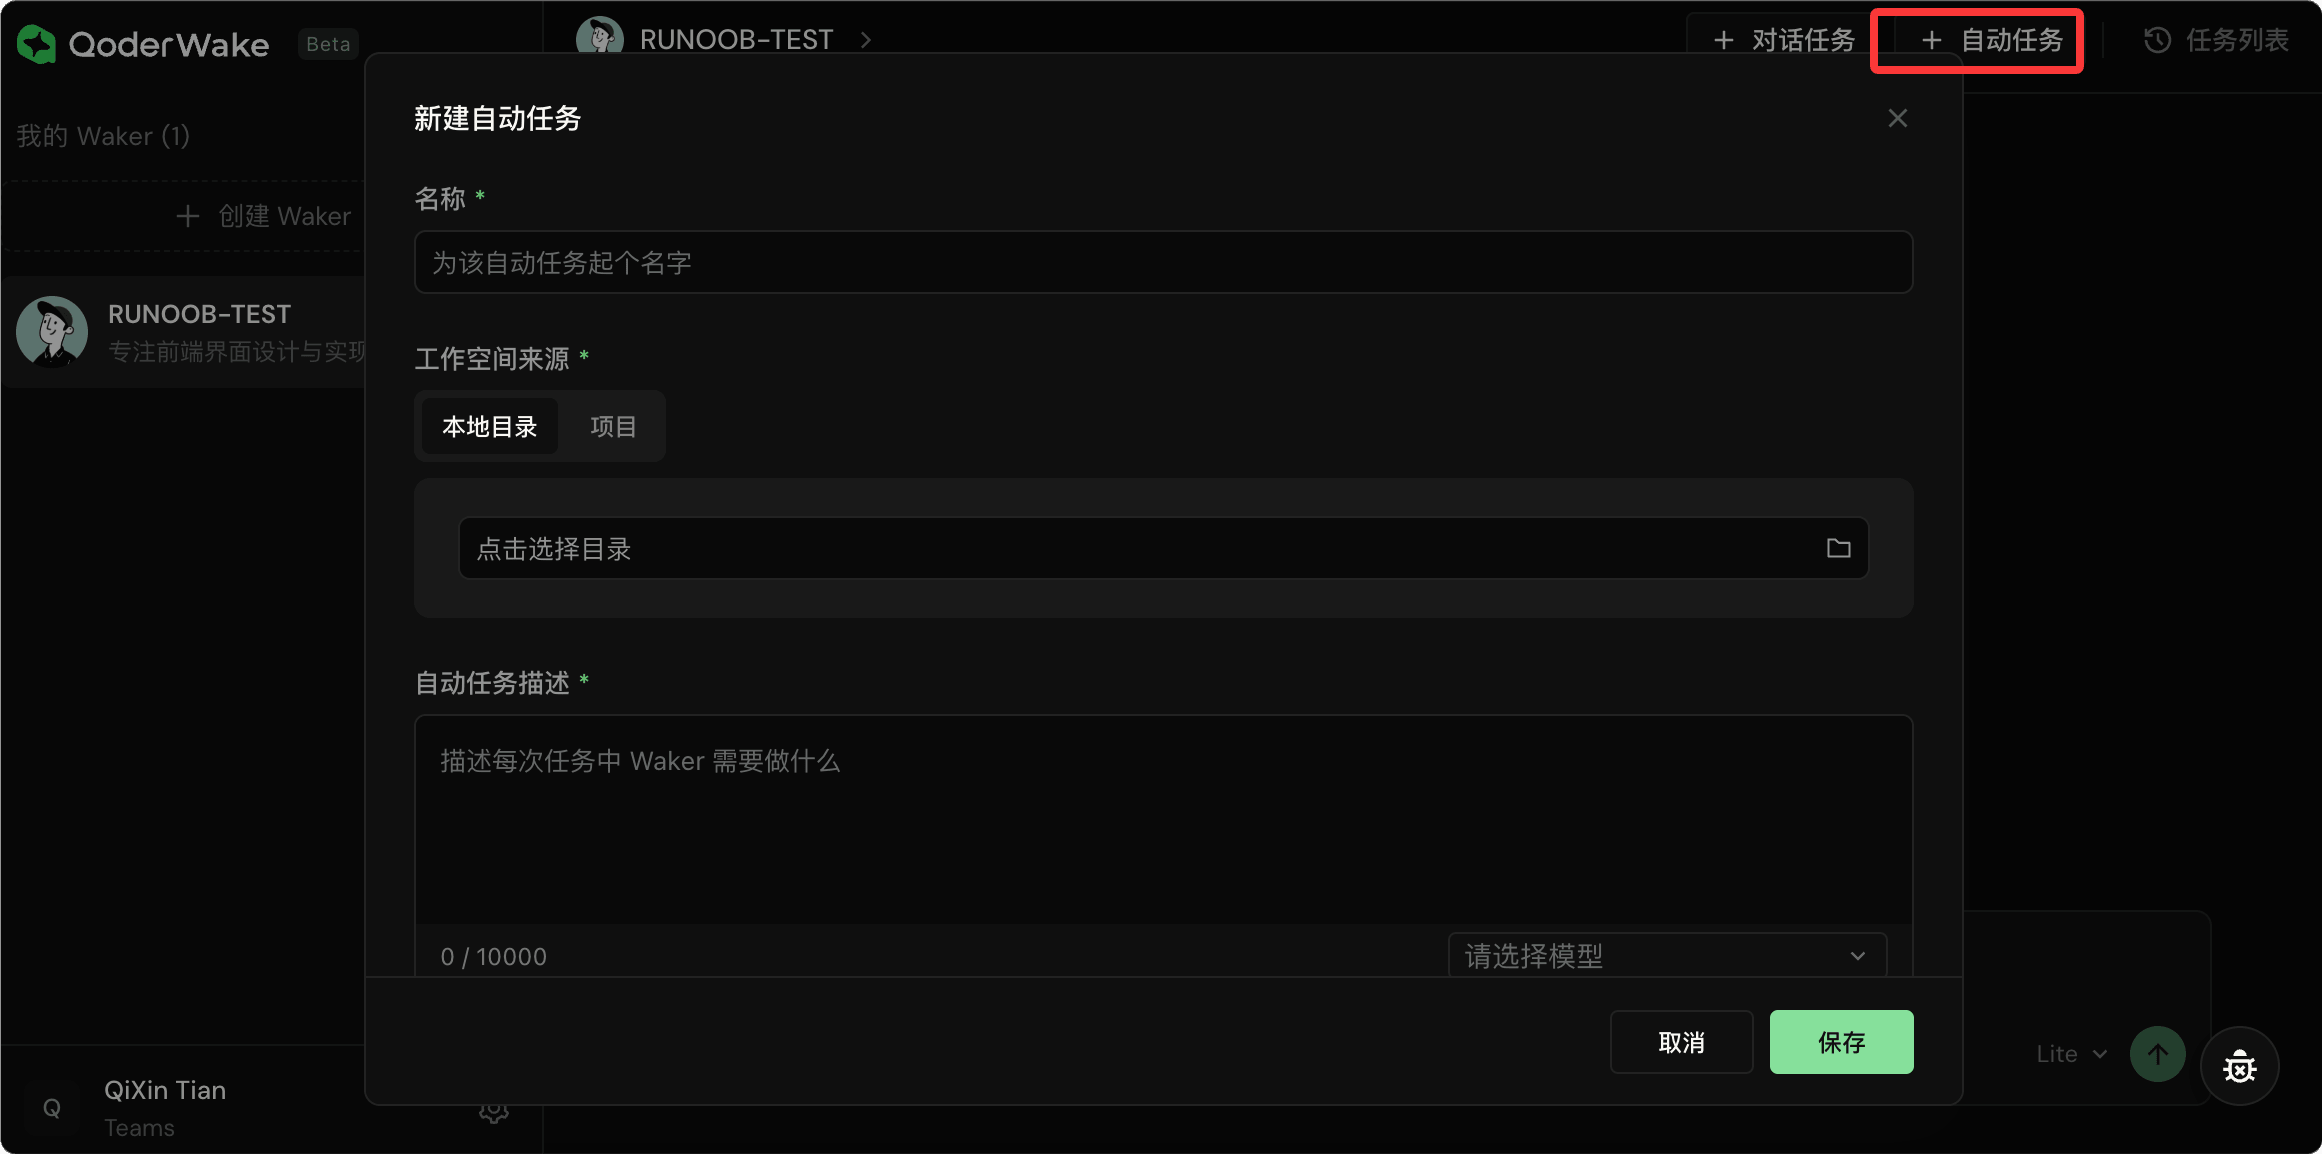
Go toWaker Details - Trigger Tasks - Create, where you can configure the following:
| Configuration Item | Description |
|---|---|
| Task Name and Description | Employees know what to do just by reading it |
| AI Model | Select the model to use |
| Working Directory | Which local directory, repository, or project workspace to run in |
| Trigger Method (up to 5 types) | Scheduled (one-time / recurring / complex schedule), event-driven (listen to GitHub repository changes), webhook (third-party systems trigger directly by calling a fixed address) |
| Maximum Count / Deadline (optional) | Limit tasks so they don't run indefinitely |
After saving, the employee automatically works according to the schedule you set.
You can pause/enable, run a test immediately, and view run history at any time.
Step 5: Manage Your Digital Employees
Go to the employee details page to view and adjust all configurations of the employee.
| Section | Function Description |
|---|---|
| Home | View avatar, status, days since onboarding, number of trigger tasks, number of conversation tasks, and work heatmap |
| Projects | Bind the code repository or local directory where the employee works. A project can contain multiple sources (multiple directories or repositories). Project memory is separate from the employee's personal memory. |
| Trigger Tasks | Add/delete/modify/pause automated tasks on the employee |
| Conversation Tasks | Browse historical conversations and continue chatting |
| Memory | View/edit the employee's long-term knowledge about you and projects. Sources: automatically accumulated during conversations, manually edited, periodically organized and deduplicated by the system. Stored locally, not uploaded to the cloud. |
| Skills | Install from Qoder's official Skills Marketplace, upload custom skills locally, or toggle existing skills. Built-in skills cannot be uninstalled. |
| Connectors | Integrate external tools/services (GitHub, Jira, GitLab, etc.) |
| Permissions | Tool protection, file protection, built-in tool policies. High-risk operations will pop up an approval card. |
Detailed Employee Configuration
Memory Management
Each employee has their own long-term memory, used to accumulate knowledge about you and projects.
There are three memory sources:
| Source | Description |
|---|---|
| Automatic Accumulation | Information that the employee deems worth remembering during conversations is automatically written |
| Manual Writing | You can go to the memory page and edit directly. |
| System organization | Periodically, the system organizes and deduplicates them. |
EnterEmployee Details - MemoryYou can browse, search, and edit all memory entries.
Memory is stored locally and not uploaded to the cloud.
Skills
Skills are specialized capability packages that employees can invoke in conversations or when triggering tasks.
- Skill Marketplace:Install from the Qoder official Skills Marketplace
- Upload Skill:Import locally by yourself
- Built-in Skills:Built into the system, cannot be uninstalled.
EnterEmployee Details - SkillsYou can view installed skills, search the marketplace, and upload custom skills.
Connectors
Connectors are bridges for employees to connect to external tools/services, and support manual addition of connectors.
Projects
Projects are employees' workspaces.
EnterEmployee Details - ProjectYou can bind local directories or git repositories. A project can contain multiple sources (multiple directories/repositories). Projects have independent memory, separate from the employee's personal memory.
Permission Management
Permissions control what employees can and cannot do.
EnterEmployee Details - PermissionsIt includes two major categories of protection, plus built-in tool policies.
Tool Protection
Validates tool parameters based on built-in security rules, and requests user authorization when high-risk rules are hit.
| Rule Category | Detection Content |
|---|---|
| Command Injection | Detects dangerous operations such as rm, mv |
| Resource Abuse | Detects fork bombs, system reboots, etc. |
| Code Execution | Detects remote execution such as curl | bash |
| Network Abuse | Detects reverse shells and local loopback access |
| Sensitive File Access | Detects access to critical system files |
| Privilege Escalation | Detects privilege escalation operations such as sudo |
File Protection
Controls employees' read and write permissions to local files.
Built-in Tools
Settings for built-in tools available to WakerAllow/Ask/DisablePolicy.
When an employee's operation triggers a security rule, an approval card will pop up for you to decide whether to allow it.
Example Scenario: Automatically Fixing Bugs
Two driving modes can achieve automatic bug fixing.
Method A: Manually Initiate a Conversation
- Open the console and select aBackend EngineerWaker with the role
- Enter your requirements in the dialog box and attach the error information
- The employee analyzes the problem, locates the root cause, and provides a fix plan
- After confirmation, have them execute the fix and submit a PR
Example
# "Help me investigate the root cause of this error and provide a minimal fix plan"
# The employee will perform operations similar to the following:
# 1. Analyze the error log and locate the problematic code
# 2. Provide a fix plan for your confirmation
# 3. Execute the code fix
# 4. Submit a PR to the code repository
When he needs to execute commands or modify files during the process, he will ask for your consent first.
Method B: Set Up Automated Task Processing
- Go toEmployee Details - Triggered Tasks - New
- Select the trigger method as"Event", and listen for Issue changes in the GitHub repository
- Write the task description:"When a new Bug Issue comes in, automatically analyze and provide a fix PR."
- After saving, whenever a new Bug Issue appears in the repository, the employee automatically starts analysis and fixing
Each of the two methods has its applicable scenarios: Method A is suitable for temporary, one-time troubleshooting; Method B is suitable for continuous automated operations, reducing manual intervention.
Frequently Asked Questions
Unable to Open Web Console After Installation?
Confirm whether the local service is running normally, and checkhttp://127.0.0.1:19820whether it is accessible.
If there is a port conflict, check whether other programs are occupying port 19820.
Employee Stuck When Executing Tasks?
Check whether the employee needs your approval confirmation, and view the dialog window for any pending approval cards.
Custom Roles Not Working Well?
It is recommended to provide complete role information when creating: including role positioning, core responsibilities, workflow, required skills, and tool capability configurations such as MCP. The more complete the information, the better the results.
How to Provide Feedback?
If you encounter any issues or have product feature feedback, click the feedback button in the bottom-right corner of the console to submit. The team will reply and resolve it as soon as possible.
Other Extensions