OpenClaw Skills -- ClawHub
OpenClaw Skills are Markdown files containing instruction code that help the Agent perform specific tasks or optimize workflow functionality.
What truly turns OpenClaw from a chatbot into a super assistant is its Skills ecosystem — equivalent to the App Store for AI.
In simple terms:
OpenClaw = iPhone 手机
Skills = App Store
Without Skills, an AI can only chat; with Skills, an AI can search, automate, operate systems, call APIs, and execute scripts.
A typical Skill directory structure is as follows:
my-skill/
├── SKILL.md        # 主说明文件(含 YAML frontmatter + Markdown 指令)
├── script.py       # 可选:Skill 依赖的脚本
└── config.json     # 可选:配置文件
For more Skills content, refer to:https://www.example.com/ai-agent/skills-agent.html
ClawHub -- Installing and Using Skills
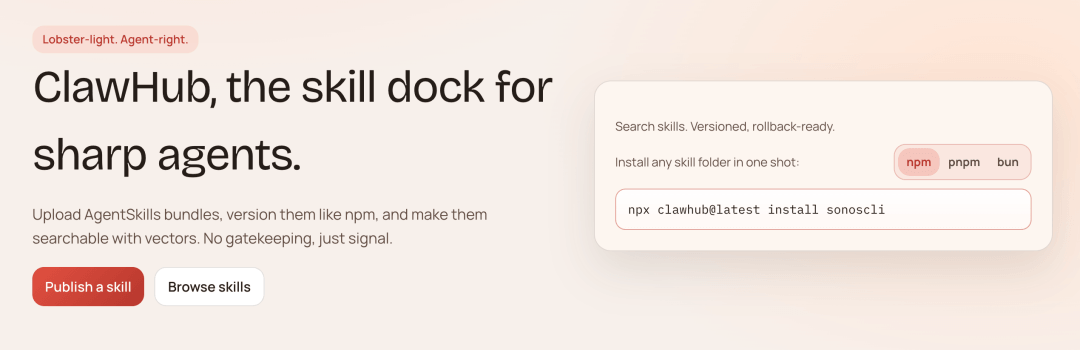
ClawHub is OpenClaw's Skills marketplace; you can think of it as the App Store for OpenClaw.
OpenClaw's App Store is called ClawHub --https://clawhub.ai/, which has currently gathered tens of thousands of community Skills.
Analogy:
OpenClaw = 操作系统

Agent = 大脑

ClawHub = 应用商店
ClawHub is OpenClaw's public skill registry, used to discover, install, update, and back up Skills.
- Official address:https://clawhub.ai/
- Domestic mirror address (faster):https://skillhub.tencent.com/
ClawHub provides the following features:
- Browse Skills
- Search Skills
- Install Skills
- Update Skills
- Publish Skills
Execution process:
用户提需求 → Agent 做决策 → ClawHub 找工具 → Skill 去执行 → 返回结果

Step 1: Install ClawHub CLI
npm i -g clawhub
clawhub --version
Step 2: Search and Install a Skill
# 搜索 Skill(支持自然语言)
clawhub search "send emails automatically"

# 安装 Skill
clawhub install <slug>
By default, the CLI installs Skills into the ./skills folder in the current working directory.
If an OpenClaw workspace is configured, clawhub will fall back to that workspace unless you override the path via the --workdir parameter or the CLAWHUB_WORKDIR environment variable.
OpenClaw loads Skills from <workspace>/skills, which take effect in the next Session.
Step 3: Restart OpenClaw Session
openclaw chat
# 新 Session 启动后,Skill 自动加载生效
Update Skill:
clawhub sync # 更新当前 workdir 下的所有 Skill
Use a Domestic Mirror
Domestic mirror addresshttps://skillhub.tencent.com/, using this one installs faster.

Run the following command in the terminal to install the SkillHub CLI, which prioritizes using SkillHub to accelerate skill installation:
curl -fsSL https://skillhub-1388575217.cos.ap-guangzhou.myqcloud.com/install/install.sh | bash
For example, let's install the search feature:
skillhub install tavily-search
After installation is complete, we can see in the backend that the Skill has been installed:

Common Skills
If you're new to OpenClaw, the strongly recommended installation order is:
- First install Skill Vetter to ensure basic safety.
- Then install self-improving-agent or its variants, allowing the AI to start developing a memory.
- Based on your needs, add these all-rounders: Summarize / Agent Browser / Gog / Github / Multi Search Engine.
Installation is super simple:
1. First install the clawhub CLI
npm i -g clawhub
2. Then install these Skills:
clawhub install self-improving-agent
clawhub install summarize
# 批量更新全部
clawhub update --all
The list of commonly used Skills is as follows:
| # | Skill | Description | Applicable Scenarios | Installation |
|---|---|---|---|---|
| 1 | self-improving-agent | Record failures and corrections, and review for optimization. | Failure review / repeated errors / user corrections | clawhub install self-improving-agent |
| 2 | summarize | Multi-format content summarization (web pages/PDFs/videos, etc.) | Long article reading / document summarization | clawhub install summarize |
| 3 | agent-browser | Automated browser operations (click/type/scrape) | Scraping / forms / automation | clawhub install agent-browser |
| 4 | skill-vetter | Pre-installation security check | Detect permissions / risky plugins | clawhub install skill-vetter |
| 5 | github | Operate GitHub via gh | PR / Issue / CI | clawhub install github |
| 6 | gog | Google Workspace integration | Email / Docs / Sheets | clawhub install gog |
| 7 | ontology | Structured knowledge graph memory | Project / multi-task management | clawhub install ontology |
| 8 | proactive-agent | Proactive execution and scheduling | Scheduled tasks / automatic execution | clawhub install proactive-agent |
| 9 | multi-search-engine | Multi-engine search aggregation | Research / comparison | clawhub install multi-search-engine |
| 10 | humanizer | Optimize text to be more natural | Copywriting / polishing | clawhub install humanizer |
| 11 | nano-pdf | Natural Language PDF Editing | Contract / Document Modification | clawhub install nano-pdf |
| 12 | notion | Management Pages and Database | Notes / Knowledge Base | clawhub install notion |
| 13 | obsidian | Markdown Note Automation | Organize / Consolidate | clawhub install obsidian |
| 14 | api-gateway | Connect 100+ APIs | System Integration | clawhub install api-gateway |
| 15 | automation-workflows | Design and Execute Automated Workflows | Side Hustle / Automation | clawhub install automation-workflows |
| 16 | auto-updater | Automatically Update Skills | Long-running | clawhub install auto-updater |
| 17 | openai-whisper | Local Speech-to-Text | Meeting Notes | clawhub install openai-whisper |
| 18 | nano-banana-pro | Image Generation and Editing | Poster / Image | clawhub install nano-banana-pro |
| 19 | stock-analysis | Stock and Crypto Analysis | Trends / Analysis | clawhub install stock-analysis |
| 20 | weather | Weather Query and Forecast | Daily Queries | clawhub install weather |
Create Your Own Skill
Below is a simplest SKILL.md example:
---
name: my-skill
description: Does a thing with an API.
---

# My Skill

## Rules
- Always confirm with the user before making destructive changes.
- Use the credentials from environment variable MY_API_KEY.

## Usage
When the user asks to "do the thing", call the API endpoint at
https://api.example.com/action with the provided payload.
Once written, execute the publish command:
clawhub publish ~/.openclaw/skills/my-skill \
  --slug my-skill \
  --name "My Skill" \
  --version 1.0.0 \
  --tags latest
Publishing requires a GitHub account registered for at least one week. --slug is the unique identifier of the Skill on ClawHub and must be unique across the entire registry.
Other Extensions