TortoiseSVN Tutorial
TortoiseSVN is a free open-source client for the Subversion version control system, which can manage files and directories across time.
TortoiseSVN Installation
Download address:https://tortoisesvn.net/downloads.htmlThe page contains download links for language pack patches.
The latest version is 1.11.0. Download address:https://osdn.net/projects/tortoisesvn/storage/1.11.0/
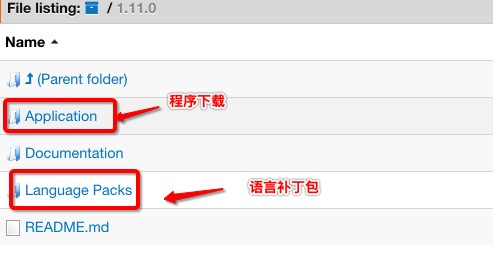
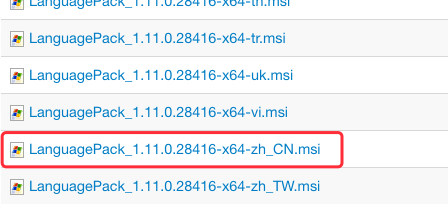
In the language pack, we can find the Chinese patch and download it:
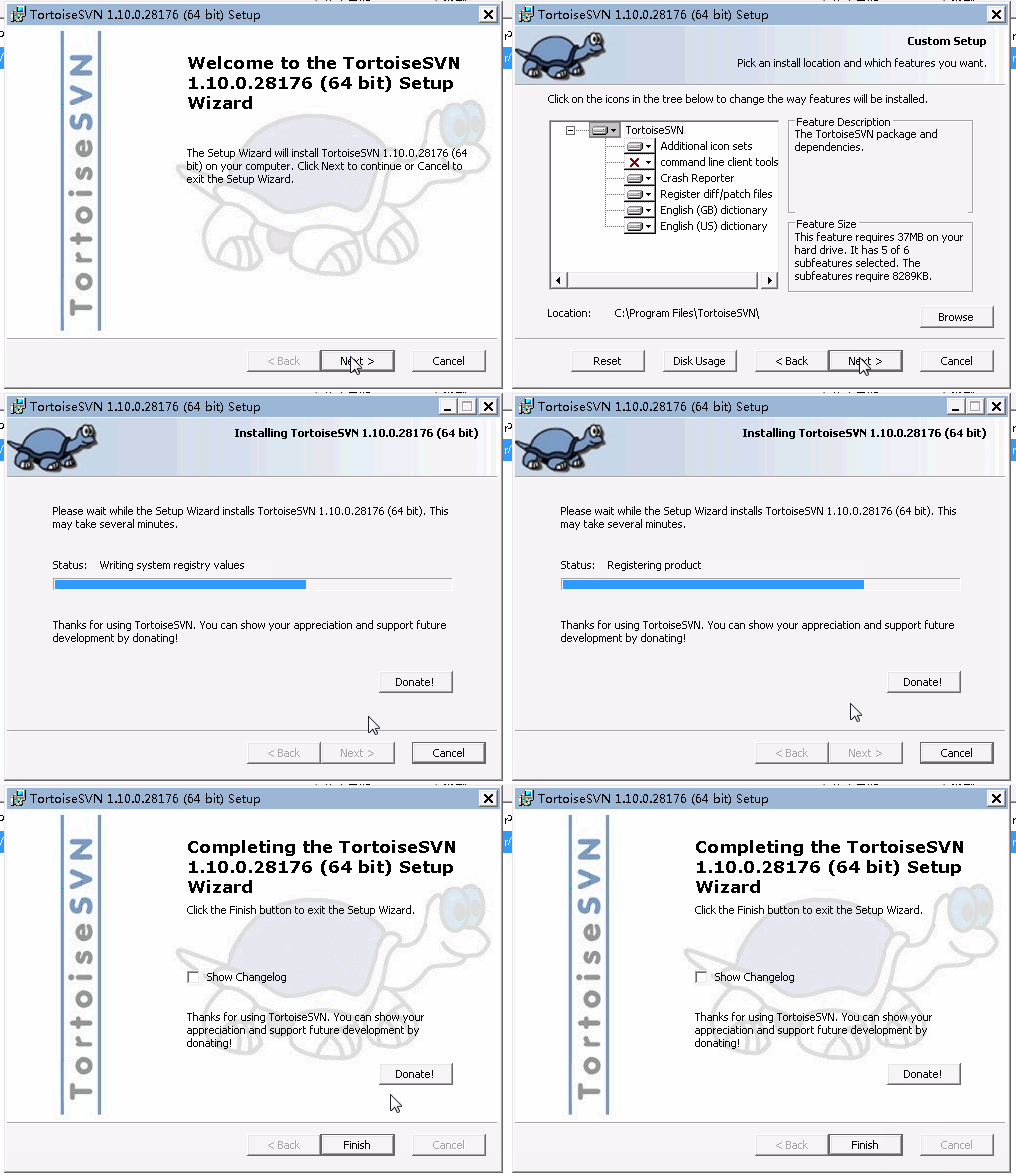
Run the downloaded TortoiseSVN installer
Run the downloaded TortoiseSVN Chinese language pack
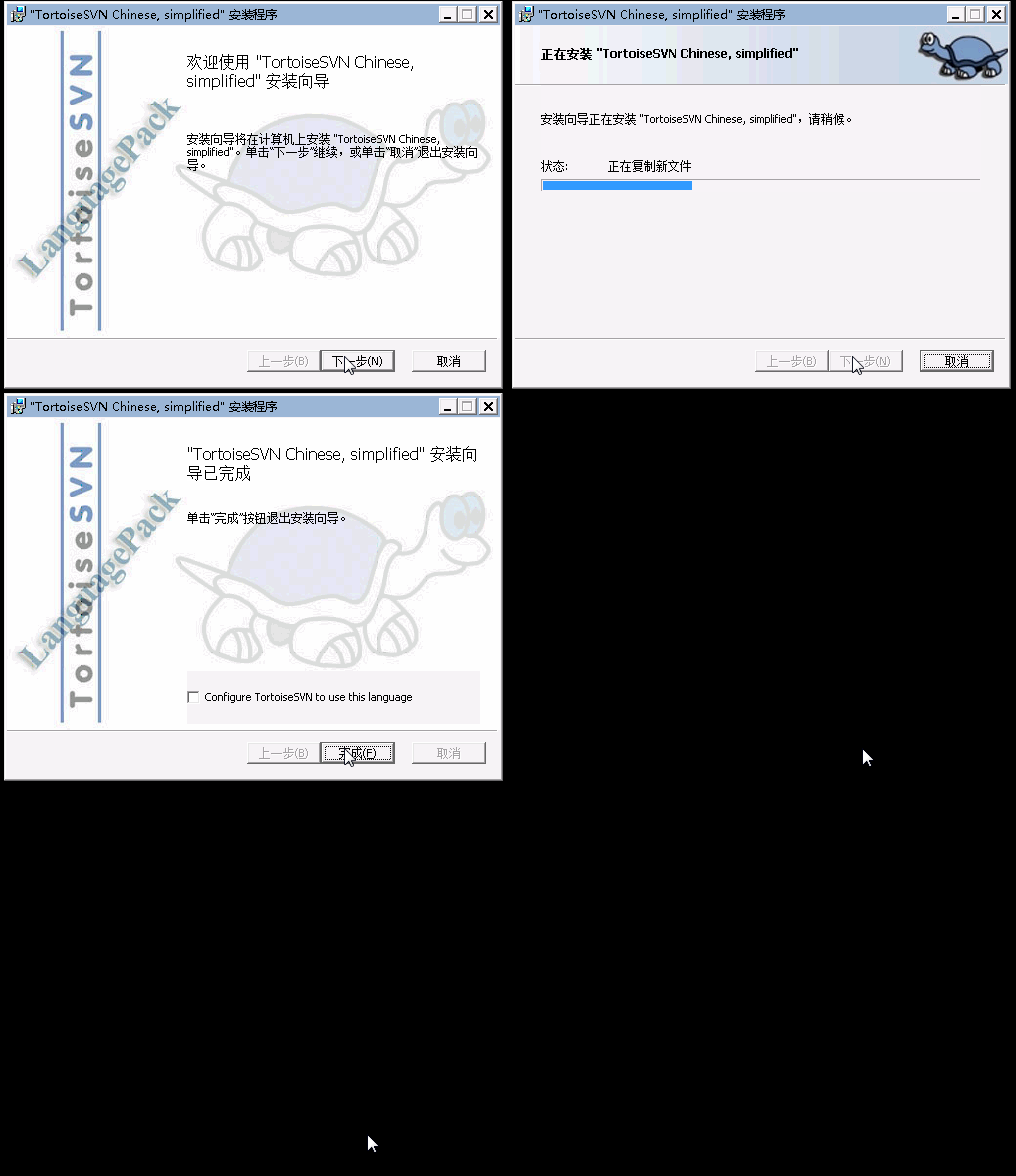
After proper installation, you should restart your computer once to ensure TortoiseSVN works correctly.
Change the TortoiseSVN default language
After installation, the default interface of TortoiseSVN is English. We can change it to an installed language through the settings.

Using TortoiseSVN
Create a working directory called example01
The so-called example01 directory is actually where you normally store your working files. Usually, we wait until we have completed a milestone of our work before backing up. So we normally work in the example01 directory and commit to the repository at the appropriate time. For example, we want to create a directory named example01 on the D drive. First, create this directory.
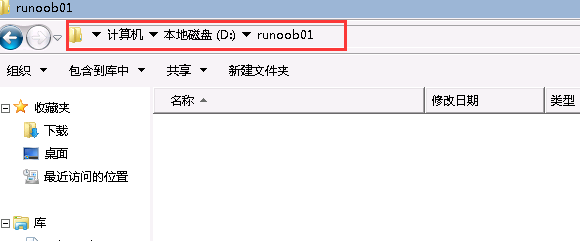
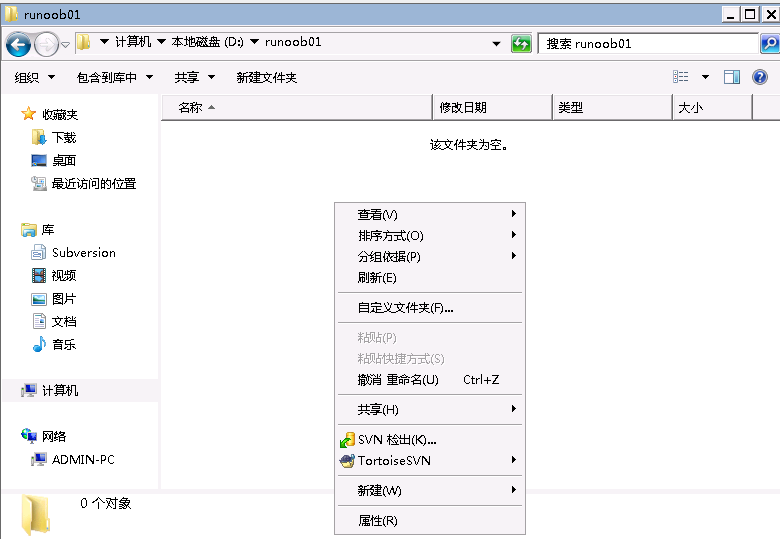
After entering the created directory, right-click on an empty area (you can right-click on the MyWork directory icon, or enter the MyWork directory and right-click on an empty area), then selectSVN checkout。
You will then see the following screen:
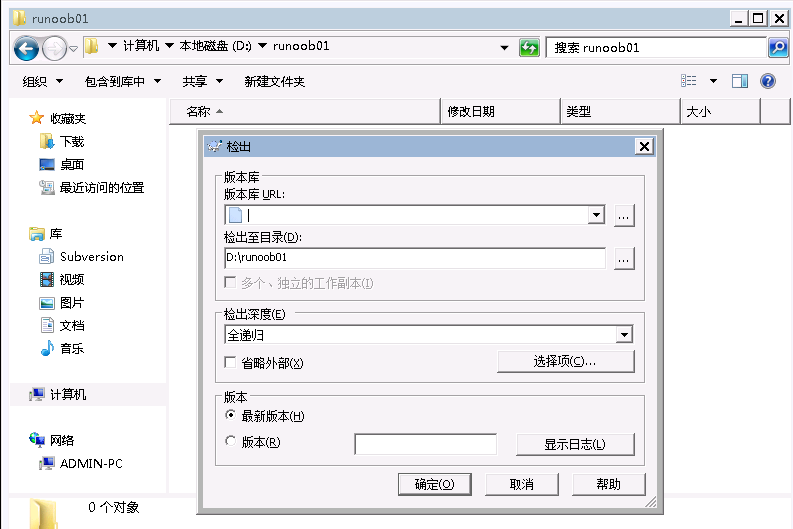
First, we need to fill in the location of the repository. For SVN, the repository location is a URL. In the "URL of repository" field, enter the test repository address.svn://10.0.4.17/example01。
Next, take a look at "Checkout directory". This field should point to your example01 directory.
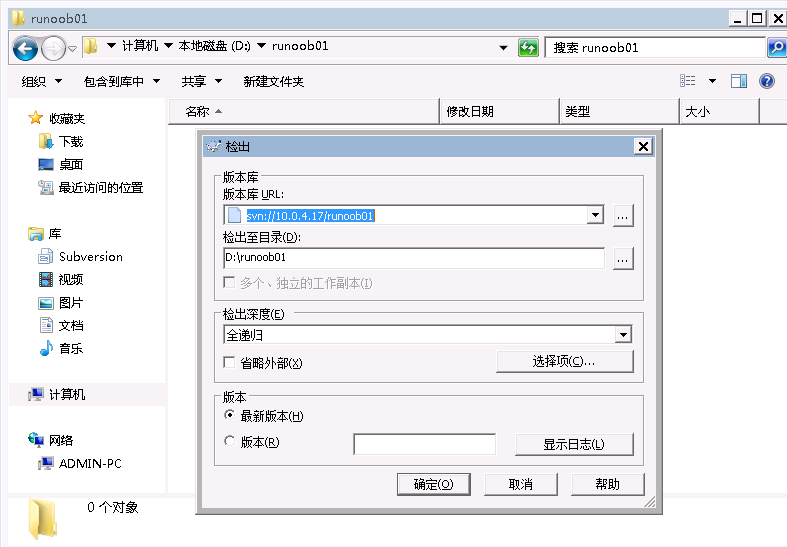
After confirming, click OK. You should see the following information window.
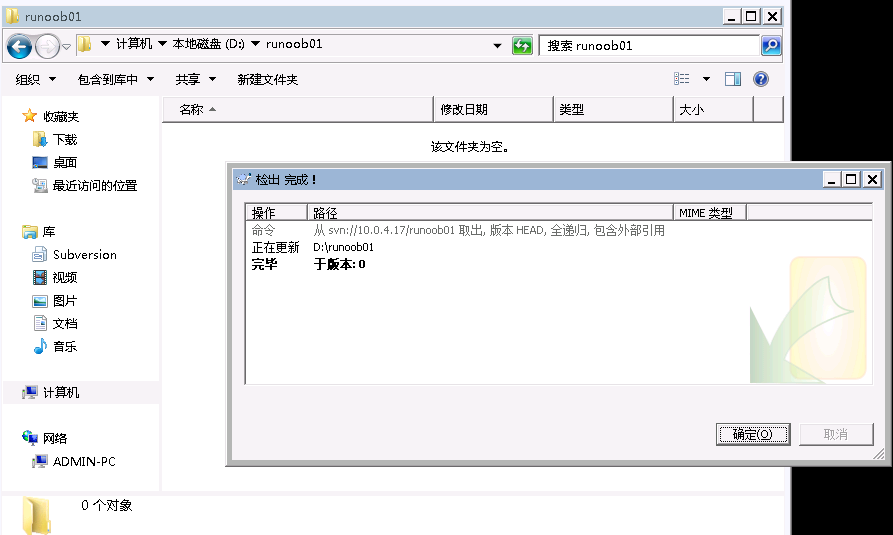
This means the action is complete. After clicking OK, go to the directory you just created. You will see that under the MyWork directory, there is an additional directory named.svndirectory (this directory is hidden; if your file manager is not set to show hidden directories, you will not be able to see it).
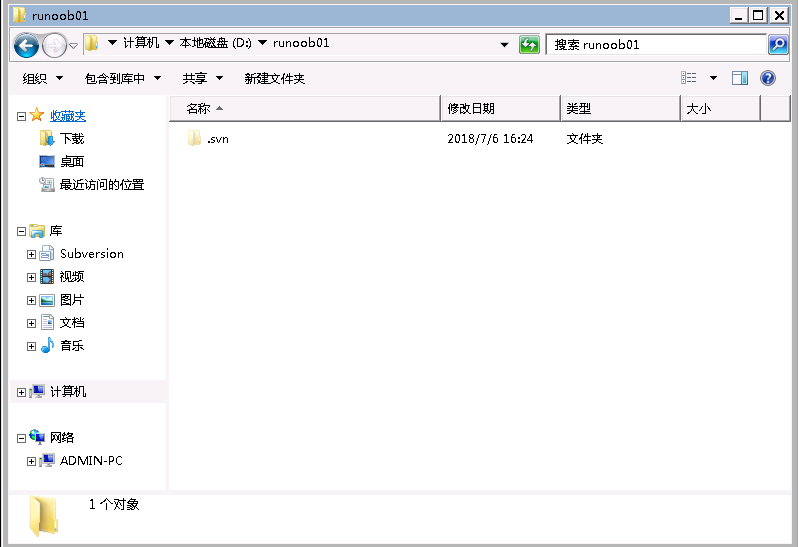
If you want to check out the above files from an existing SVN server, you only need to provide the correct SVN URL and the name of the directory to check out. Then you can retrieve the specified files and directories.
Add files and directories to the Repository - add & commit
Create a directory dir01, and add new files inside it.
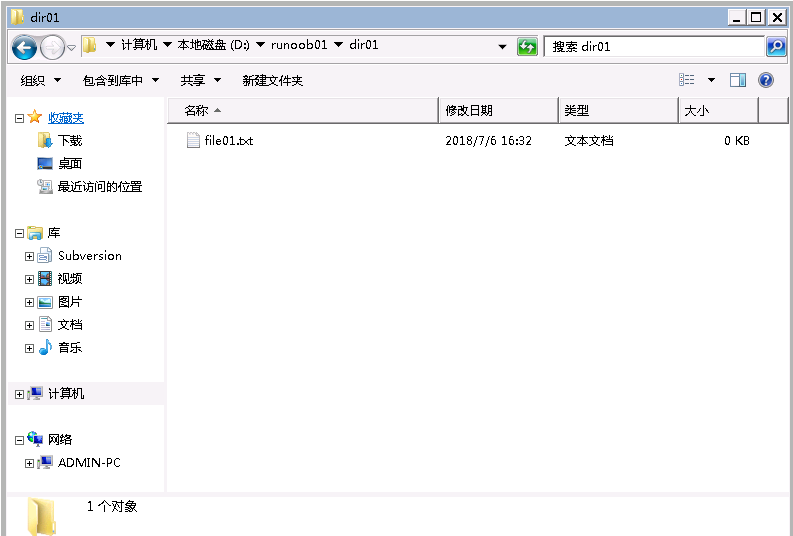
To add the new files to SVN version control, TortoiseSVN will show the files and directories that are ready to be added. Check the files you want to add.
After clicking OK, you will see the following message window:
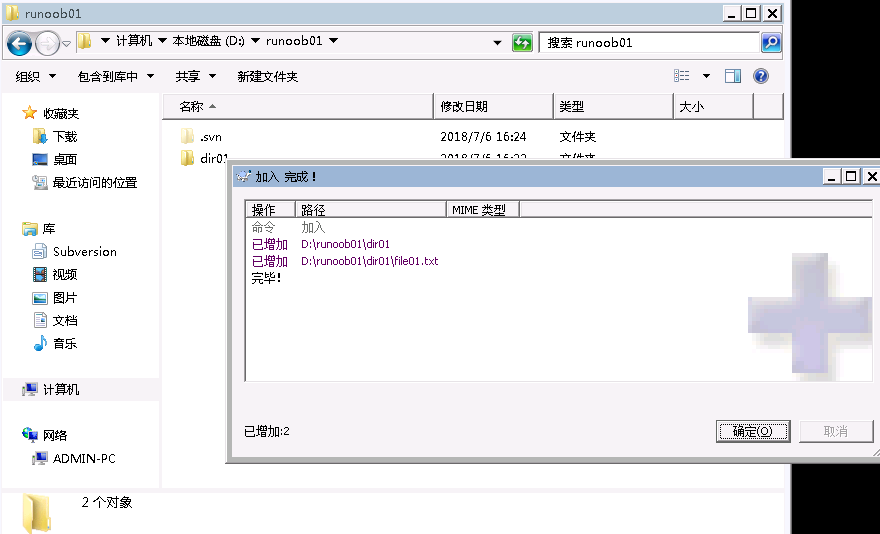
This Add action does not actually place the files into the Repository. It only tells SVN that these files are ready to be added to the Repository. At this point, the file status is:

To actually put these files into the Repository, right-click on an empty area and select SVN Commit. Then, you will see the following window appear:
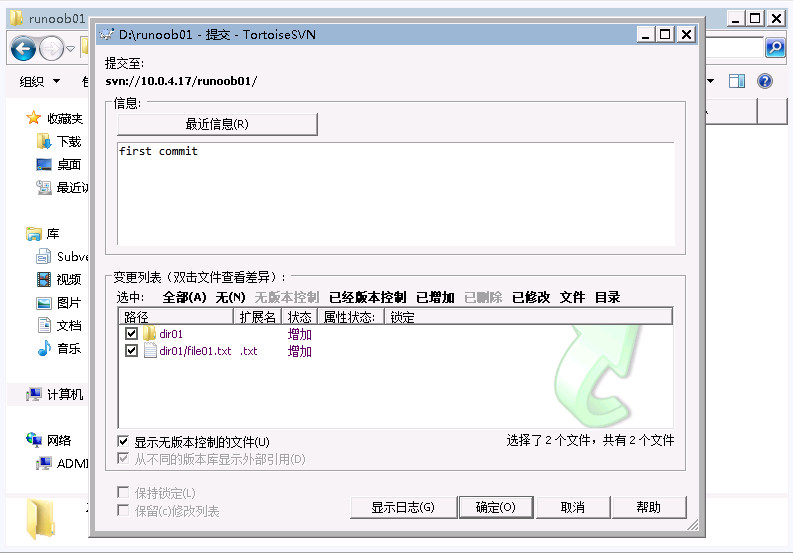
Here you can clearly see which files will be committed to the repository. Similarly, if there are files you do not want to commit to the Repository at this time, you can uncheck them, and they will not be committed to the Repository. In the "Message" text box, you can write a description for this commit.
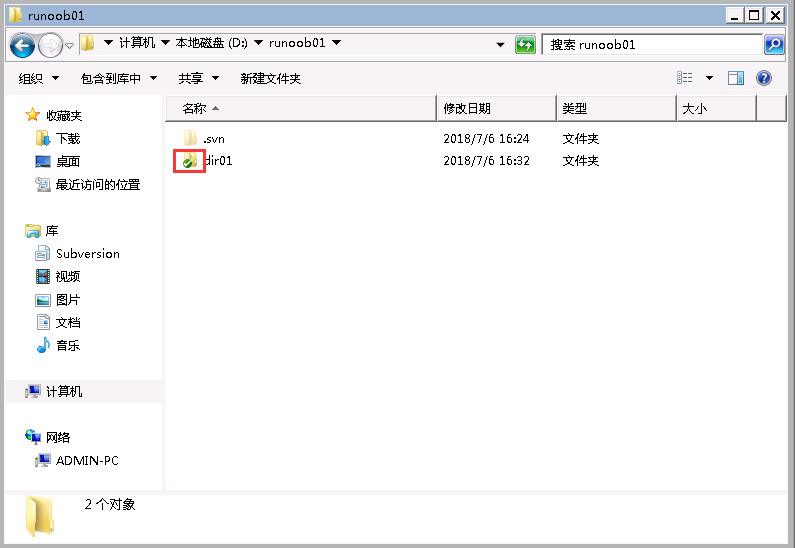
After clicking "OK" to complete the commit action, you can go to the example directory and check whether all file icons have a green checkmark as shown below. This means your files have been correctly uploaded to the repository.
Update files and directories - update
Since version control systems are usually used by many people, the same files may also be edited by others. To ensure that the files in your working directory are synchronized with the files in the Repository, it is recommended that you update before editing.
Right-click on the icon of the file or directory you want to update, and select SVN Update.
Sometimes we need to go back to a specific date or revision. In this case, we can use SVN's "Update to revision" feature. Right-click on the icon of the file or directory you want to update, and select TortoiseSVN -> Update to revision.
Copy files and directories - branch
Many times you will want another copy of the directory to make new edits. After confirming that the modifications in this branch are complete, merge them back into the original main development version. For example, we currently have the following directories and files under example01/trunk:
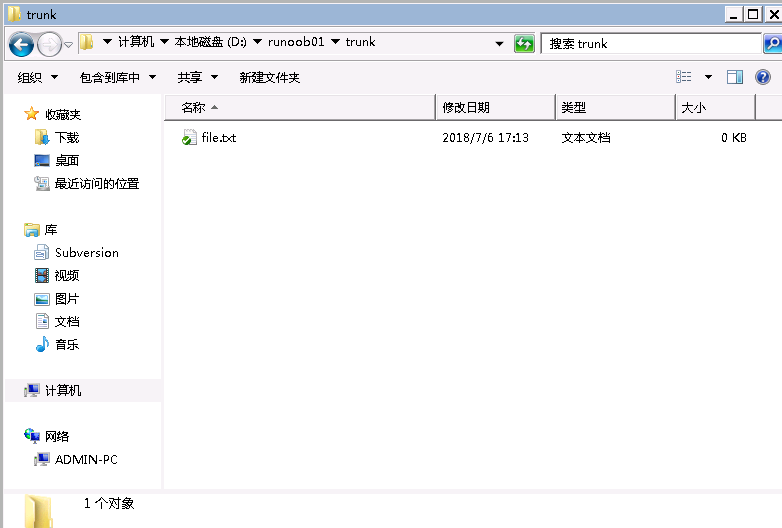
Now, we want to create a branch for the trunk directory. Suppose we want this directory to be D:\example01\branch. First, we can right-click on an empty area under the trunk directory, or directly on the trunk icon, and select the Branch/Tag... option. You will see the following dialog appear.
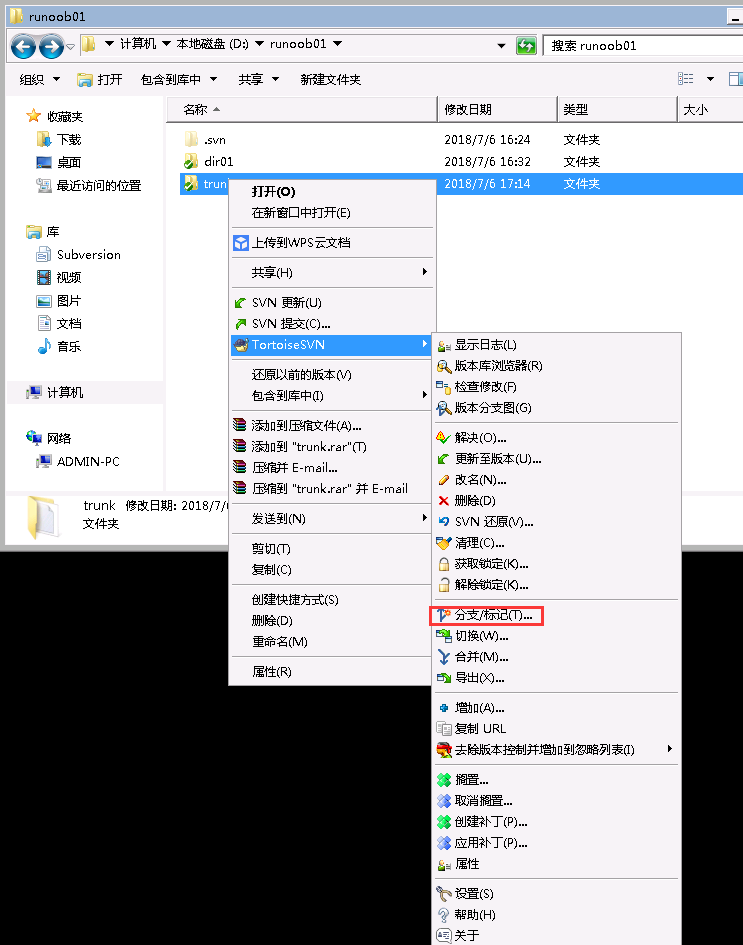
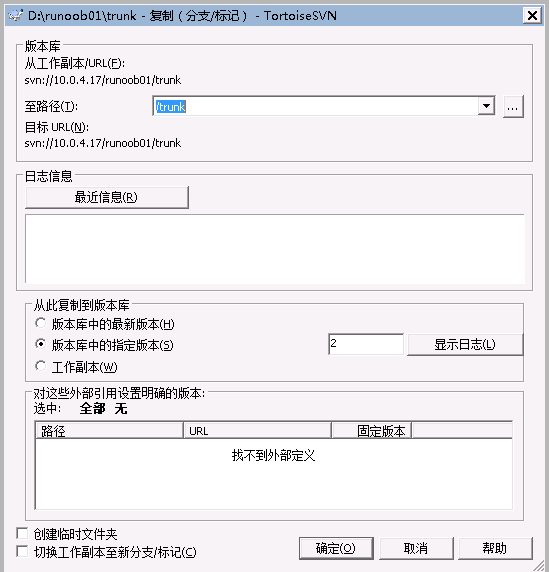
First, confirm that the directory in "From WC at URL" is the source directory you want to copy. Then, enter the target path in "To URL". Usually we put all branches under one directory. In the above example, branch files are placed under the branch subdirectory. In "To URL", you only need to enter the directory you want. If the directory does not exist, SVN will create it for you. Note especially that SVN uses forward slashes as directory separators, not backslashes. Then enter the purpose of this branch in "Log message", and click OK.
If successful, you will see the following screen:
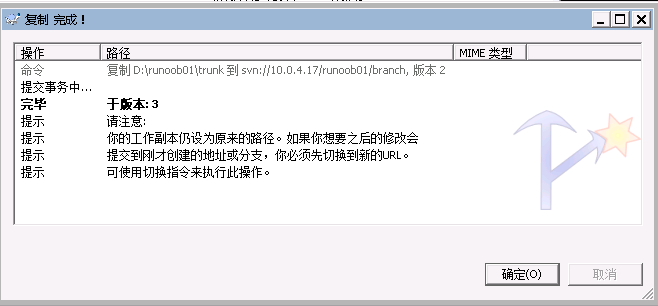
Click OK to close this window. If you immediately go to the branch subdirectory under the example01 directory, you will be disappointed to find that the directory you just specified does not exist there. This is because the example01 directory part is still old. You only need to perform an SVN update in the branch subdirectory to see this newly added directory. The new directory is now independent of the original directory. You can edit it freely. Once you have confirmed that all the work under the branch has been completed, you can choose to merge this branch back into the original trunk directory, or keep it in the branch.
Merge operation - merge
Suppose we have modified or added files in the branch, and we want to merge back to the trunk directory. The method is very simple. In the above example, right-click on an empty area in D:\example01\trunk and select Merge:
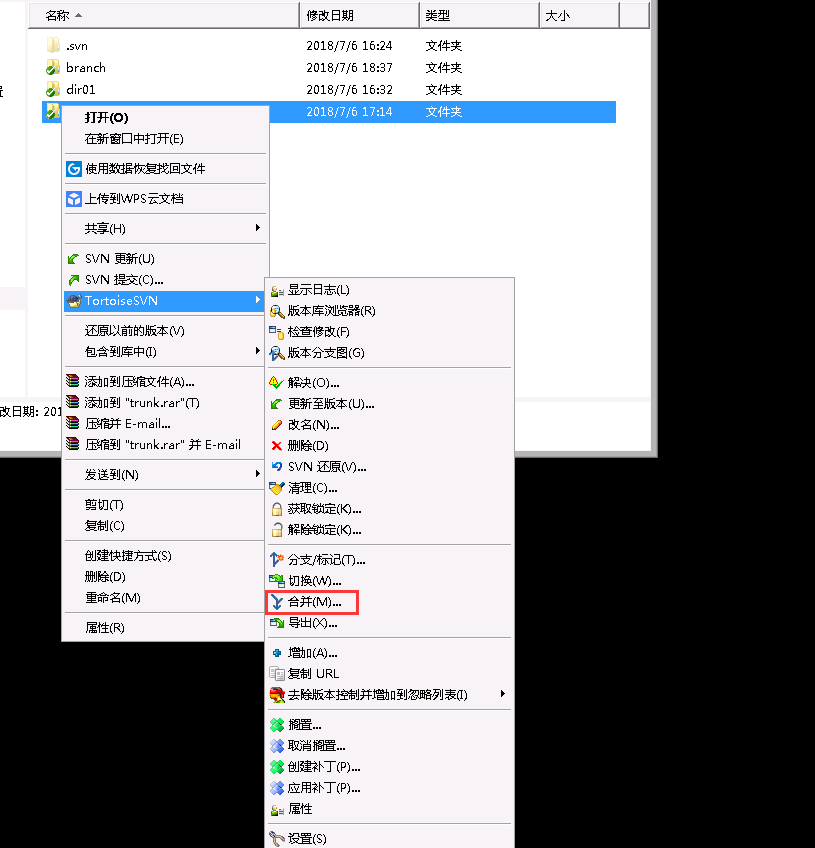
This screen is mainly divided into three parts. The "From:" and "To:" fields ask you which revision in the Branch to merge from and to, back into the original trunk directory. Therefore, the URL fields of From and To should both point to the original branch directory. The rest is specifying the revision range to merge. In the above example, we merge from Revision 7 of the Branch to the latest version under the Branch. You can click the "Try run" button to test a merge. This merge only shows some messages and does not actually update the trunk directory. Only after clicking the Merge button will the branch files and trunk files actually be merged.
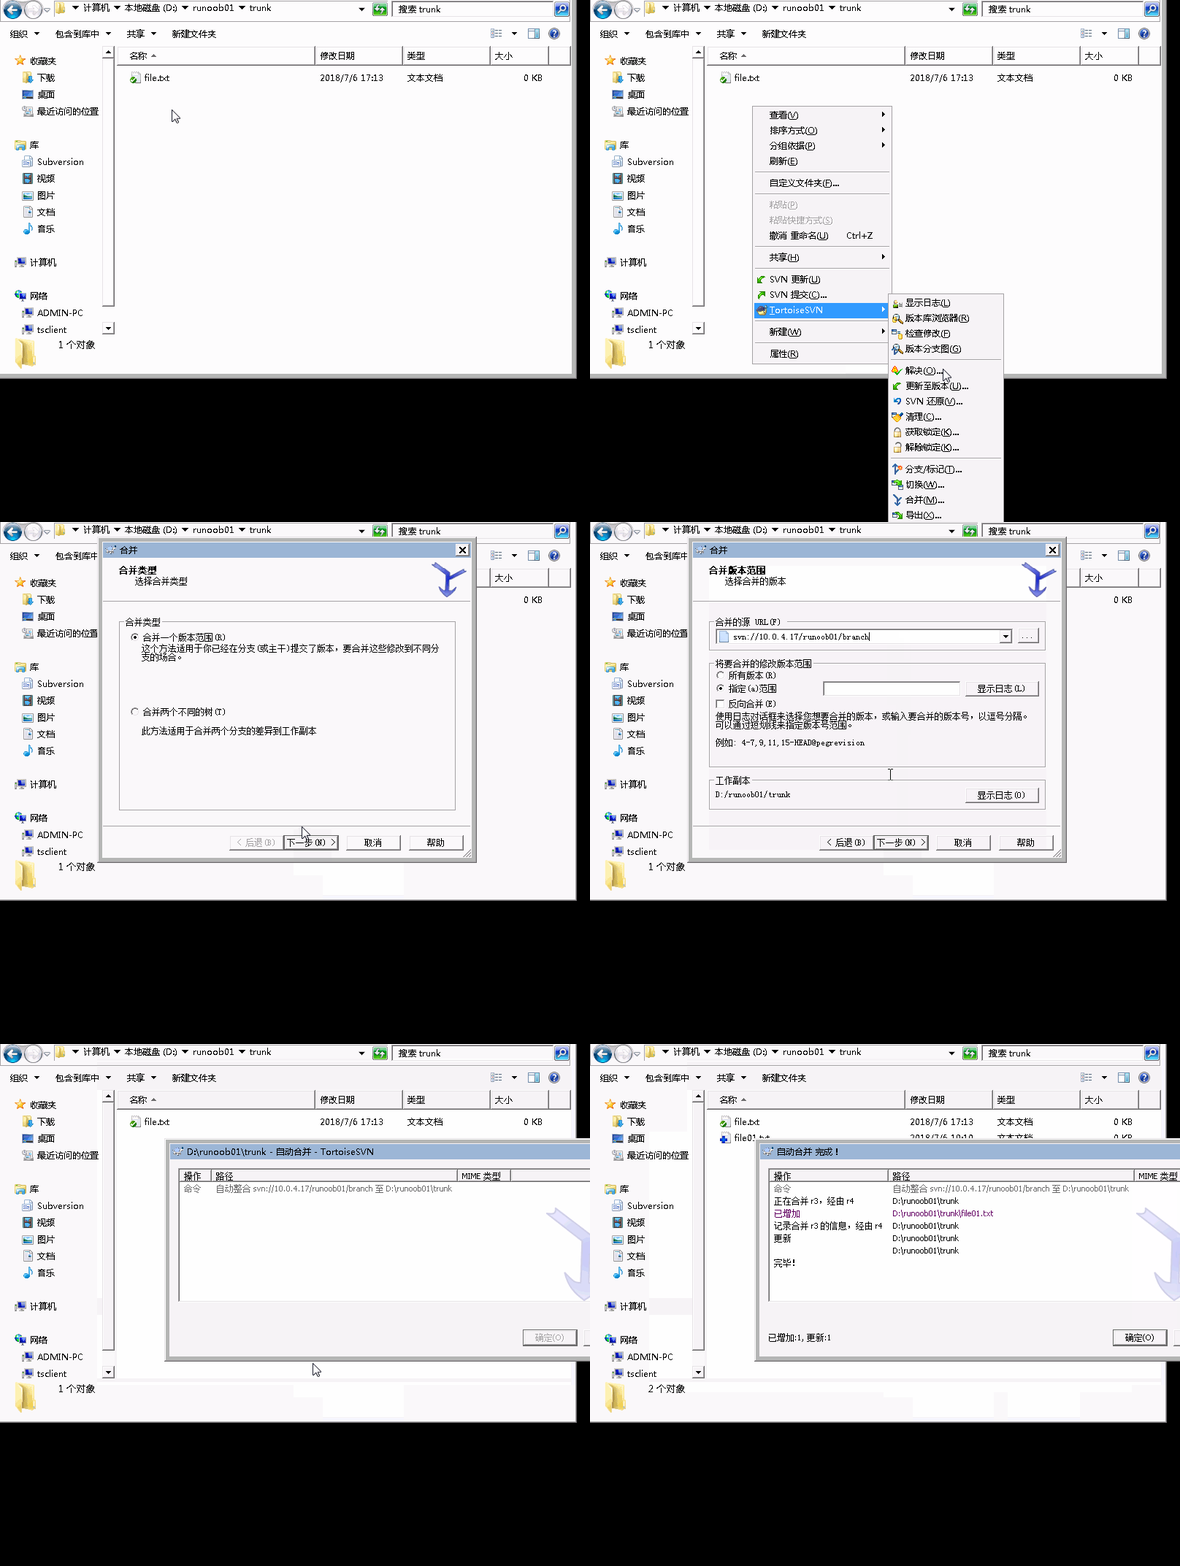
If you confirm that this merge is fine, you can directly use commit to commit the two modified files back to the SVN repository. If there are problems, you can directly modify these two files until you confirm they are OK, and then commit.
Create a Tag or Release
The so-called Tag or Release is a special version, because this version may have special significance. For example: this version is a special Milestone or a version released to customers. In fact, the process of Tag and Release is exactly the same as Branch. The only difference is that a Branch may need to be merged back into the original trunk, while most tags and releases do not need to be merged back into the trunk.
For example, today our trunk produced a version, and this version was recognized as version 1.0 of the software. Version 1.0 is a very important milestone for development. So we need to make a special mark for it, namely a Tag. Suppose this version 1.0 is to be officially released to customers or related vendors; we need to be able to create a Release tag for it. Basically, SVN only has the concept of directories, and has no special Tag usage. So you will see that on the SVN menu, Branch and Tag are the same item. Taking this version 1.0 example, we create a tags directory under the example01 directory to store the tagged version, and commit it to the repository. Then right-click on Trunk and select the Branch/Tag item:
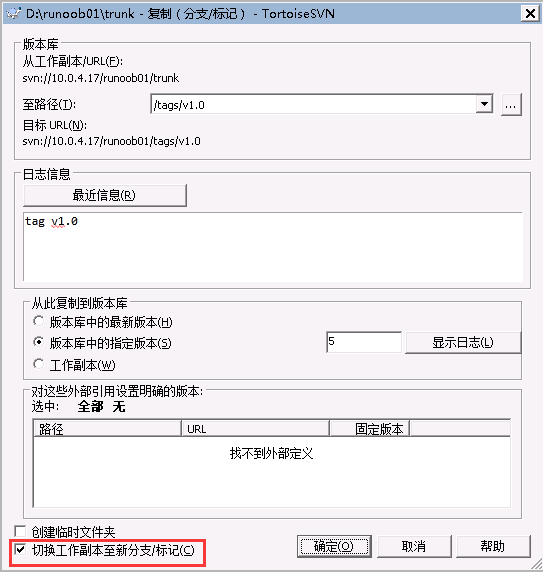
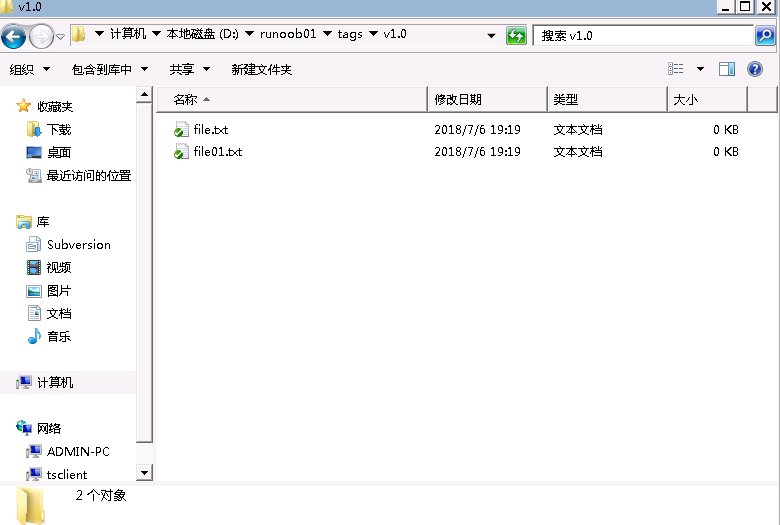
If successful, you will have created a v1.0 directory under the corresponding Tag directory. Of course, if you go to the Tag directory at this time, you will not see this directory; you need to update under the Tag directory to see it.