React Installation (Vite)
Vite is a modern frontend build tool designed to provide a fast development experience by leveraging the native ES module support of modern browsers.
Vite is currently the preferred tool officially recommended by React. It is faster, lighter, and offers a better development experience than the traditional Create React App.
Vite is based on native ES Modules, supports instant hot module replacement (HMR), and typically takes only a few hundred milliseconds to start.
For more details on Vite, see:Vite Tutorial。

Why Choose Vite + React?
- Lightning-fast startup: The development server opens instantly, and hot updates are almost real-time.
- Modern features: Out-of-the-box support for JSX, TypeScript, CSS Modules, PostCSS, etc.
- Lightweight and flexible: Simple configuration file, easily customizable.
- Production optimization: Built-in Rollup build, small output size, and high performance.
- Official endorsement: React's official documentation has made Vite the default recommendation.
Create Your First Vite + React Project
Open a terminal (Windows: PowerShell/Command Prompt; macOS/Linux: Terminal).
Install using npm:
npm create vite@latest my-first-react-app -- --template react
Recommended command (using pnpm, fastest and saves the most disk space):
pnpm create vite@latest my-first-react-app -- --template react
Other package manager commands:
Install using yarn:
yarn create vite my-first-react-app --template react
Command explanation:
create vite@latest: Use the latest version of the Vite scaffolding tool.my-first-react-app: Your project name (lowercase letters + hyphens recommended).-- --template react: Specify the React template.
Interactive prompts(You will be prompted to select):
- Project name: press Enter to confirm or modify it.
- Select framework: selectReact。
- Select variant:
- JavaScript(Recommended for beginners, start with plain JS).
- TypeScript(Recommended for advanced users, better type safety, can switch later).
Here we chooseJavaScript。
Wait a few seconds, and the project skeleton is created!
Install Dependencies and Start the Project
Enter the project directorycd my-first-react-app, install dependencies:
npm install
Start the development server:
npm run dev
The browser will automatically open http://localhost:5173 (Vite's default port).
You will see a welcome page with the Vite + React logo and a counter example. That is your first React application running!
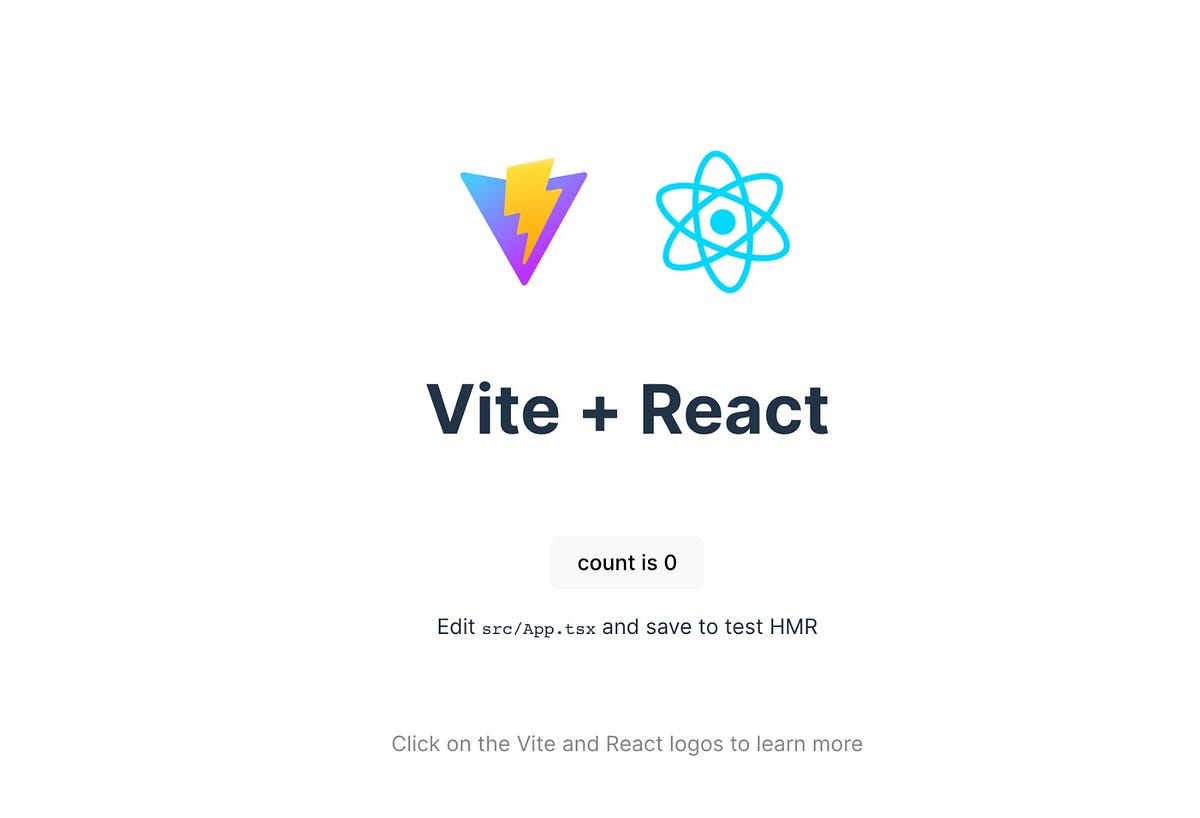
Hot Module Replacement (HMR) experience: modify any code (we will teach you later), save, and the page updates automatically without refreshing! That is the magic of Vite.
Project Structure Explained in Detail
Open the project folder (recommended to use VS Code:code .command to open it with one click).
cd my-first-react-app
code .
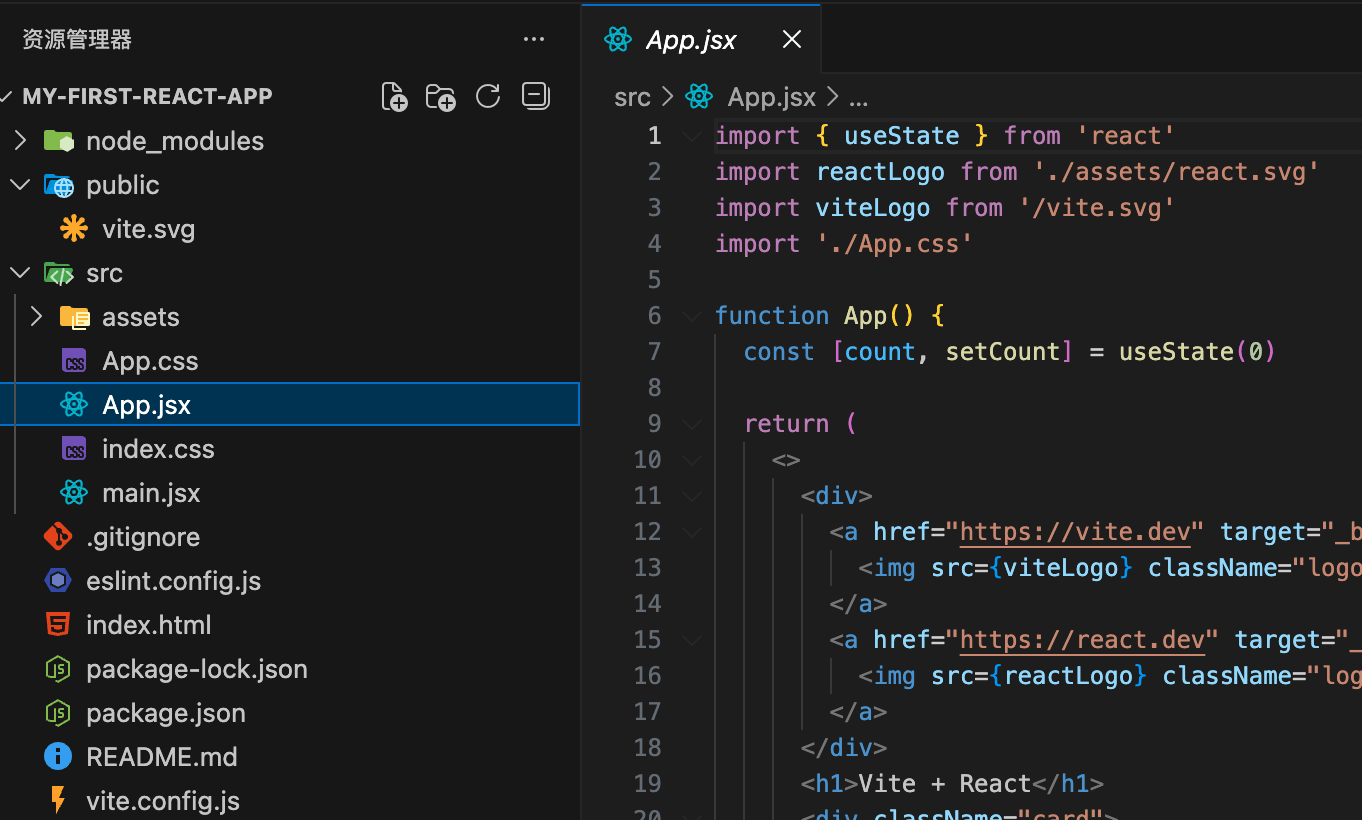
The typical structure is as follows:
my-first-react-app/
├── public/              # 静态资源(直接复制到构建输出)
│   └── vite.svg         # Vite Logo
├── src/                 # 源码主目录(重点!)
│   ├── assets/          # 图片等资源
│   │   └── react.svg
│   ├── App.jsx          # 主组件(应用入口)
│   ├── main.jsx         # 入口文件(挂载根组件)
│   ├── index.css        # 全局样式
│   └── vite-env.d.ts    # TypeScript 声明(JS 项目可忽略)
├── .gitignore
├── index.html           # HTML 入口模板
├── package.json         # 依赖和脚本
├── vite.config.js       # Vite 配置文件(目前为空,可自定义)
└── README.md
Key file explanations:
- index.html: Page entry,
<div></div>is the React mount point. - src/main.jsx: React startup file, uses React 18's new API to create the root node.
- src/App.jsx: Your main component, comes with a counter example by default.
Modify Code: Your First React Component
Opensrc/App.jsx, replace all the content with the following code (let's start with a simple greeting):
Example
import reactLogo from './assets/react.svg'
import viteLogo from '/vite.svg'
import './App.css'
function App() {
const [count, setCount] = useState(0)
return (
<div className="App">
<div>
<a href="https://vitejs.dev" target="_blank">
<img src={viteLogo} className="logo" alt="Vite logo" />
</a>
<a href="https://react.dev" target="_blank">
<img src={reactLogo} className="logo react" alt="React logo" />
</a>
</div>
<h1>Hello, React+ Vite!</h1>
<div className="card">
<button onClick={() => setCount((count) => count + 1)}>
Current count:{count}
</button>
</div>
<p>
Edit<code>src/App.jsx</code>and save to experience hot updates!
</p>
</div>
)
}
export default App
After saving, the page updates automatically! You have written a complete function component:
import { useState } from 'react': Import a Hook.useState(0): Declare a state variablecount, with an initial value of 0.onClickEvents: Clicking the button updates state and triggers re-rendering.- JSX syntax: Looks like HTML, but it is actually JavaScript.
Mini Exercise:
- Change the title to your name:
<h1>你好,[你的名字]!</h1> - Add a new button: implement a subtraction counter.
<button onClick={() => setCount(count - 1)}>
  减一
</button>
Understanding the Entry File: src/main.jsx
Opensrc/main.jsx:
Example
import ReactDOM from 'react-dom/client'
import App from './App.jsx'
import './index.css'
ReactDOM.createRoot(document.getElementById('root')).render(
<React.StrictMode>
<App />
</React.StrictMode>
)
Explanation:
ReactDOM.createRoot: React 18's new API, enables concurrent features.<App />: Renders your main component.<React.StrictMode>: Strict checks in development mode to help identify issues.
Adding New Components (Componentization Practice)
Insrc/Create a new file undercomponents/HelloWorld.jsx(first manually create the folder):
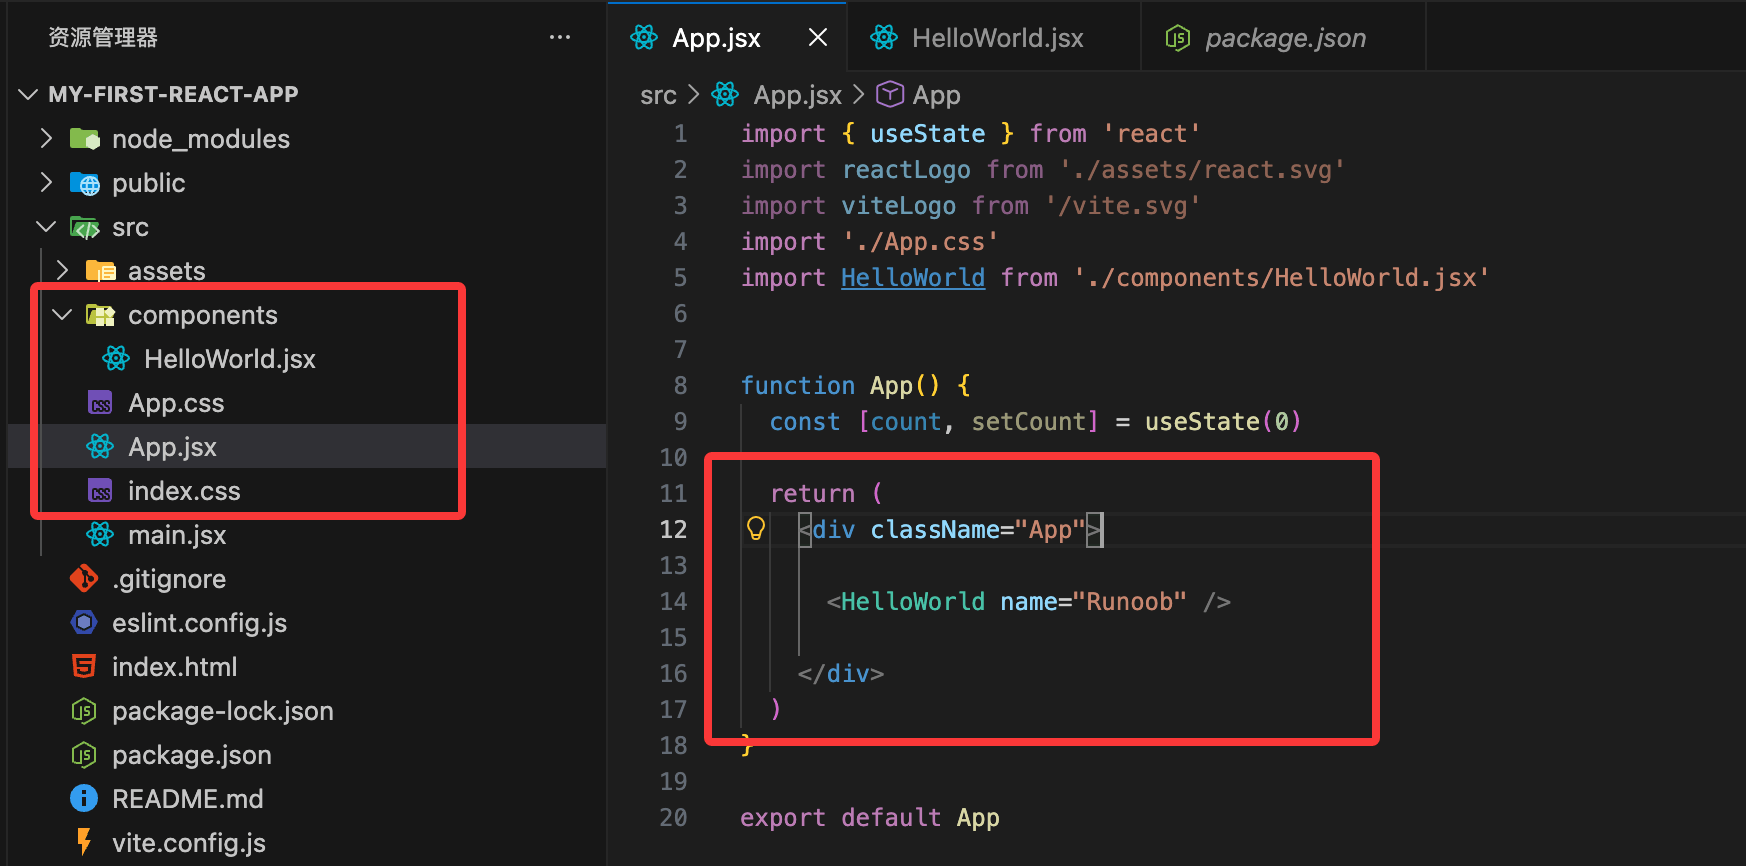
// src/components/HelloWorld.jsx
function HelloWorld({ name }) {
  return <h2>欢迎,{name || '陌生人'}!</h2>
}

export default HelloWorld
InApp.jsxImport and use it in:
import HelloWorld from './components/HelloWorld.jsx'

// 在 return 中添加:
<HelloWorld name="Example" />
Save and refresh, and you will see the new component rendered. This is thecomponentizationappeal: reusable and composable!
Styles and Asset Handling
- CSS: Directly import
./App.css, supports regular CSS. - Images: Use as a variable after importing (Vite automatically optimizes).
- Advanced: Supports CSS Modules (file name
.module.css), Tailwind CSS (can be configured later).
Building a Production Version
After development is complete, build static files for deployment:
npm run build
The output is in thedist/folder: pure HTML/CSS/JS, can be uploaded to Vercel, Netlify, etc.