Redis Installation
Install on Windows
Download address:https://github.com/redis-windows/redis-windows/releases。
Redis supports 32-bit and 64-bit. This should be selected according to your system platform. Here we downloadRedis-x64-xxx.zipthe archive to the C drive, after extracting, rename the folder toredis。
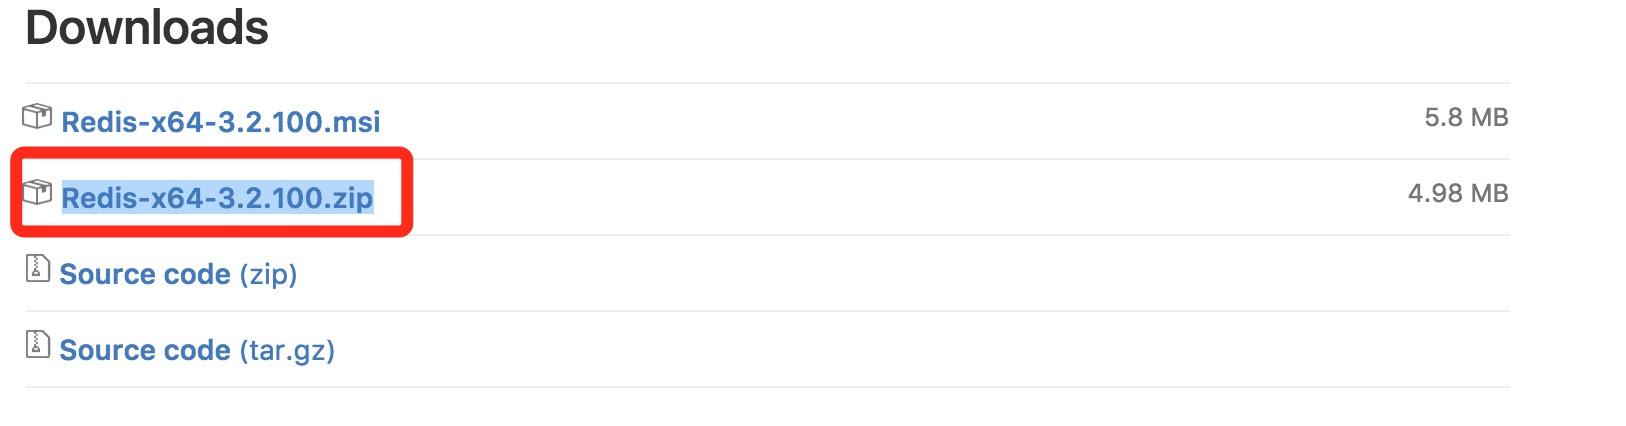
Open the folder, the contents are as follows:

Open acmdwindow, use the cd command to switch the directory toC:\redisRun:
redis-server.exe redis.windows.conf
If you want convenience, you can add the Redis path to the system environment variables, saving you from typing the path again. The following redis.windows.conf can be omitted; if omitted, the default will be used. After entering, the following interface will be displayed:
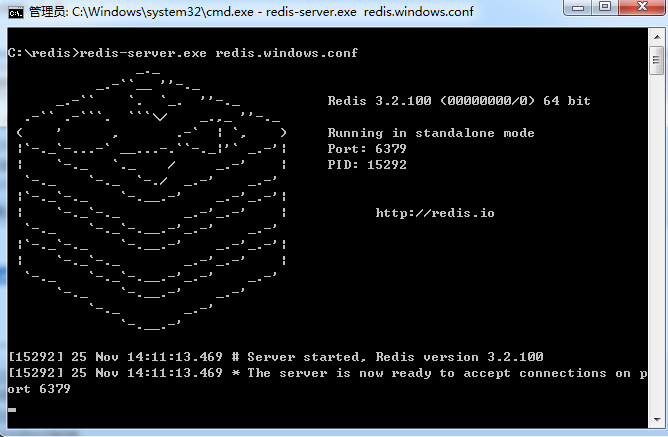
At this point, open another cmd window. Do not close the original one, otherwise you won't be able to access the server.
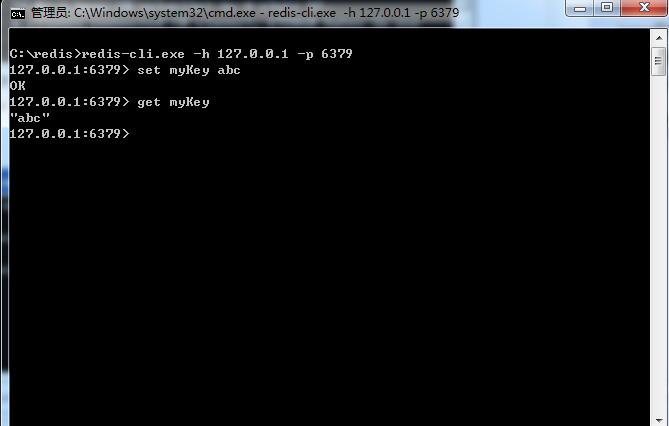
Switch to the Redis directory and run:
redis-cli.exe -h 127.0.0.1 -p 6379
Set key-value pair:
set myKey abc
Retrieve key-value pair:
get myKey
Linux Source Code Installation
Download address:http://redis.io/download, download the latest stable version.
The latest documentation version used in this tutorial is 2.8.17. Download and install:
# wget http://download.redis.io/releases/redis-6.0.8.tar.gz
# tar -xzvf redis-6.0.8.tar.gz
# cd redis-6.0.8
# make
After executingmakecommand, the redis-6.0.8srcdirectory will contain the compiled Redis server program redis-server, and the test client program redis-cli:
Now start the Redis service:
# cd src
# ./redis-server
Note that this way of starting Redis uses the default configuration. You can also tell Redis to use a specified configuration file via startup parameters using the following command.
# cd src
# ./redis-server ../redis.conf
redis.confis a default configuration file. We can use our own configuration file as needed.
After starting the Redis service process, you can use the test client program redis-cli to interact with the Redis service. For example:
# cd src
# ./redis-cli
redis> set foo bar
OK
redis> get foo
"bar"
Ubuntu apt Command Installation
To install Redis on Ubuntu system, you can use the following command:
# sudo apt update
# sudo apt install redis-server
Start Redis
# redis-server
Check if Redis is started?
# redis-cli
The above command will open the following terminal:
redis 127.0.0.1:6379>
127.0.0.1 is the local machine IP, 6379 is the Redis service port. Now we enter the PING command.
redis 127.0.0.1:6379> ping
PONG
The above indicates that we have successfully installed Redis.
<div style="display:none;"> <hr><h2 id="cs-redis"> Running Redis in Cloud Studio</h2> <p>Below we introduce how to install and use Redis in Cloud Studio:</p> <ul> <li><p>step1: Visit <a target="_blank" href='https://studio.dev.tencent.com/' rel="noopener noreferrer">Tencent Cloud Developer Platform</a>, register/log in to your account.</p></li> <li><p>step2: In the runtime environment menu on the right, select: <code>"ubuntu"</code></p> <p><img src='https://dn-coding-net-production-pp.qbox.me/86b0d145-626a-4235-b25e-391d44251cd8.jpg' alt='' /></p></li> <li><p>step3: Execute the following commands in the terminal below:</p> <pre>sudo apt-get update sudo apt-get install redis-server</pre> </li> <li><p>step4: Start Redis:</p><pre>redis-server</pre></li> <li><p>step5: Check if Redis is started:</p><pre>redis-cli</pre></li></ul> <p>The above command will open the following terminal:</p> <pre>redis 127.0.0.1:6379></pre> <p>127.0.0.1 is the local machine IP, 6379 is the Redis service port. Now we enter the PING command:</p> <pre>redis 127.0.0.1:6379> ping PONG</pre> <p>The above indicates that we have successfully installed Redis.</p> <p>Now CODING is holding a [My Favorite Cloud Studio Plugin Selection Contest] based on Cloud Studio workspaces. Go to the event official website: <a href="https://studio.qcloud.coding.net/campaign/favorite-plugins/index" rel="noopener noreferrer" target="_blank">https://studio.qcloud.coding.net/campaign/favorite-plugins/index</a> to learn more event information.</p> </div> Other Extensions