Local Model Deployment
Many people think AI can only be used in the cloud: when using ChatGPT, data is sent to OpenAI's servers, and when using Claude, requests are sent to Anthropic's data centers.
In fact,AI models can run entirely on your own computer。
Imagine: you can use AI without a network, sensitive data never leaves your computer, no need to pay per call, and you can customize it however you want.
This is the value of local model deployment.
This module will take you from zero to running your first local AI model on your own computer.
Why Local AI Is Needed
Cloud AI is convenient, but local AI has irreplaceable advantages.
Data Privacy Protection
This is the primary reason many people choose local deployment.
If you are dealing with contracts, medical records, financial data, or internal documents, sending this data to third-party servers is risky.
When running locally,all data is processed on your own computer and never leaves your device。
Offline Environment Usage
On airplanes, trains, or in places with unstable networks, cloud AI is unusable.
Once downloaded, local models are available forever and do not require a network connection.
Cost Control
Cloud AI charges based on the number of calls or tokens, and heavy usage can become a significant expense.
Local models are downloaded once and can be used freely afterward, with no additional costs.
Customization Possibilities
You cannot modify cloud models; you can only use the features provided.
With local models, you can fine-tune, quantize, modify prompt templates, and customize them entirely according to your own needs.
Comparison of these advantages:
| Feature | Cloud AI | Local AI |
|---|---|---|
| Data Privacy | Data must be uploaded | Data is fully localized |
| Network Dependency | Internet connection required | No network required |
| Usage Cost | Pay per use | One download, unlimited use |
| Customization Capability | Limited | Fully controllable |
| Ease of use | Out-of-the-box | Requires configuration |
| Response speed | Depends on network | Depends on hardware |
Not that cloud AI is bad, but ratherBoth have their own applicable scenariosFor daily chat, use the cloud; for sensitive data, use local; for simple tasks, use the cloud; for special customization, use local.
Hardware Requirements Assessment
Whether a local model can run and how fast it runs mainly depends on your hardware configuration.
CPU Inference vs GPU Inference
There are two ways to run models: CPU inference and GPU inference.
CPU inference uses the computer's main processor to run models. The advantage is good compatibility; almost all computers can run it. The disadvantage is slow speed; large models may take a long time.
GPU inference uses graphics cards. The core advantage isStrong parallel computing capability, making model runs dozens of times faster。
For NVIDIA graphics cards, you need to install the CUDA toolkit; for AMD graphics cards, you can use ROCm; for Intel graphics cards, you can use OpenVINO.
Relationship Between VRAM Requirements and Model Size
VRAM determines how large a model you can run.
The more parameters a model has, the more VRAM it requires. However, with quantization techniques, you can run larger models with less VRAM.
| VRAM size | Runnable models (FP16) | Runnable models (after quantization) | Recommended scenarios |
|---|---|---|---|
| 8 GB | 7B models are somewhat difficult | 7B (Q4), 13B (Q4) barely run | Simple chat, lightweight tasks |
| 16 GB | 7B, 13B models | 7B、13B(Q4/Q8)、33B(Q4) | Daily use, best value |
| 24 GB | 7B, 13B, 33B models | 7B、13B、33B(Q4/Q8)、70B(Q4) | Professional use, smooth experience |
| 48 GB+ | 33B, 70B models | All mainstream models | Research, production environments |
Advantages of the Mac M Series
Apple Silicon (M1, M2, M3 series chips) has unique advantages in local AI.
Apple's Metal framework and unified memory architecture make Macs highly efficient at running local models.
Unified memory meansCPU and GPU share memoryand can automatically borrow memory when VRAM is insufficient.
A MacBook Pro with 16GB of unified memory can smoothly run quantized 7B and 13B models.
Recommended Configuration Plans
Based on different budgets and needs, here are several configuration options:
| Plan | Configuration | Suitable for | Expected experience |
|---|---|---|---|
| Entry-level plan | Any computer (8GB+ RAM) | Beginners who want to experience local AI | Can run small models, relatively slow |
| Best value plan | 16GB RAM + 6GB+ VRAM | Personal daily use | Smooth running of 7B/13B models |
| Professional plan | 32GB RAM + 12GB+ VRAM | Developers, researchers | Smooth running of 33B models |
| Mac plan | M1/M2/M3 + 16GB unified memory | First choice for Mac users | Smooth running of 7B/13B models |
Don't be intimidated by the term "large model." Today's quantization technology already allows 7B models to run smoothly on ordinary computers, and the capability of 7B models is sufficient for most daily tasks.
Ollama: The Easiest Local AI Tool
- Ollama official website:https://ollama.com/
- Ollama supported models list:https://ollama.com/search
- Ollama tutorial:https://www.example.com/ollama/ollama-tutorial.html
Ollama is currently the most popular local model tool. To summarize in one sentence:Install models like installing apps, use AI like using the command line。
Installation and Configuration
Ollama supports macOS, Linux, and Windows, and the installation process is very simple.
Installer download link:https://ollama.com/download
Install with one command:
curl -fsSL https://ollama.com/install.sh | sh
macOS users can download the installer directly, or install with Homebrew:
# macOS 使用 Homebrew 安装
brew install ollama

# 或者下载安装包:https://ollama.com/download
Windows users can simply download the installer from the official website and run it.
After installation, start the Ollama service:
ollama serve
Once you see the service started successfully, you can start using it.
Downloading Models
Ollama's model library is very rich, including mainstream models such as Llama, Qwen, Gemma, and Mistral.
Downloading a model takes just one command:
Example
ollama pull llama3
# Download Qwen (Tongyi Qianwen, Chinese-friendly)
ollama pull qwen
# Download Gemma (from Google)
ollama pull gemma
# Download Mistral
ollama pull mistral
You can also useollama run + model namecommand, which will automatically download the specified model if it is not already present:
ollama run qwen
Run the qwen model, downloading it if it's not available.
Each model has different versions, such as 8B, 70B, or different quantized versions.
You can useollama listto view already downloaded models:
ollama list
Output similar to:
NAME              ID              SIZE      MODIFIED
qwen3.5:latest    6488c96fa5fa    6.6 GB    3 months ago
Command Line Usage
After the model is downloaded, you can run it directly to start a conversation:
# 运行 Llama 3,没有会下载
ollama run llama3

# 运行 Qwen,没有会下载
ollama run qwen3.5
qwen3.5 is more than sufficient for ordinary tasks:
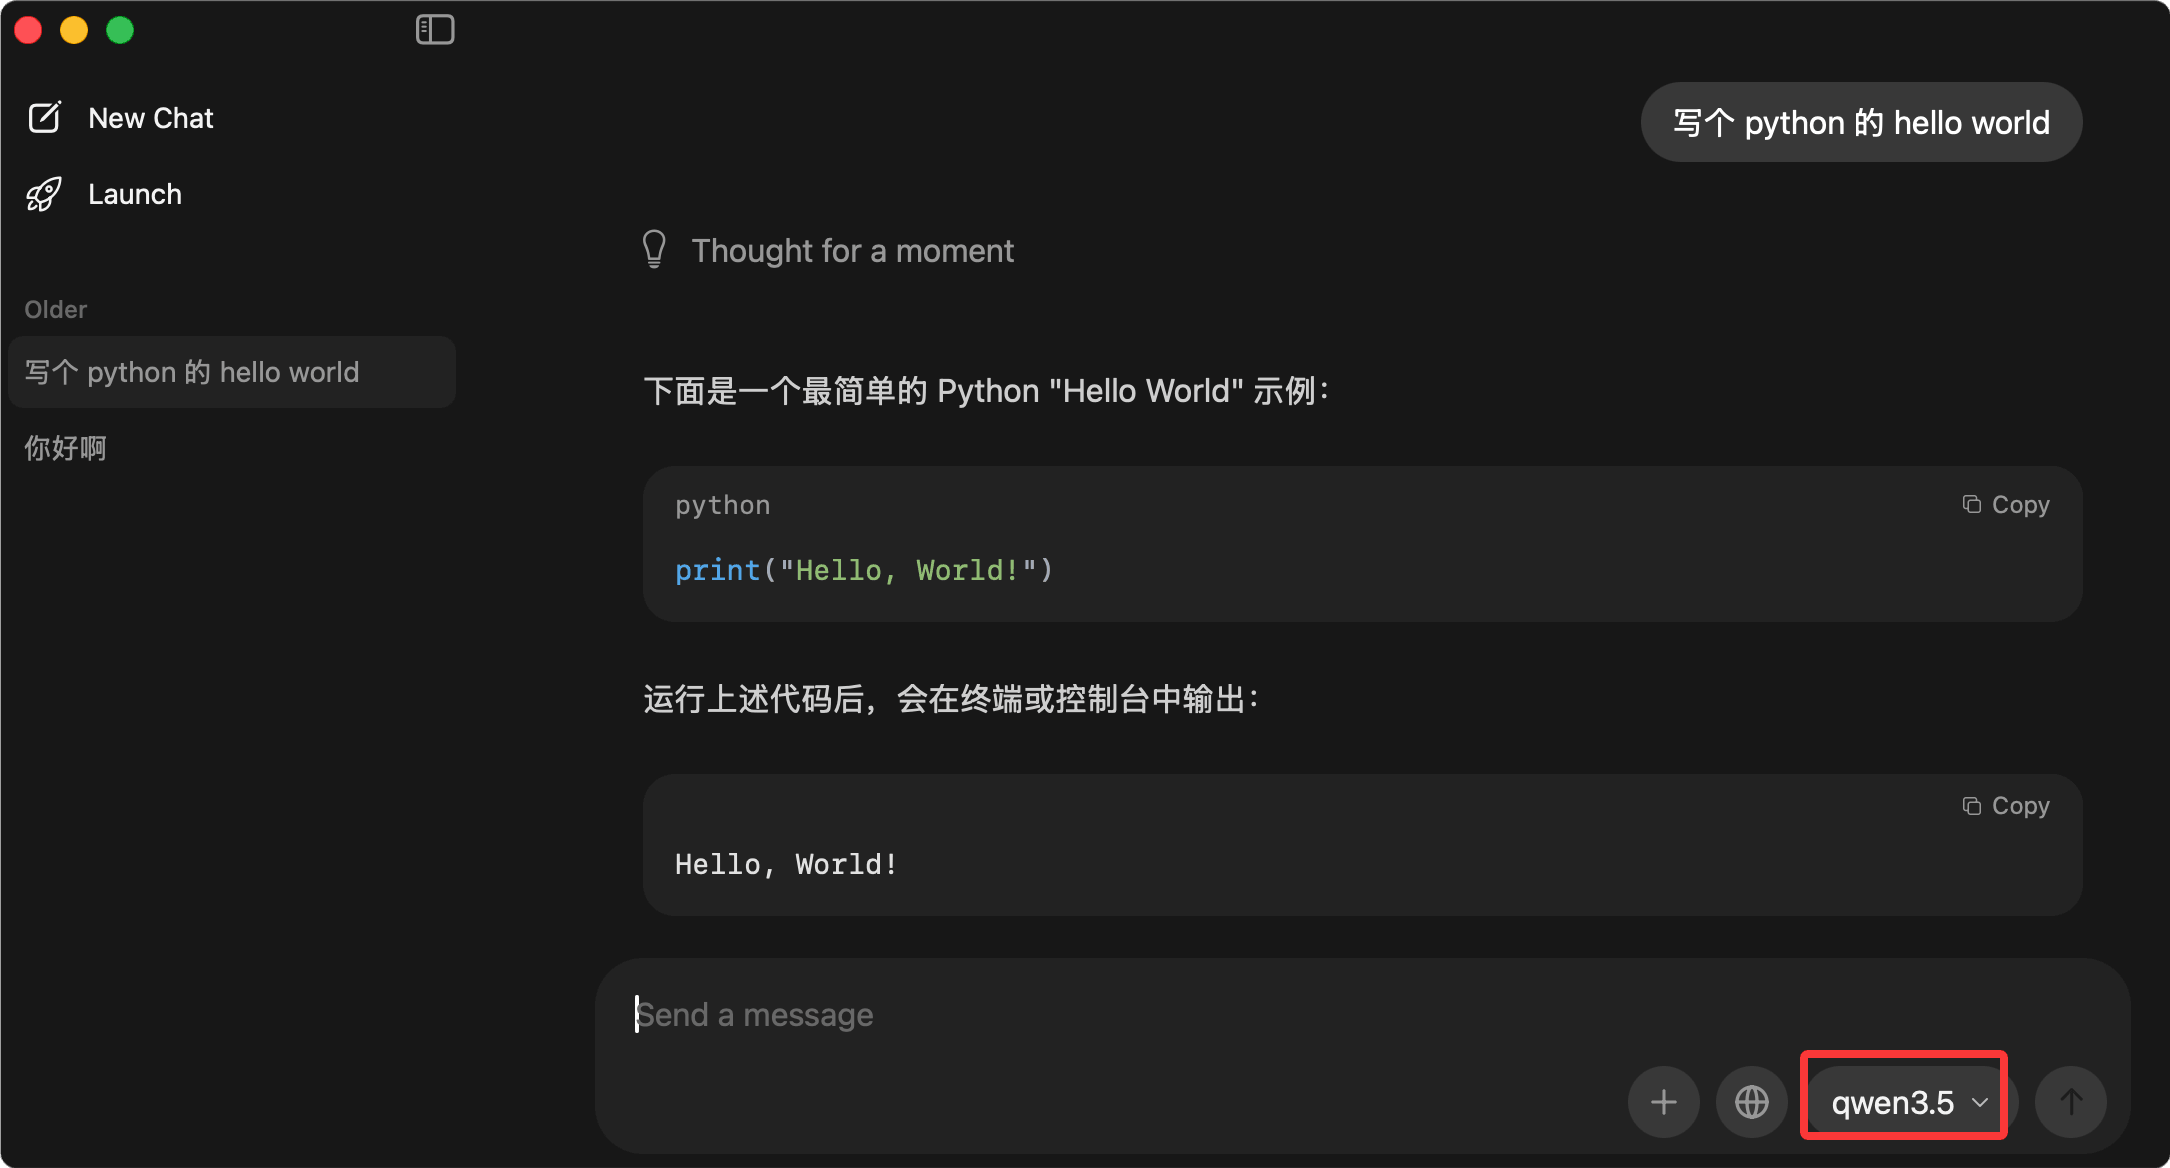
Then you can talk directly to the model:
>>> 你好,请介绍一下你自己
你好!我是 Llama 3,由 Meta 开发的 AI 助手。我可以帮你回答问题、
写作、编程、分析数据等。有什么我可以帮你的吗?

>>> 用 Python 写一个 Hello World 程序
好的,这是一个简单的 Python Hello World 程序:

print("Hello, World!")

>>> /bye  # 输入 /bye 退出
Common commands:
| Command | Function | Example |
|---|---|---|
| ollama pull <model> | Download model | ollama pull llama3 |
| ollama run <model> | Run model | ollama run llama3 |
| ollama list | List installed models | ollama list |
| ollama rm <model> | Delete model | ollama rm llama3 |
| ollama show <model> | View model info | ollama show llama3 |
API Interface Calls
Ollama comes with an HTTP API, so you can call it with code, not just from the command line.
By default, Ollama is athttp://localhost:11434to provide API service.
Call Ollama API with Python:
Example
# Calling Ollama API with Python
import requests
import json
# Ollama API address
OLLAMA_URL = "http://localhost:11434/api/generate"
def ask_ollama(prompt: str, model: str = "llama3") -> str:
"""
Send request to Ollama to get model reply
Args:
prompt: the prompt input by the user
model: the model name to use, defaults to llama3
Returns:
The model's reply text
"""
# Construct request data
payload = {
"model": model, # Model to use
"prompt": prompt, # User input
"stream": False # Do not use streaming output, return all at once
}
try:
# Send POST request
response = requests.post(OLLAMA_URL, json=payload)
response.raise_for_status() # Check if the request was successful
# Parse the returned JSON
result = response.json()
return result.get("response", "")
except requests.exceptions.ConnectionError:
return "Error: Cannot connect to Ollama service, please confirm Ollama is started"
except requests.exceptions.RequestException as e:
return f"Request error: {str(e)}"
# Test it
if __name__ == "__main__":
# Test question 1
question1 = "Please introduce EXAMPLE tutorial in one sentence"
answer1 = ask_ollama(question1)
print(f"Question: {question1}")
print(f"Answer: {answer1}")
print("-" * 50)
# Test question 2
question2 = "Write a Python function to calculate the Fibonacci sequence"
answer2 = ask_ollama(question2)
print(f"Question: {question2}")
print(f"Answer: {answer2}")
Run this script:
Example
pip install requests
# Run the script
python ollama_test.py
If you want a higher-level wrapper, you can use Ollama's official Python library:
Example
# Using the Ollama Python library
# First install: pip install ollama
import ollama
def chat_with_example():
"""
Use the Ollama Python library for multi-turn conversations
"""
# Message history
messages = [
{
"role": "system",
"content": "You are a friendly programming assistant named ExampleBot. Your answers should be concise and practical, with more code examples."
}
]
print("ExampleBot is started! Enter 'quit' to exit.")
print("-" * 50)
while True:
# Get user input
user_input = input(You:)
if user_input.lower() in ["quit", "exit", Exit]:
print(Goodbye!)
break
# Add user message to history
messages.append({
"role": "user",
"content": user_input
})
# Call the model
response = ollama.chat(
model="llama3",
messages=messages
)
# Get reply
assistant_message = response["message"]["content"]
print(f"ExampleBot:{assistant_message}")
print("-" * 50)
# Add assistant reply to history
messages.append({
"role": "assistant",
"content": assistant_message
})
if __name__ == "__main__":
chat_with_example()
Integration with Open WebUI
The command line is convenient, but a graphical interface is more friendly.
Open WebUI is a very beautiful web interface that can connect to Ollama, allowing you to use local models just like ChatGPT.
Install Open WebUI:
Example
docker run -d -p 3000:8080 --add-host=host.docker.internal:host-gateway -v open-webui:/app/backend/data --name open-webui --restart always ghcr.io/open-webui/open-webui:main
# If you don't use Docker, you can also install with pip
pip install open-webui
open-webui serve
After installation, open in browserhttp://localhost:3000, and you'll see an interface that looks a lot like ChatGPT.
Ollama + Open WebUI is currently the most recommended local AI combo—simple to install, friendly interface, and powerful, suitable for the vast majority of users.
LM Studio: Graphical Interface Operations
If you don't like the command line, LM Studio is a great choice—Pure graphical interface, downloading and running models are all done in the window.。
Installing LM Studio
LM Studio supports Windows, macOS, and Linux.
From the official websitehttps://lmstudio.aiDownload the installation package and just install it directly.
Model Download and Management
Open LM Studio, the model library is on the left.
You can search by model name, for example search for "llama", "qwen", "mistral", find the model you want, and click download.
LM Studio will automatically list different versions of the same model:
| Version | Description | Recommended scenario |
|---|---|---|
| Q4_K_M | 4-bit quantization, little quality loss | The choice of most people |
| Q5_K_M | 5-bit quantization, better quality, slightly larger size | Choose this when you have enough VRAM |
| Q8_0 | 8-bit quantization, close to native quality | For those who pursue quality and have enough VRAM |
| FP16 | Full precision, largest size | For research purposes |
Downloaded models will appear in the "My Models" list.
Local API Service
LM Studio can also provide an API service, compatible with OpenAI's API format.
This means that for the OpenAI code you write, you only need to change the API address and Key to use a local model.
Example
# LM Studio is compatible with OpenAI API format
from openai import OpenAI
# Connect to LM Studio local server
# Note: You need to start the server in LM Studio first
client = OpenAI(
base_url="http://localhost:1234/v1",
api_key="lm-studio" # LM Studio can just use this placeholder
)
def ask_local_model(prompt: str, system_prompt: str = "You are a helpful assistant.") -> str:
"""
Calling LM Studio local model via OpenAI-compatible interface
"""
response = client.chat.completions.create(
model="local-model", # This field will be ignored by LM Studio
messages=[
{"role": "system", "content": system_prompt},
{"role": "user", "content": prompt}
],
temperature=0.7,
)
return response.choices[0].message.content
# Test
if __name__ == "__main__":
question = "Introduce the features of the Python tutorial"
answer = ask_local_model(
prompt=question,
system_prompt="You are Example's dedicated customer service, professionally answering questions about programming learning."
)
print(f"Q: {question}")
print(f"A: {answer}")
This feature is very useful—you can use the same code to switch between cloud models and local models as needed.
For users new to local AI, I recommend: first get started with LM Studio to understand the basic concepts and operations; once familiar, use Ollama for automation and integration.
Getting Started with Model Quantization
Quantization is a key technology that allows large models to run on ordinary computers—Run larger models with less VRAM while maintaining most capabilities。
What Is Quantization
Simply put, quantization is reducing the precision of model parameters.
Native models typically store each parameter using 16-bit floating point (FP16) or 32-bit floating point (FP32).
After quantization, we use 8-bit integers (INT8) or even 4-bit integers (INT4) for storage.
Precision decreases, but the size and VRAM requirements are greatly reduced.
For example:
| Precision | 7B model size | 13B model size | VRAM requirement | Quality loss |
|---|---|---|---|---|
| FP16 | 13 GB | 26 GB | High | None |
| Q8_0 | 7 GB | 13 GB | Medium | Very small |
| Q5_K_M | 5 GB | 9 GB | Low | Acceptable |
| Q4_K_M | 4 GB | 7 GB | Very low | Slight |
| Q3_K_M | 3 GB | 5 GB | Extremely low | Obvious |
The rule of thumb: Q8 quantization has almost imperceptible quality loss, and Q4 quantization is sufficient for most tasks.
GGUF Format Explained
GGUF is currently the most popular quantized model format.
GGUF's predecessor is GGML, developed by the llama.cpp project.
Advantages of this format:
-
First,Good cross-platform compatibility—Works on Windows, macOS, and Linux; runs on both CPU and GPU.
-
Second,Supports multiple quantization levels—From FP16 to Q3, choose as needed.
-
Third,Fast inference speed—Heavily optimized for CPU and GPU.
Most local model tools (Ollama, LM Studio, llama.cpp) now support GGUF format.
Differences Between Q4/Q8 Quantization
Q4 and Q8 are the two most commonly used quantization levels.
Q8 quantization is 8-bit; each parameter is stored as an 8-bit integer. The advantage of Q8 isMinimal quality loss, almost identical to the original model; the disadvantage is that the size is still not small enough.
-
Q4 quantization is 4-bit; each parameter is stored as a 4-bit integer. The advantage of Q4 isSmall size and fast speed; the disadvantage is that quality drops noticeably on complex tasks.
How to choose:
| Scenario | Recommended quantization level | Reason |
|---|---|---|
| Very limited VRAM (below 8GB) | Q4_K_M | Being usable is the top priority |
| Daily conversation, simple tasks | Q4_K_M | Best value for money |
| Writing, programming, analysis | Q5_K_M or Q6_K | Balance of quality and speed |
| Pursuing the best quality | Q8_0 | Close to native quality |
AWQ/GPTQ Quantization Schemes
In addition to GGUF quantization, there are two other common quantization schemes: AWQ and GPTQ.
AWQ (Activation-aware Weight Quantization) is characterized byRetaining weights that have a large impact on the results, resulting in smaller quality loss after quantization.
GPTQ (Gradient-based Post-Training Quantization) is characterized byUsing gradient information to optimize quantization, suitable for scenarios with GPU.
These two schemes are mainly used on NVIDIA GPUs that support CUDA.
Simple comparison:
| Quantization scheme | Applicable hardware | Speed | Quality | Recommended tools |
|---|---|---|---|---|
| GGUF | CPU + various GPUs | Fast | OK | Ollama、LM Studio |
| AWQ | NVIDIA GPU | Very fast | Very good | vLLM、Text Generation WebUI |
| GPTQ | NVIDIA GPU | Very fast | Very good | AutoGPTQ、ExLlama |
For beginners, don't worry about these technical details—just use the Q4_K_M version recommended in Ollama or LM Studio. It is the best balance point verified by extensive testing.
Model Selection Guide
There are hundreds of open-source models now; it's important to choose one that suits your needs.
Comparing 7B/13B/70B Models
The number of parameters is an important metric—7B, 13B, and 70B are the most common specifications.
| Specification | VRAM requirement (Q4) | Inference speed | Capability level | Applicable scenarios |
|---|---|---|---|---|
| 7B | 4-6 GB | Very fast | Adequate | Daily conversation, simple tasks |
| 13B | 7-10 GB | Fast | Good | Writing, programming, analysis |
| 33B | 15-20 GB | Medium | Excellent | Complex reasoning, professional domains |
| 70B | 30-40 GB | Slower | Close to GPT-3.5 | Research, production environments |
For most people, the sweet spot is the 13B Q4 quantized version—good capability with acceptable speed.
Recommended Models with Good Chinese Support
Many foreign models have mediocre Chinese capabilities. Here are a few Chinese-friendly models:
| Model name | Developer | Features | Ollama command |
|---|---|---|---|
| Qwen (Tongyi Qianwen) | Alibaba | Strong Chinese capability, well-rounded performance | ollama pull qwen |
| Yi (01.AI) | 01.AI | Good Chinese comprehension, strong reasoning | ollama pull yi |
| DeepSeek | DeepSeek | Strong coding, decent Chinese | ollama pull deepseek-coder |
| Llama 3 | Meta | Strong overall, but Chinese needs fine-tuning | ollama pull llama3 |
| Gemma | Solid foundation, good coding ability | ollama pull gemma |
For Chinese tasks, Qwen is the first choice; its Chinese understanding and generation are top-tier among open-source models.
Task-Specific Model Selection
Different models have different strengths; choose based on your task:
| Task type | Recommended model | Reason |
|---|---|---|
| Everyday conversation, Q&A | Llama 3、Qwen、Mistral | Balanced overall capability |
| Writing, copywriting | Yi, Llama 3, Claude (cloud) | Good writing style, fluent expression |
| Programming, code | DeepSeek-Coder、CodeLlama、StarCoder | Strong code understanding and generation |
| Math, reasoning | Llama 3、Qwen、WizardMath | Good logical reasoning |
| Professional domains (medical, legal) | Models fine-tuned for the domain | Trained on professional data |
A bigger model isn't always better, nor is a newer one—one that fits your hardware and your taskis the best. Start by trying a few 7B models to get a feel, then upgrade.
Hands-On: Building a Fully Offline Local Knowledge Base
One of the most practical use cases for local models is building your own private knowledge base—feed local documents to the model and have it answer questions based on them.。
The entire system runs fully offline; data never leaves your computer.
Technical Approach
We use RAG (Retrieval-Augmented Generation) technology:
1. Split documents into chunks
2. Use an embedding model to convert each chunk into a vector
3. Store vectors in a vector database
4. When asking, convert the question into a vector too
5. Find the most relevant document chunks in the vector database
6. Send the relevant documents and the question together to the local LLM
7. The LLM answers based on the document content
This sounds complex, but it's simple with existing tools.
Implementation with Ollama + LangChain
We'll use Python to implement a simple version:
Example
# Fully offline local knowledge base RAG system
# First install dependencies:
# pip install langchain langchain-ollama chromadb pypdf
from langchain_ollama import OllamaLLM, OllamaEmbeddings
from langchain_community.document_loaders import PyPDFLoader, TextLoader
from langchain.text_splitter import RecursiveCharacterTextSplitter
from langchain_community.vectorstores import Chroma
from langchain.chains import RetrievalQA
import os
class LocalKnowledgeBase:
"""Local knowledge base class implementing fully offline RAG functionality"""
def __init__(self, model_name: str = "llama3", persist_dir: str = "./chroma_db"):
"""
Initialize knowledge base
Args:
model_name: The Ollama model name to use
persist_dir: Vector database persistence directory
"""
self.model_name = model_name
self.persist_dir = persist_dir
# 1. Initialize LLM (local model)
self.llm = OllamaLLM(model=model_name)
# 2. Initialize embedding model (local embeddings)
# Use nomic-embed-text; this model works well for both Chinese and English
self.embeddings = OllamaEmbeddings(model="nomic-embed-text")
# 3. Vector database placeholder
self.vector_store = None
self.qa_chain = None
def load_documents(self, document_paths: list):
"""
Load documents and build vector database
Args:
document_paths: List of document paths
"""
documents = []
for path in document_paths:
if not os.path.exists(path):
print(f"Warning: file {path} does not exist, skipping")
continue
# Select loader based on file extension
if path.lower().endswith(".pdf"):
loader = PyPDFLoader(path)
elif path.lower().endswith(".txt"):
loader = TextLoader(path, encoding="utf-8")
else:
print(f"Warning: unsupported file type {path}, skipping")
continue
documents.extend(loader.load())
print(f"Loaded: {path}")
if not documents:
print("No documents were successfully loaded")
return
print(f"Total loaded {len(documents)} document chunks")
# 4. Split documents
text_splitter = RecursiveCharacterTextSplitter(
chunk_size=500, # Each chunk: 500 characters
chunk_overlap=100 # Overlap between chunks: 100 characters
)
split_docs = text_splitter.split_documents(documents)
print(f"Split into {len(split_docs)} chunks")
# 5. Build vector database
print("Building vector database...")
self.vector_store = Chroma.from_documents(
documents=split_docs,
embedding=self.embeddings,
persist_directory=self.persist_dir
)
print("Vector database built successfully!")
# 6. Build QA chain
self._build_qa_chain()
def _build_qa_chain(self):
"""Build RAG QA chain"""
if not self.vector_store:
print("Please load a document first!")
return
# Build retriever
retriever = self.vector_store.as_retriever(
search_type="similarity",
search_kwargs={"k": 3} # Return the 3 most relevant chunks
)
# Build RAG chain
self.qa_chain = RetrievalQA.from_chain_type(
llm=self.llm,
chain_type="stuff",
retriever=retriever,
return_source_documents=True
)
def load_existing_db(self):
"""Load existing vector database"""
if os.path.exists(self.persist_dir):
self.vector_store = Chroma(
persist_directory=self.persist_dir,
embedding_function=self.embeddings
)
self._build_qa_chain()
print("Loaded existing vector database")
return True
else:
print("No existing vector database found")
return False
def ask(self, question: str) -> dict:
"""
Ask the knowledge base a question
Args:
question: question
Returns:
A dictionary containing the answer and reference sources
"""
if not self.qa_chain:
return {"error": "Please load a document or an existing database first!"}
# Construct prompt template to encourage Chinese answers
result = self.qa_chain.invoke({
"query": f"""Please answer the following question in Chinese. If the answer is in the context, point it out explicitly.
If the answer is not in the context, honestly say "Unable to answer based on the provided information."
Question: {question}
"""
})
return {
"question": question,
"answer": result["result"],
"sources": [doc.page_content for doc in result["source_documents"]]
}
# ============================================
# Usage example
# ============================================
if __name__ == "__main__":
# 1. Create a knowledge base instance
kb = LocalKnowledgeBase(model_name="qwen") # Use Qwen, better for Chinese
# 2. Try to load an existing database; otherwise, load documents
if not kb.load_existing_db():
# Prepare some documents, e.g., save some EXAMPLE tutorials as txt
sample_docs = [
"/Users/example/documents/example_python_tutorial.txt",
"/Users/example/documents/company_handbook.pdf",
]
kb.load_documents(sample_docs)
# 3. Interactive Q&A
print("=" * 50)
print("Example local knowledge base has started!")
print("Enter your question, or type 'quit' to exit")
print("=" * 50)
while True:
user_input = input("\n"Your question: ")
if user_input.lower() in ["quit", "exit", "Exit"]:
print("Goodbye!")
break
if not user_input.strip():
continue
# Ask a question
result = kb.ask(user_input)
if "error" in result:
print(f"Error: {result['error']}")
continue
print(f"\n"Answer: {result['answer']}")
print("\n"Reference sources: ")
for i, source in enumerate(result["sources"], 1):
print(f"\n[{i}] {source[:200]}...")
Before using this system, you need to download the embedding model:
Example
ollama pull nomic-embed-text
# Download main model (if not already downloaded)
ollama pull qwen
This way, you have a private knowledge base system that runs entirely locally.
You can add your own notes, documents, and e-books, and let AI help you search and answer questions.
All data in this system stays on your local machine—documents on your hard drive, vector database in your directory, models on your computer—so you don't need to worry about data leaks at all.
Performance Optimization Tips
The local model is running, but how can you make it faster? Here are some practical tips.
Choosing the Right Quantization Level
This is the simplest and most effective optimization—the lower the quantization level, the faster the speed.
If Q4 works, don't use Q8; if Q8 works, don't use FP16.
Adjusting Context Window Size
The larger the context window, the more computation is required.
If you don't need a long context, you can set it in Ollama's Modelfile:
Example
# Create a new file Modelfile
echo "FROM llama3
PARAMETER num_ctx 2048" > Modelfile
# Create the custom model
ollama create llama3-fast -f Modelfile
# Run
ollama run llama3-fast
Reducing the context from the default 8192 to 2048 will make it noticeably faster.
Using GPU Acceleration
If you have an NVIDIA GPU or an Apple Silicon Mac, make sure Ollama is using the GPU rather than the CPU.
Ollama will automatically detect and use the GPU, but sometimes you need to verify it.
In the Ollama startup logs, you should see messages like "Metal GPU activated" or "CUDA activated".
Using Faster Sampling Parameters
Some sampling parameters can affect speed:
Example
# File: Modelfile.fast
echo "FROM llama3
PARAMETER temperature 0.7
PARAMETER top_k 20
PARAMETER top_p 0.9
PARAMETER num_predict 256" > Modelfile.fast
# Create and run
ollama create llama3-optimized -f Modelfile.fast
ollama run llama3-optimized
Parameter descriptions:
| Parameter | Description | Optimization Suggestions |
|---|---|---|
| temperature | Control Randomness | Moderate is fine, doesn't affect speed |
| top_k | Limit candidate word count | Set it smaller (20-40) to speed up |
| top_p | Cumulative probability threshold | Default 0.9 is fine |
| num_predict | Maximum generated token count | Limit as needed |
| num_ctx | Context window size | Just enough is fine, the smaller the faster |
Disabling Unnecessary Features
If you're using API calls and don't need streaming output, you can set stream to false.
Although this won't make inference faster, it can reduce network transmission overhead.
Other extensionsPerformance optimization is an art of balance—speed, quality, and memory cannot all be achieved at once. Find the balance point that suits your needs.