1. Go to the official website to find the installation package you need: https://dev.mysql.com/ , Path: DOWNLOAD-->MYSQL Community Edition (GPL)-->MYSQL on Windows (Installer & Tool)
Or click directlyhttps://dev.mysql.com/downloads/windows/installer/to view the latest version.
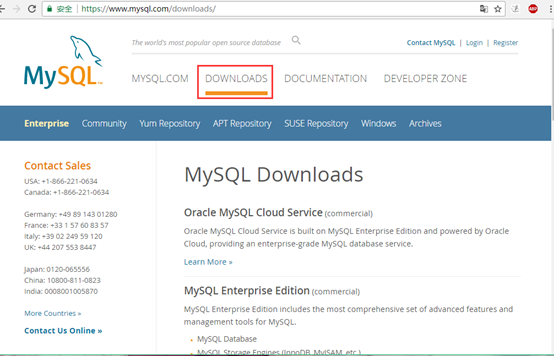
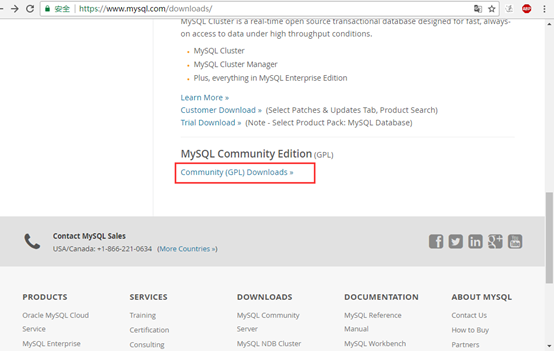
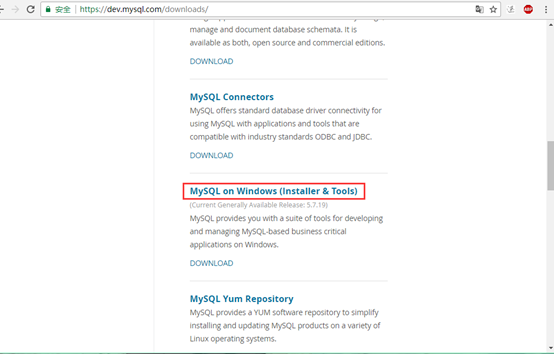
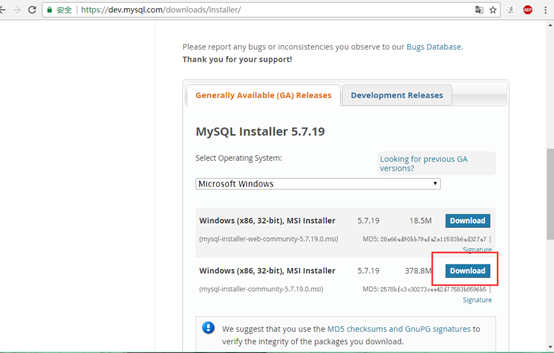
2. Find the required installation package.
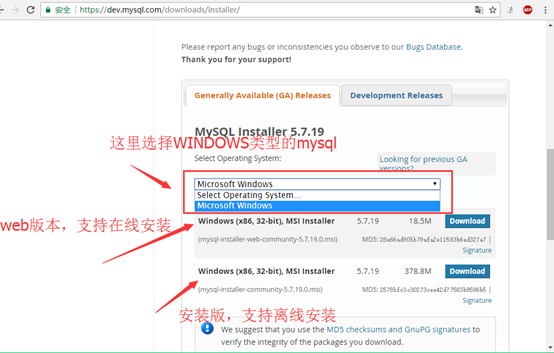
3. Click Download. Here, the installation version (mysql-installer-community) is selected.
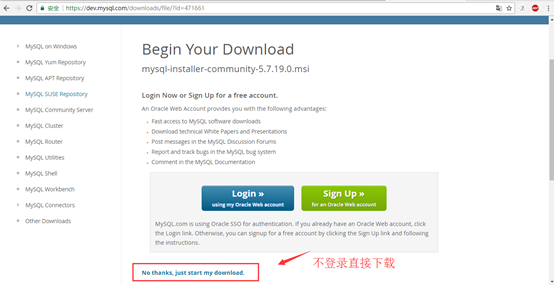
4. Choose to download without logging in.
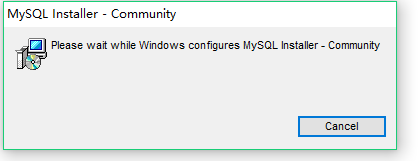
5. Double-click to run the downloaded mysql-installer-community-5.7.19.0.msi. The program will take some time to run, so please wait.
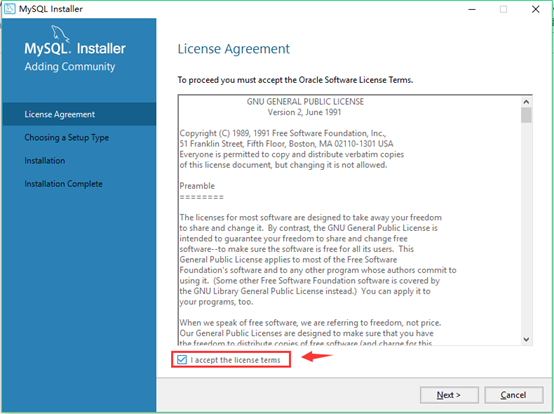
6. After it runs successfully, the welcome screen appears. Select "I accept the license terms", otherwise you cannot proceed to the next step.
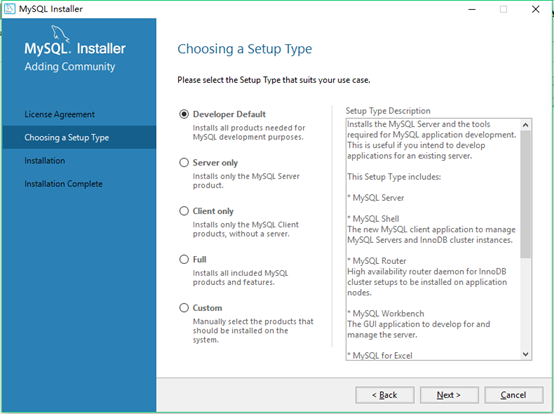
7. Enter the type selection page. Because I need MySQL cloud services, I chose Developer Default (section 7.1 is the default installation steps). If you only want to install MySQL Server, choose Custom mode (section 7.2 steps are for selecting the server type you need; the selected items are used for some data analysis).
- Developer Default: installs all products required for MySQL development
- Server Only: installs only the MySQL Server product
- Client Only: installs only the MySQL client products without the server
- Full: installs all included MySQL products and features
- Custom: manually select the products that should be installed on the system
7.1 In Developer Default mode, the installer detects that the following programs will not install successfully. Click Next to proceed to the next installation step —> jump to step 8.
Check Requirements: The requests for the following products failed. The installer will automatically attempt to resolve some of these issues. Requirements marked as Manual cannot be resolved automatically. Click these items to try to resolve them manually.
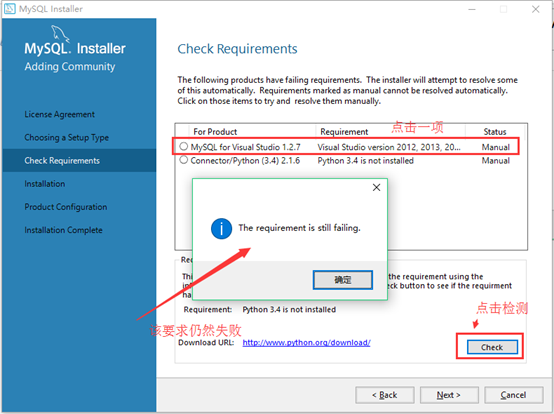
Description of programs detected as uninstallable:
Visual Studio: It is a code editing tool (can write C#, Visual Basic, C++, TypeScript, F#). If you want to install it, install one of the Visual Studio versions as required: 2012, 2013, 2015, 2017.
Connector/Python 3.4: Since the computer has Python 3.6, the 3.4 version was not selected. If you don't have Python installed, you can install some content as required.
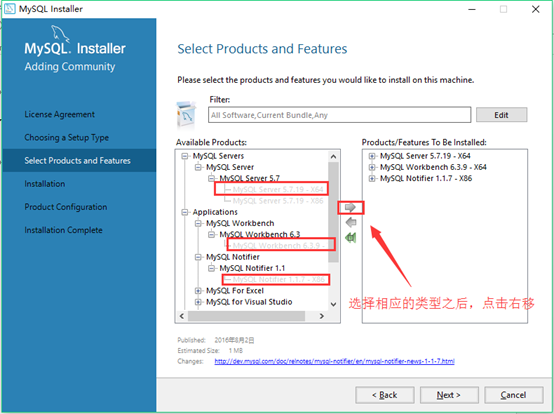
7.2 Select MySQL Server 5.7.19 x64
Select MySQL Workbench (MySQL's workbook) 6.3.9 x64
Select MySQL Notifier 1.1.7 x86 (since there is only one option here, x86 was selected). Click Next to proceed to the next installation step —> jump to step 9.
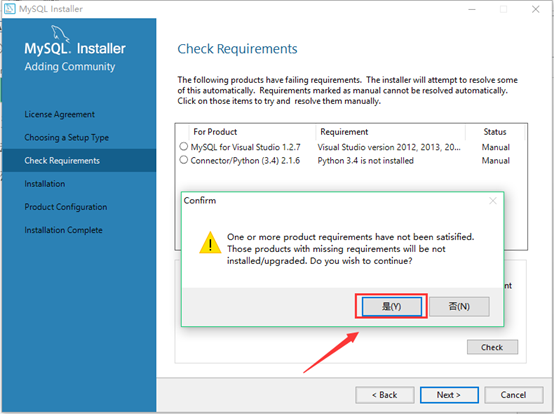
8. When we clicked Next, the installer displayed a prompt: (One or more product requirements have not been satisfied. Products that meet the requirements will not be installed/upgraded. Do you want to continue?). Here, I chose: Yes.
9. On the installation screen for the selected products, we can see the programs that need to be installed next. Click Execute.
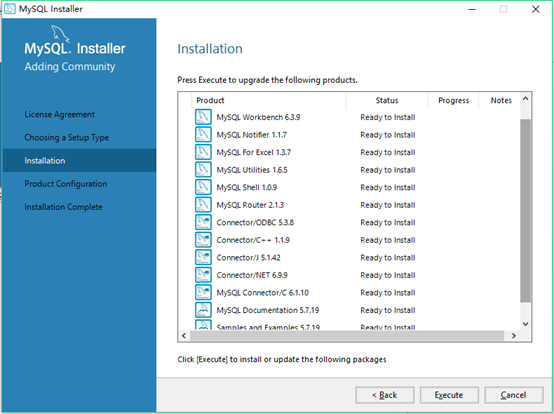
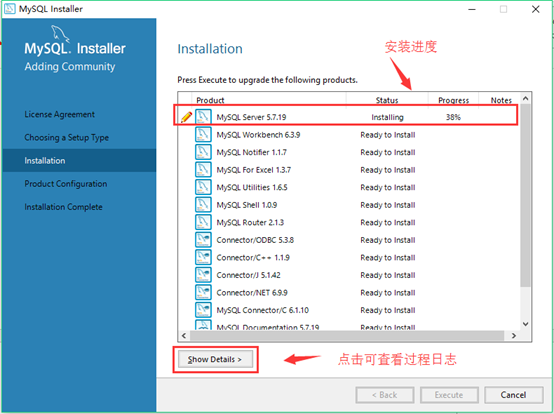
10. Installation progress screen. Installation takes some time. Click 'Show Details' to view the installation log.
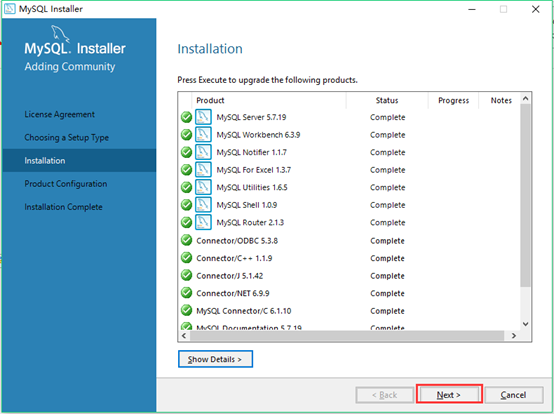
11. After the program installation is complete, click Next.
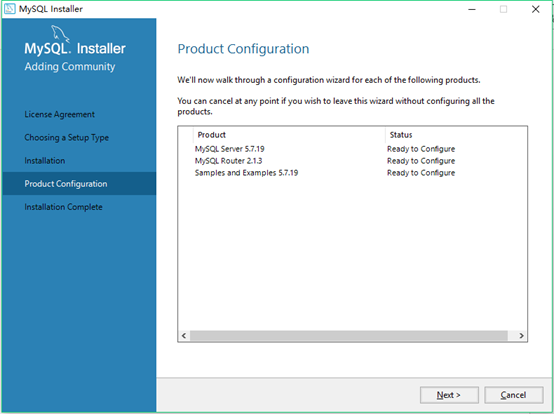
12. On the Product Configuration page, you can see the programs that need to be configured. Click Next. (English introduction on the page: "We will now walk you through the configuration wizard for the following products. You can cancel at any time if you wish to leave this wizard without having to configure all the products.")
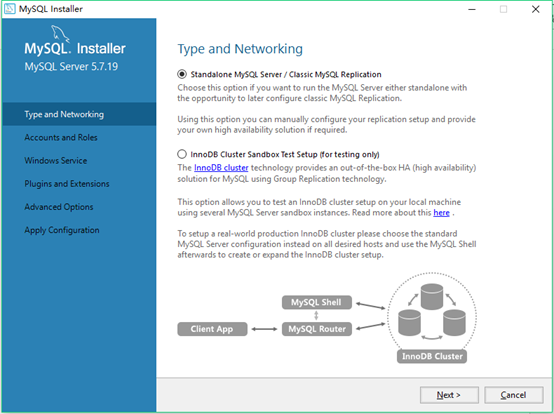
13. First, configure the MySQL Server type and network: Type and Networking. There are two MySQL Server types here. Select the first type and click Next.
A brief introduction to the two types:
1. Standalone MySQL Server / Classic MySQL Replication: independent MySQL server / classic MySQL replication.
Choose this option if you want to run the MySQL Server either standalone with the opportunity to later configure Classic MySQL Replication: choose this option if you want to run the MySQL server standalone, with the opportunity to configure Classic MySQL Replication later.
- 2. innodb cluster sandbox thst setup(for testing only):
InnoDB Cluster sandbox setup (for testing only)
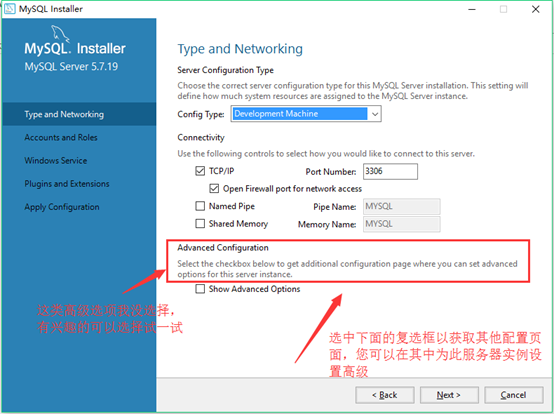
14. Set the server configuration type and connection port: continue by clicking Next.
Config Type: Select Development Machine, which is sufficient for small-scale use and learning.
Port Number: Enter 3306. You can also enter another port, preferably between 3306 and 3309.
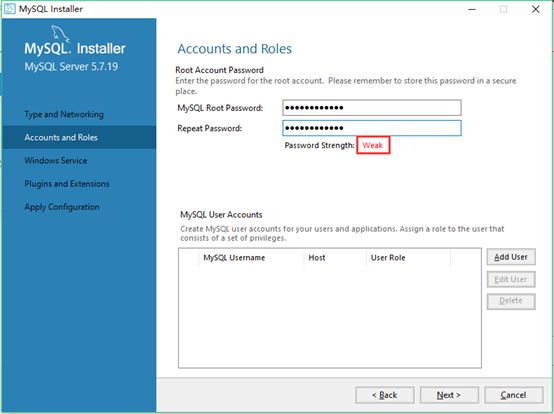
15. Configure the root password (remember this password). The system indicates that this password is weak.
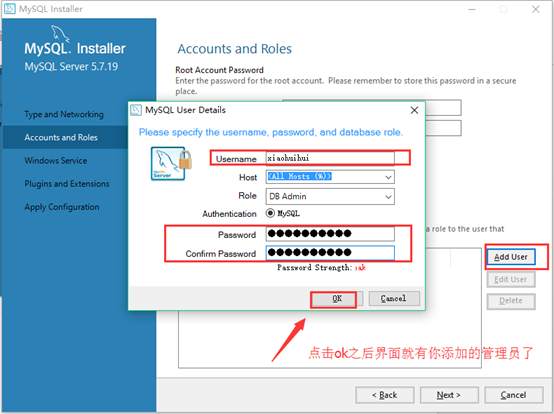
16. Add other administrators. Click 'Add User', enter the username and password, then click OK. (If the added administrator is only allowed to log in locally, change the host tolocal), and after returning to the screen, click Next.
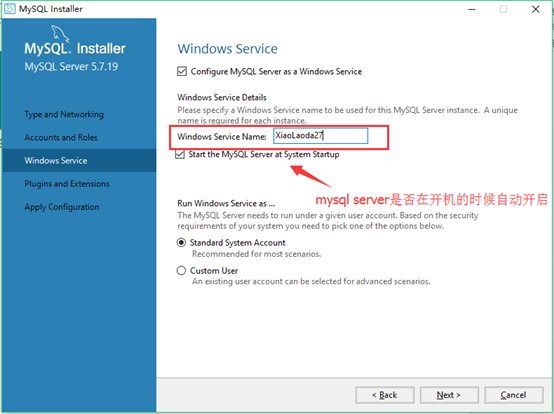
17. Configure the name of MySQL in the Windows system and choose whether to start the MySQL service at boot. Other settings were not modified. Click "Next".
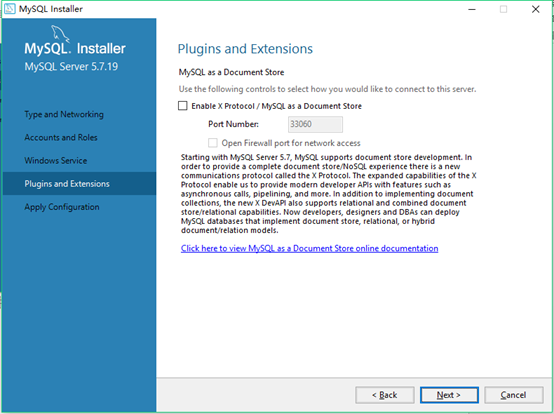
18. The Plugins and Extensions page was not modified; go directly to the next step.
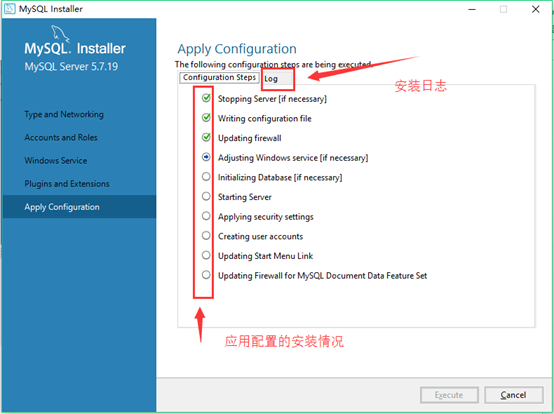
19. MySQL Server: Apply Configuration (apply configuration page). Select Execute to apply the installation configuration.
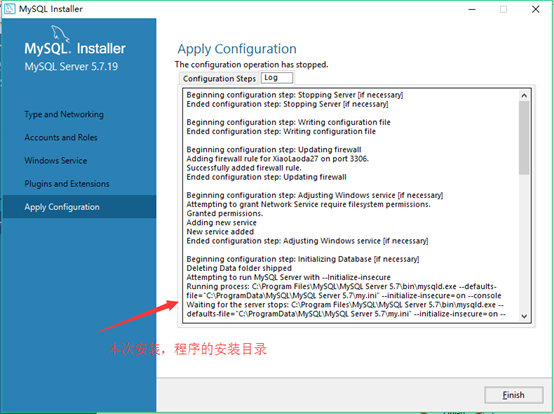
20. MySQL Server: Apply Configuration log. Select Finish.
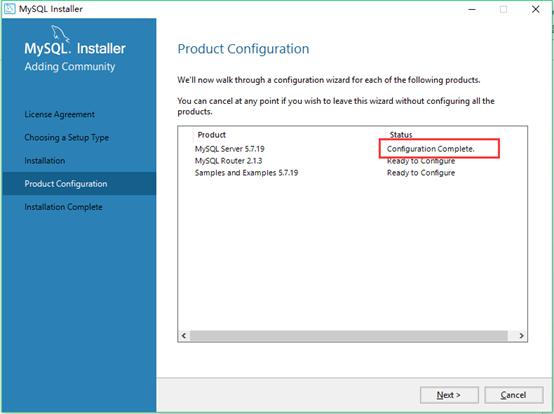
21. The installer returns to the Product Configuration page. At this point, we can see that MySQL Server was installed successfully. Continue to the next step:
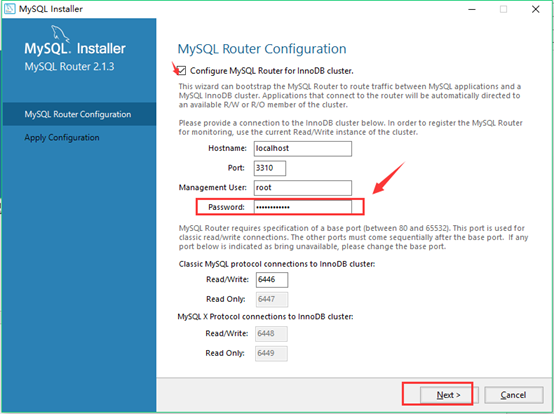
22. Configure MySQL Router: Check 'Configure MySQL Router for InnoDB Cluster' and enter the password. (If you don't want to enter the password, you can just click it once to uncheck it.) Click Next.
23. MySQL Router: Apply Configuration (apply configuration page). Click Execute.
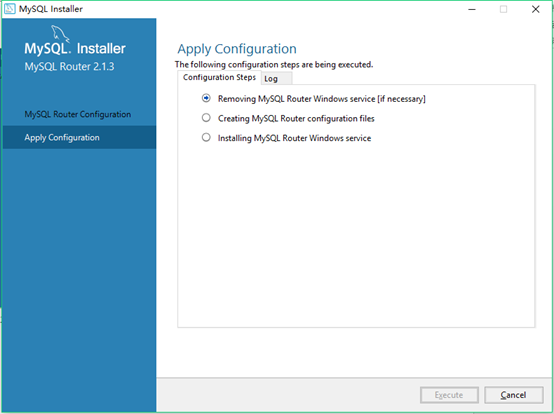
24. After the installation is complete, click Finish.
25. Check the root password.
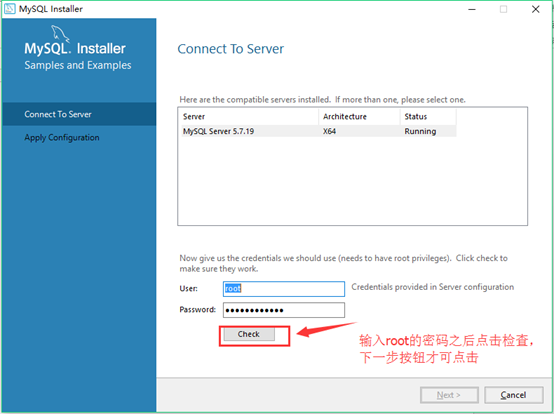
26. Install some Server components. As usual, click Execute, and after completion, click Finish.
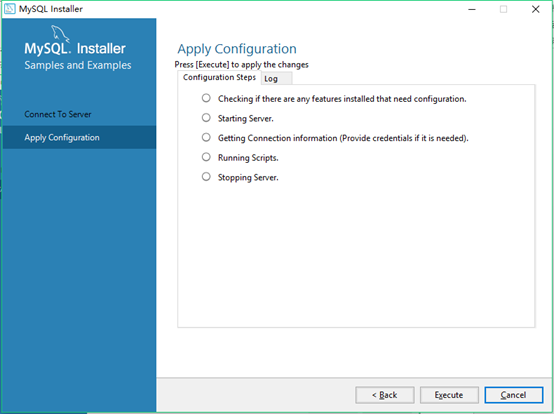
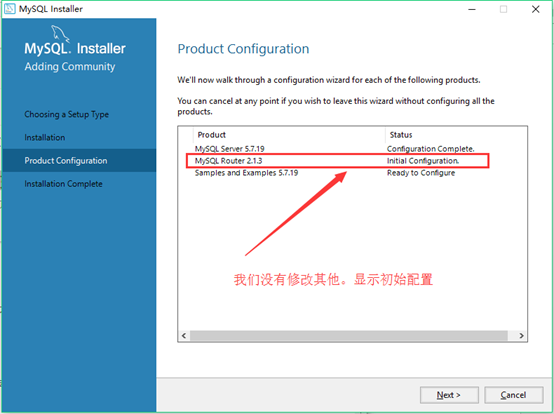
27. The program returns to the Product Configuration page. Continue to the next step:
28. Installation wizard completion screen.
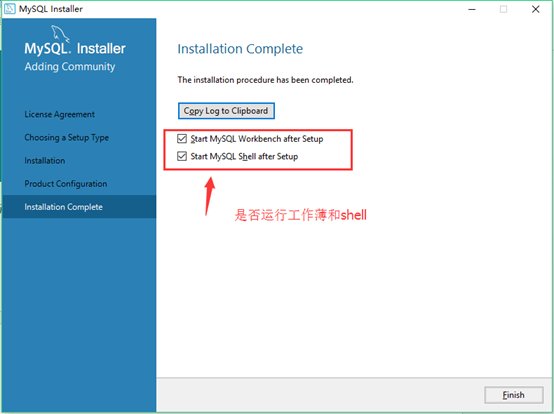
29. Double-click to run the previously downloaded installation package, and you can see the products we installed.
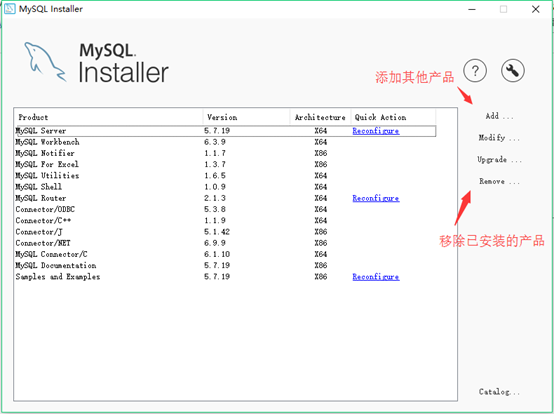
30. Configure the MySQL environment variables.
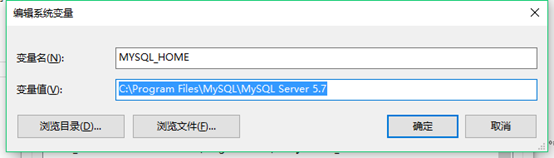
During the installation above, we saw that the default MySQL installation path is: C:\Program Files\MySQL\MySQL Server 5.7
Right-click 'My Computer' —> Properties > Advanced System Settings > Environment Variables > Create a new MYSQL_HOME, and enter the installation directory:
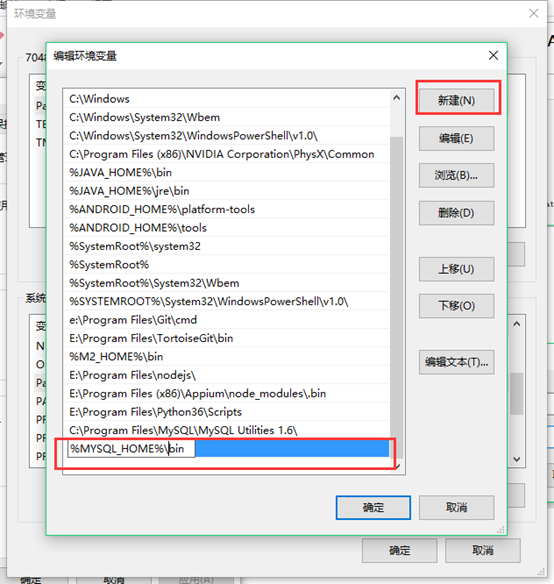
Find 'Path' and edit it: enter %MYSQL_HOME%\bin
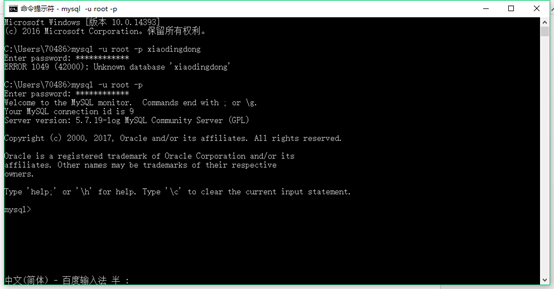
Open cmd and enter: mysql -u root -p
Enter the root password.
Original link: https://www.cnblogs.com/xiaodingdong/p/7223245.html