Preface
I had been wanting to write something like this for a while. When I first got started, I also carefully read Liao Xuefeng’s tutorial, but it seemed to me that it covered too much, and it still brought a lot of redundant and repeated operational overhead. So I wanted to reduce its cost in my work, but after searching I didn’t find a satisfactory tutorial. In the new year, I’ve sorted out my own experience.
Maybe there are many male experts here who think Git is so simple and that command-line operations are SO EASY, and perhaps even look down on GUI as something for low-end users. Well, if that’s the case, you can just consider me a fraud and click the close button in the top-right corner.
I’ve always felt that something like Git is only a not-fully-essential tool for me. I don’t want to become an expert in using it. Similar things: today there’s Git, tomorrow there might be Gat, or Gay? So I want to quickly grasp the important daily operations I need, ideally in 10 minutes. That would be great. If you have similar thoughts, okay, no more nonsense, let’s get started.
(The entire article is limited to Windows systems.)
What is Git?
Install Git, get a rough idea of it.What is Git for?。
Permission verification
First, your data is stored on a remote server, and the server needs to identify you. [It uses] an RSA-encrypted string.
Launch GUI, menu - Help, [Step1-Create key]Generate SSH KEY
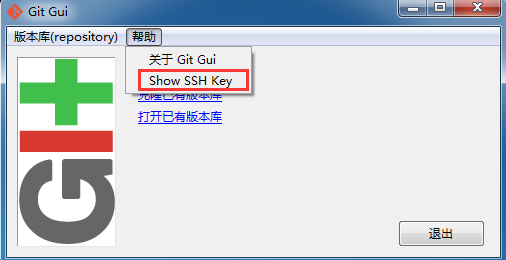
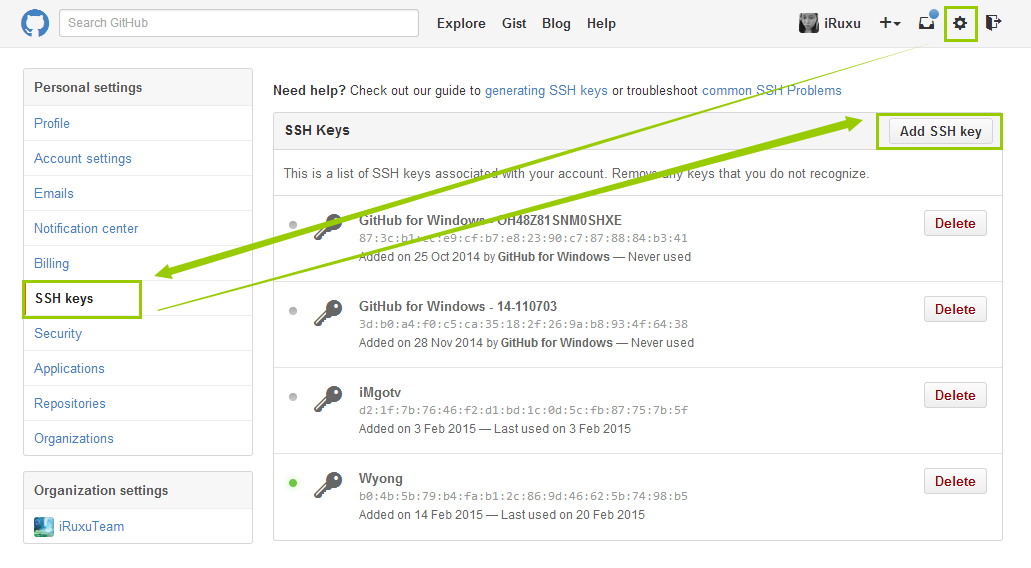
【Step2-Add key]Go to your code hosting server, and in your account settings, add it.
For example, on GitHub, the address. The title is arbitrary; for instance, you can use Home, company, etc. as identifiers to distinguish.
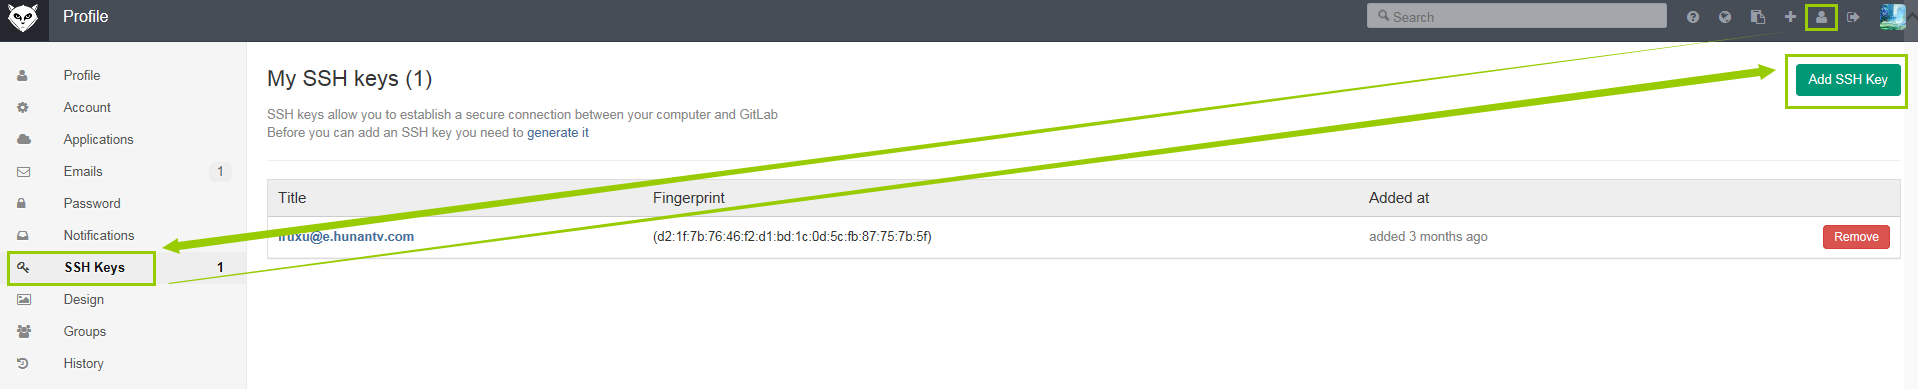
Demo in GitLab
Save account
If you don’t configure this, every time you commit, it will ask you to enter your password. So let’s set this up first.
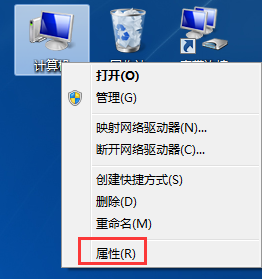
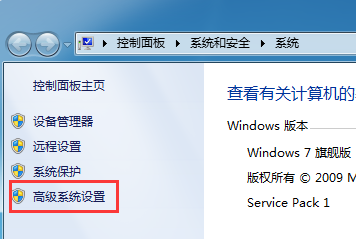
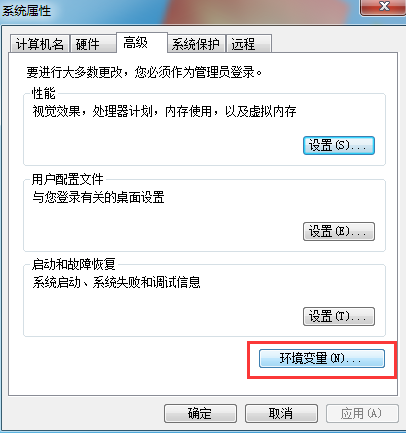
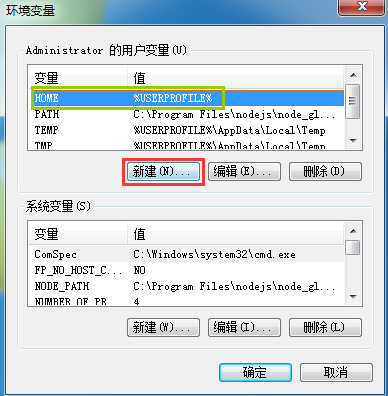
[Step 3.1 - Add environment variable】
My Computer - Properties - Advanced system settings - Environment variables - New variable
Variable name HOME, variable value %USERPROFILE%
[Step 3.2 - Create account file】
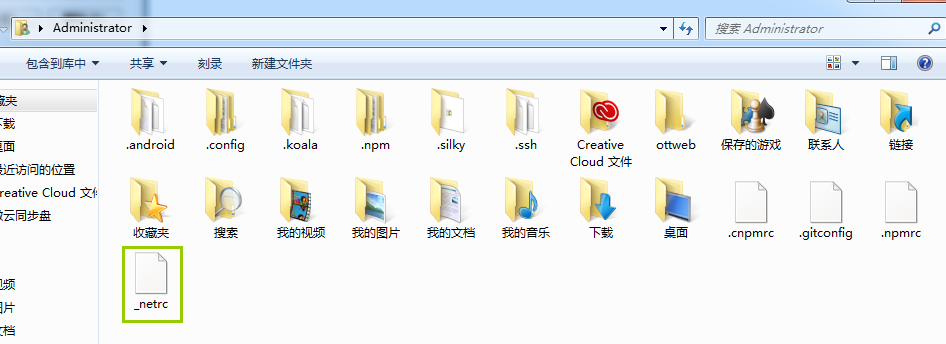
In Start - Run, open %Home%, which is the Windows administrator user folder.
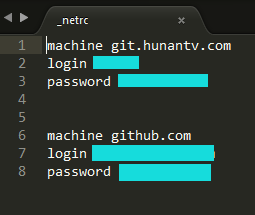
Create a file named "_netrc", fill in the server address and account password you want to save, and save it.
Operation process
If you’ve used SVN, you’ll roughly understand the workflow. If not, that’s fine.
Initialize(Git init)
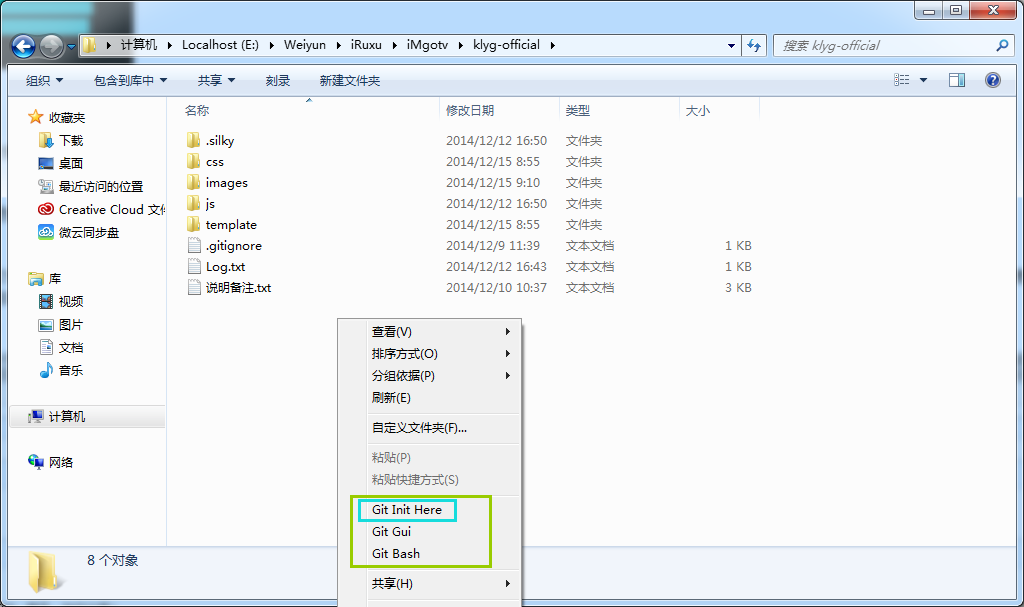
As the name suggests, it means creating a new project, just like creating a new canvas in PS. In your newly created folder, right-click to create. If you click Git Bash, it uses this directory as the current directory and enters the command-line state.
Add(Git add)
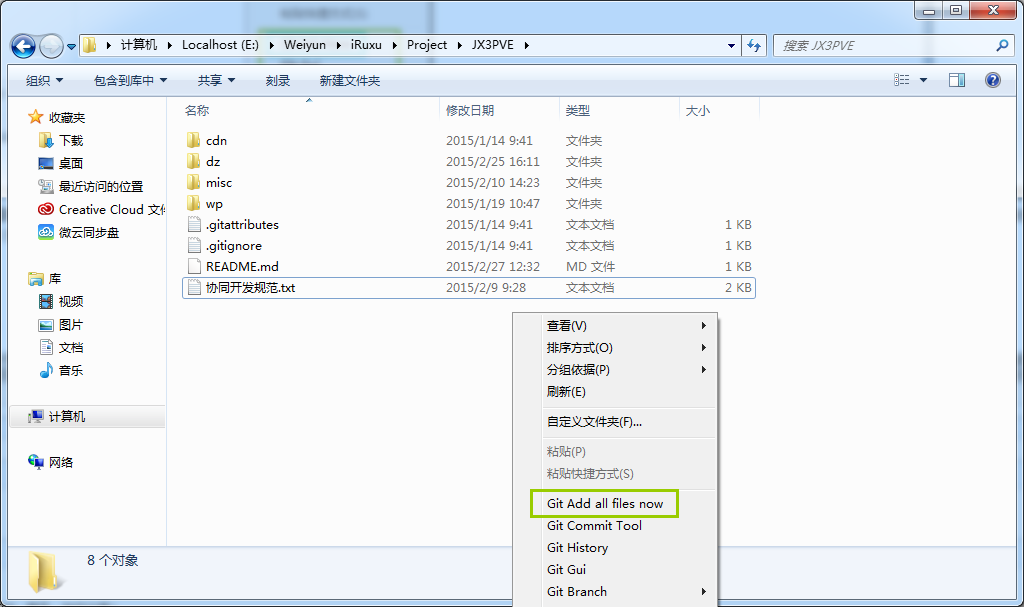
Adding is not committing code to the remote Git repository. Git also does not automatically save every change you make to your code. You’ve modified many files, but not all modifications are ultimately intended to be committed. So which ones do you plan to submit? You can add them in to be committed later; this is called staging changes. It’s very simple. For example, on my local computer I have the entire project complete, even including some files with account passwords, but I only ADD files other than the account passwords; I don’t stage changes to the account password files. If it’s not ADDed, it won’t participate in subsequent operations. Usually I just stage everything directly; it will automatically find all changed files, and files that don’t need to be committed are placed in an ignored folder. (We’ll talk about ignoring below.)
Ignore(.gitignore)
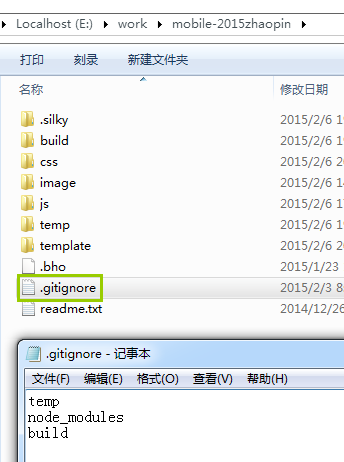
But in fact, most of our files are committed together, and we don’t screen them one by one. Or, for large source files like PSD and transitional files that are not part of the final product display, we can put them together in a temporary folder and ignore this folder.
Commit(Git commit)
Committing represents that the files previously ADDed have been confirmed to be committed to the Git repository. Note that if you change the indentation of the code (even without modifying content), by default it will be recognized as the entire code having changed.When committing, you are required to write a message.。
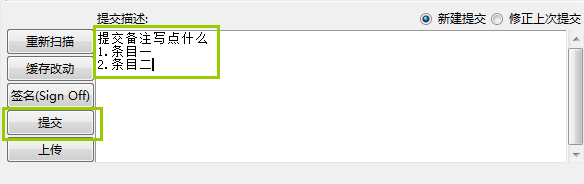
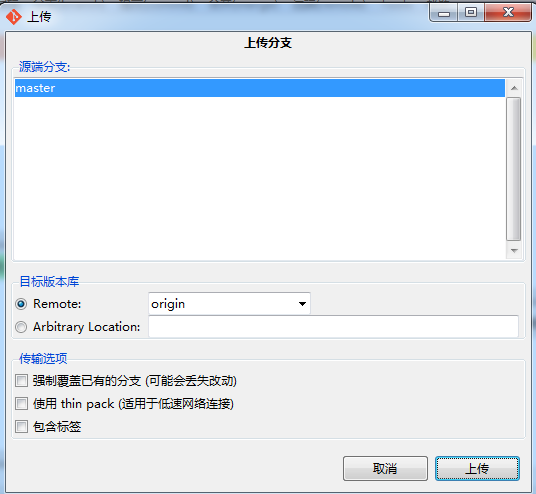
Push(Git push)
As the name suggests, pushing means uploading to the remote server. Then teammates can see our crappy code (so shy).
Fetch remote code(Git remote/fetch)
For example, you’ve finished something at the company, can’t sleep tonight because you’re very excited, and plan to continue working at home. Then on your home computer, after completing all the installation, configuration, and account setup as above, first pull down what you made at the company (though if the company is on an intranet, that’s not possible, but if it’s on GitHub, it is). Or if you’re developing something with teammates, you also need to fetch theirs first. As for how to operate, here are the steps below. For now, you just need to know what the "fetch" that the experts keep talking about with a brushing-teeth smile of exposed lower teeth actually is.
 Come on, read with me: fetch~~ (I’m afraid you can’t imagine it...)
First, set up the association with the remote address: Git remote.

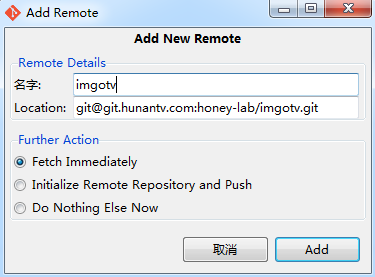
Fill in the SSH address and project name. There are 3 options below:
First: immediately fetch the latest changes (so if you’re cloning a remote project locally, you can also do it this way).
Second: for a newly created local project, initialize the remote repository and publish it.
Third: do nothing.
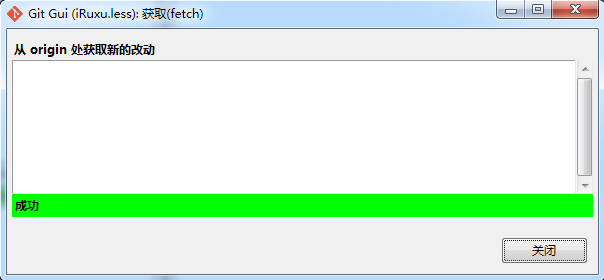
During the progress of the project, fetch the latest changes of the repository: Git fetch.
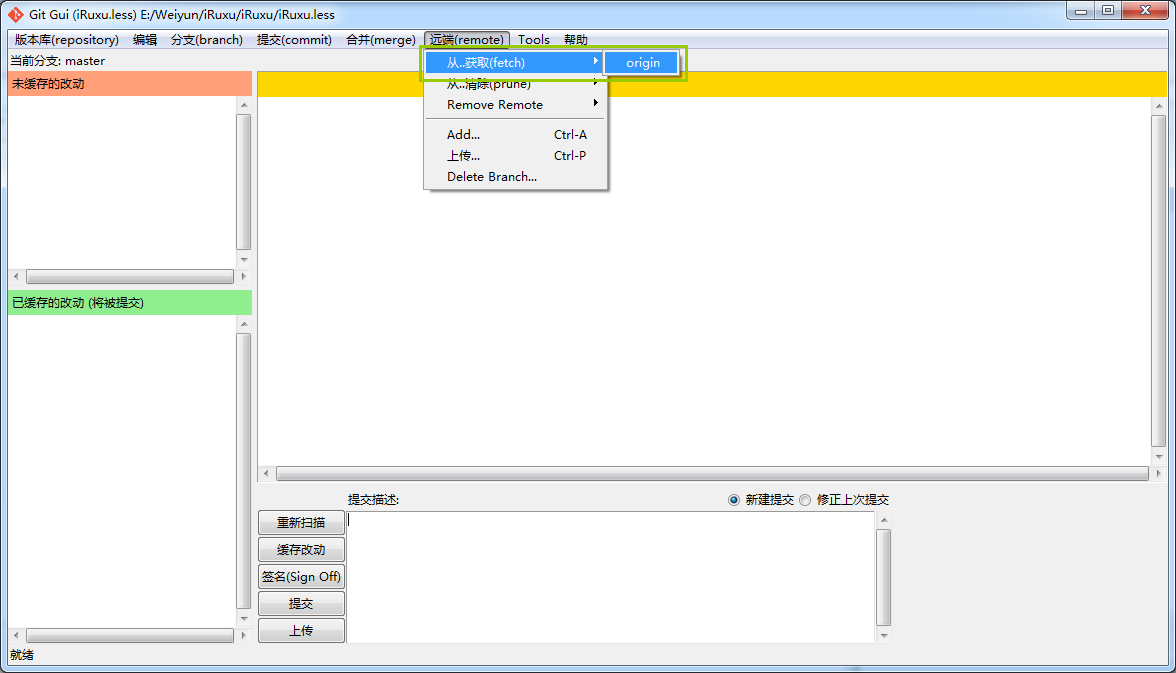
Choose which branch of the remote repository to fetch updates from; if there is none, there is only the main branch.
If it indicates success, the changes have been stored in the temporary area, and you will need to perform a merge operation shortly. If there are no changes, the list will be empty, for example:
Merge(Git merge)
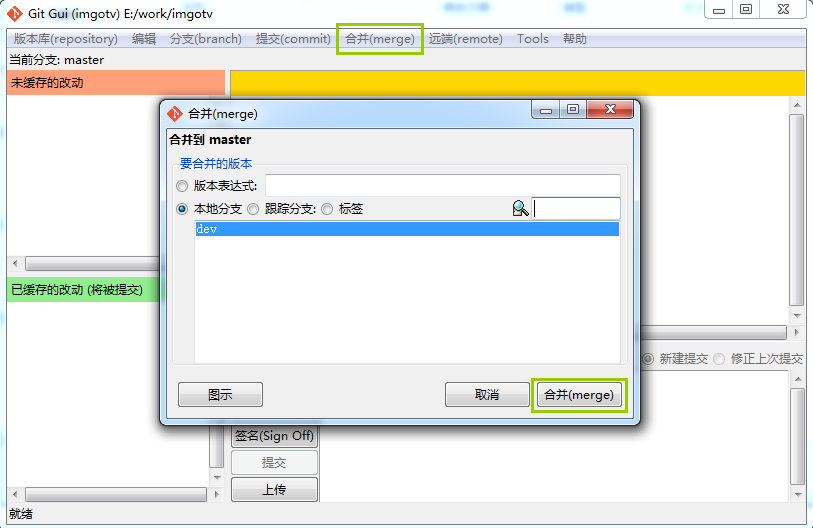
Please note: regardless of whether you have code locally, after fetching, you always need to merge. That is, after fetching, the expert’s code is still in a little dark room, and we need to put it into our own pocket.
Choose Merge - Local merge, then select the local branch (if you haven’t created a branch, there is only the main branch, master).
Conflict handling(Conflict)
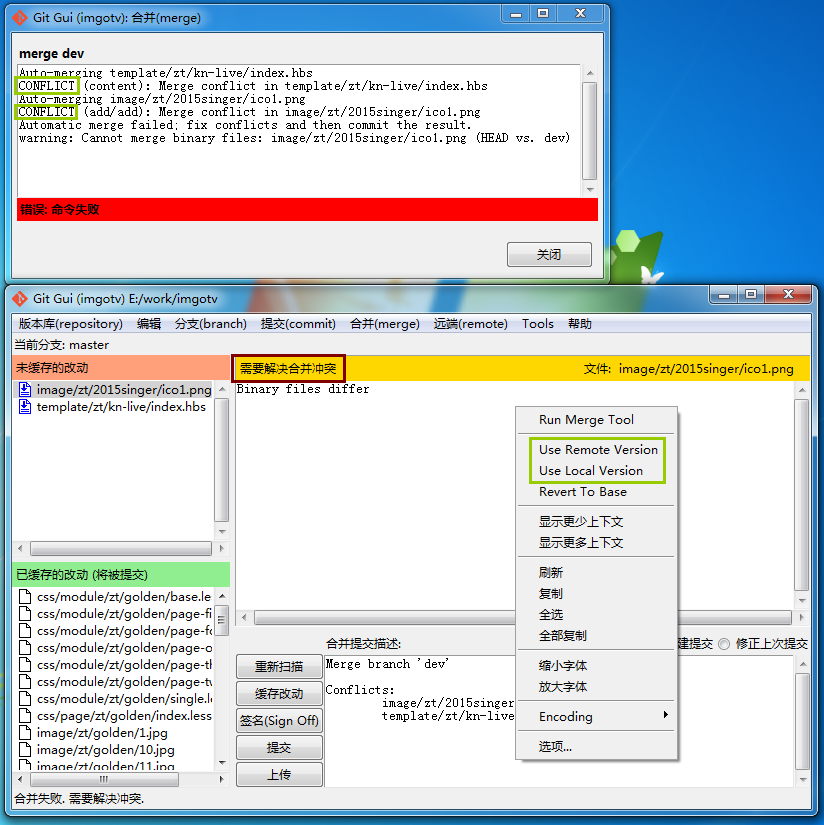
During the merge process, some red files and a bunch of exclamation marks may appear. At this point, clicking around in a panic won’t help. Don’t worry, the program isn’t broken; it’s just files with conflicts. For example, student A wrote width:1180px, and you wrote width:auto. Then whose version should be used?
In the GUI main content area,Right-click in the content areaYou can choose: Use local version or Use remote version. Use yours or your teammate’s? Or you can also integrate it yourself.
There are also branches and some advanced features. If you need to understand them, you can explore them on your own. The operations above are already enough to meet simple development needs.
Summary
1. First perform one-time operations such as installation, key addition, and account setup.
2. Workflow:
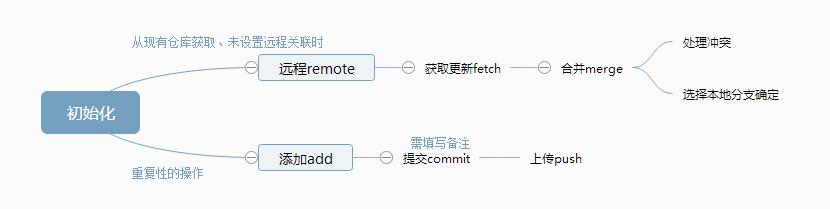
Don’t you think it’s so easy? Hurry up and have a try!
Source: http://www.cnblogs.com/iruxu/p/gitgui.html