In this article, we discuss an important component in Android application development — Android Service. Unlike Activity, a Service runs in the background in Android. A Service has no UI and its lifecycle is also different from that of an Activity. Using a Service, we can perform some background operations, such as loading a web page from a remote server. We can use a Service to implement multitasking in Android.
Android Service Overview
We know that if system resources become tight, an Android Activity can be started, stopped, destroyed, or even recreated. A Service, on the other hand, is designed to have a longer lifecycle. A Service in Android can be started from an Activity, a Broadcast receiver, or from other Services.
It must be noted that using a Service does not automatically create a new thread. Therefore, if we want to implement simple logic in a Service that does not require long processing, we don't need to run it in a separate thread. However, if we need to implement complex logic that takes a long time to process, we must be careful when creating new threads; otherwise, since the Service runs on the main thread, it may cause ANR (Application Not Responding) issues.
The main scenarios for using a Service in Android are as follows:
- Implementing multitasking (multi-task)
- Inter-process communication (IPC)
A typical example of the first case is when an app needs to download data from a remote server. In this case, you can use an Activity that interacts with the user, and start a Service while the user is using the app, letting it complete the work in the background. There is also a scenario where the Service sends information to the user after completing its task.
In the second case, we want to "share" some common functionality so that different applications can reuse it. For example, suppose we have a Service that can send emails, and we want to share this Service among several applications so that we don't have to rewrite the same code. In this case, we can use IPC so that the Service exposes a "remote" interface that can be called by other applications.
Service Basics
Now that we understand more about Services, let's create one. To create a Service in Android, we need to inherit from the Service class.
public class TestService extends Service {

    @Override
    public IBinder onBind(Intent arg0) {
        return null;
    }

}
As you can see, we have only implemented a method called onBind. In the example above, we used a local Service, so the method returns null. As mentioned earlier, a Service has its own lifecycle, so we can override some callback methods to handle its different states:
public class TestService extends Service {

    @Override
    public void onCreate() {
        super.onCreate();
    }

    @Override
    public void onDestroy() {
        super.onDestroy();
    }

    @Override
    public int onStartCommand(Intent intent, int flags, int startId) {
        return super.onStartCommand(intent, flags, startId);
    }

    @Override
    public IBinder onBind(Intent arg0) {
        return null;
    }

}
The first method, onCreate, is called only when the Service is created. If the Service is already running, this method will not be called. We cannot call it directly; it is called by the system.
The onStartCommand method is the most important method because it is called when we need to start the Service. In this method, we have the Intent passed in when running the Service, so we can exchange some information with the Service. In this method, we implement our own logic: if it is not a time-consuming operation, it can be executed directly in this method; otherwise, a thread can be created. As you can see, this method needs to return an integer value. This integer represents how the system should handle the Service:
- START_STICKY: With this return value, if the system kills our Service, it will be recreated. However, the Intent that was sent to the Service will not be redelivered. This way the Service keeps running.
- START_NOT_STICKY: If the system kills the Service, it will not be recreated unless the client explicitly calls the onStart command.
- START_REDELIVER_INTENT: Functions similarly to START_STICKY. In addition, in this case the Intent will be redelivered to the Service.
onDestroy is a method called by the system when the Service is about to be destroyed.
Once we have a custom Service class, we need to declare it in Manifest.xml so that we can use it.
<service android:name=".TestService"
         android:enabled="true"/>
Starting and Stopping a Service
As we know, a Service is started and eventually stopped, so that it can complete its task. Suppose we start it from an Activity; we can use an Intent to pass some information to the Service. Suppose our Activity has two buttons, one to start and one to stop the Service:
btnStart.setOnClickListener(new View.OnClickListener() {

    @Override
    public void onClick(View v) {
        Intent i = new Intent(MainActivity.this, TestService.class);
        i.putExtra("name", "SurvivingwithAndroid");
        MainActivity.this.startService(i);
    }
});

btnStop.setOnClickListener(new View.OnClickListener() {

    @Override
    public void onClick(View v) {
        Intent i = new Intent(MainActivity.this, TestService.class);
        MainActivity.this.stopService(i);
    }
});
In line 5 of the example code above, we create an Intent that passes the class name to handle our Service, and we set some parameters such as name. Then, at line 7, we start this Service. In the same way, at line 17, we stop this Service.
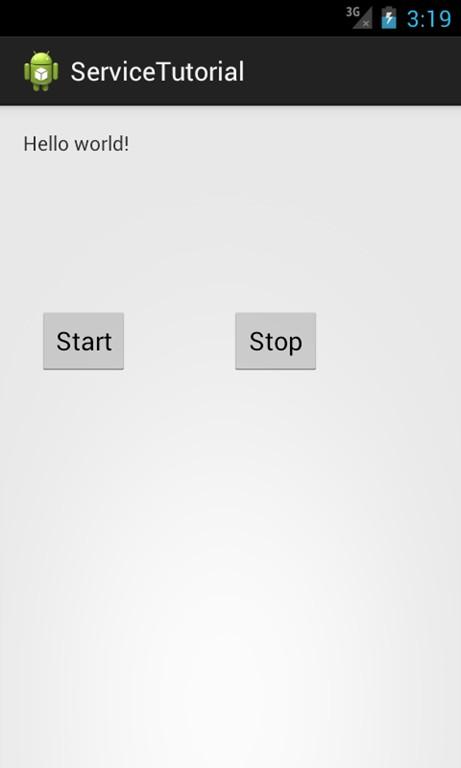
When you click the start button, you get the following Log:

You can notice that the onCreate method is called. Because this is the first time we start this Service. If we click the start button again, the system will not call onCreate. When we click the stop button, the system destroys this Service.
IntentService
As we mentioned earlier, a Service runs on the main thread. Therefore, we must be very careful when implementing logic in a Service. Consider that if this logic is a blocking operation or takes a long time to finish, it may cause ANR issues. In such cases, we need to move the logic to a separate thread. This means creating a thread in the onStartCommand method and then running it.
Another class derived from Service, IntentService, can simplify our development. This class is useful when we don't need to handle multiple requests at the same time. It creates a worker thread to handle different requests. The operations performed are as follows:
- Creates a separate thread to handle requests.
- Creates a request queue and passes an Intent to it occasionally.
- Creates a default implementation of onStartCommand.
- Stops the Service after all requests have been executed.
If we want to create an IntentService, we need to inherit from the IntentService class instead of the Service class:
public class TestIntentService extends IntentService {

    public TestIntentService() {
        super("TestIntentService");
    }

    @Override
    protected void onHandleIntent(Intent intent) {

    }

}
In this example, we only need to implement the onHandleIntent method. The external logic implemented here doesn't need to worry about whether the operation is time-consuming, because this method is called in a separate thread.
Automatically Starting a Service
Many times we want to start our Service automatically, for example, automatically starting it at boot. We know that a component is needed to start a Service. So how can we do it automatically? We can use a broadcast receiver to start the Service. For example, if we want to start it when the smartphone boots up, we can first create a broadcast receiver that listens for this event (boot), and then start the Service.
public class BootBroadcast extends BroadcastReceiver {

    @Override
    public void onReceive(Context ctx, Intent intent) {
        ctx.startService(new Intent(ctx, TestService.class));

    }

}
Declare it in Manifest.xml:
<receiver android:name=".BootBroadcast">
    <intent-filter >
        <action android:name="android.intent.action.BOOT_COMPLETED"/>
    </intent-filter>
</receiver>
Source: http://www.importnew.com/9019.html