Vibe Coding Hands-On Project
In this chapter, we will fully demonstrateVibe Codingthe entire process—not burying your head in code, but describing requirements in natural language and letting AI do the execution.
The ultimate goal is to build a real, usable web app without writing a single line of code.
First, understand: What exactly is Vibe Coding?
The name "Vibe Coding" comes from a tweet by OpenAI co-founder Andrej Karpathy.
What he meant is:You immerse yourself in the "vibe" of the product, forget the code details, just describe what you want, and AI implements it for you.
What's the difference from your current way of programming?
| Traditional programming | Vibe Coding |
|---|---|
| Memorize syntax and APIs, look up documentation | Describe intent in natural language, AI generates code |
| Write line by line by hand, debug yourself | Iterate with multi-turn conversations, AI writes + AI revises |
| Design the whole thing first, then write line by line | Work and adjust as you chat, make changes as you go |
| When you hit a bug, search and think for yourself | Throw the error message directly to AI and let it fix |
| Your role isImplementer | Your role isDesigner |
The core work rhythm of Vibe Coding
The entire development process follows a simple three-step loop:
| Step | What you do | What AI does |
|---|---|---|
| 1. Plan | Describe requirements and goals | Analyze requirements, propose technical solutions |
| 2. Execute | Confirm the plan, set constraints | Generate code, modify files |
| 3. Verify | Run verification, check results | Fix errors, adjust output |
After each step, verify it; once it passes, move on to the next loop.
This is the core secret of Vibe Coding—Don't dump all your requirements on AI at once; instead, move forward in small steps, confirming the direction at each step.
Environment Preparation
You only need three things, and they're all free.
1. VS Code Editor
Download link:https://code.visualstudio.com
VS Code tutorial:https://www.example.com/vscode/vscode-tutorial.htmlVS Code supports Windows / macOS / Linux and is completely free.
2. GitHub Copilot (Built into VS Code, no installation needed)
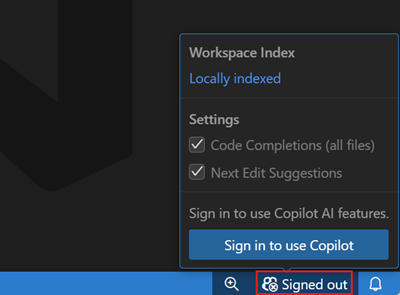
The latest version of VS Code has GitHub Copilot built in,No extensions need to be installed。
We only need to do one thing:
- Open VS Code and click theaccount icon
- selectSign in with GitHub, and log in with your GitHub account
- Once logged in, Copilot activates automatically
If you don't have a GitHub account, first gogithub.comand register one for free.
When you open the editor, you'll see the Copilot entry—just log in with your GitHub account, no need to install extensions from the marketplace.

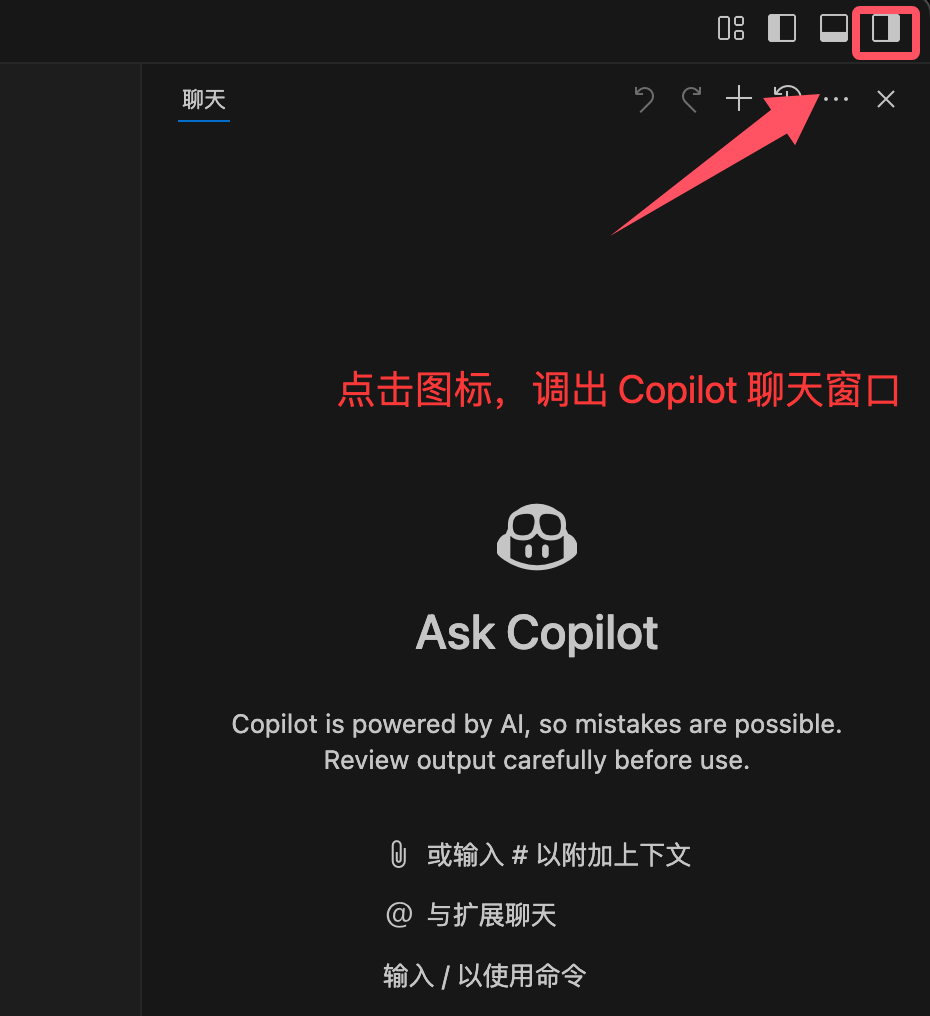
Click the small icon in the upper right corner to bring up the Copilot chat window:
3. Node.js
Download link:https://nodejs.org
Node.js tutorial:https://www.example.com/nodejs/nodejs-tutorial.html
Choose the LTS version, after installation open the terminal to verify:
node -v   # 应显示 v20.x.x 或更高
npm -v    # 应显示 10.x.x 或更高
Get to know some keyboard shortcuts
These two shortcuts are the ones you'll use most:
| Shortcut | Function | When to use |
|---|---|---|
| Ctrl+I(Mac: Cmd+I) | Inline Chat | Select a block of code and have AI explain or modify it |
| Ctrl+Shift+I(Mac: Cmd+Shift+I) | Chat panel | Long conversations related to new feature development |
| Tab | Accept completion | AI shows a gray suggestion; press Tab to accept |
| Esc | Reject completion | If AI's suggestion is wrong, press Esc to ignore |
Project Initiation: What are we building?
Now we're going to build a completetask management app。
Feature List
- Create, edit, and delete tasks
- Tasks have three states: To Do, In Progress, Done
- Priority has three levels: High (red), Medium (yellow), Low (green)
- Kanban view: drag between three columns to change task status
- Dark mode: one-click toggle
- Data auto-saves to the browser (not lost on refresh)
- Works on mobile too (responsive layout)
Technology Selection
| What for | What to use | Why choose it |
|---|---|---|
| Frontend framework | Vue 3 | Easy to learn, active community, lots of Chinese resources |
| Build tool | Vite | Fast startup, officially recommended by Vue |
| Styling | Tailwind CSS | No need to write CSS files; style classes directly in HTML |
| Data storage | localStorage | Built into the browser, no backend server needed |
| Project name | vibe-coding-example | Our hands-on project name |
Round 1 Conversation: Build the skeleton
Now we start real Vibe Coding—not telling AI all requirements at once, but going step by step.
Step 1: Create the project
Open the terminal and create the project:
npm create vite@latest vibe-coding-example -- --template vue
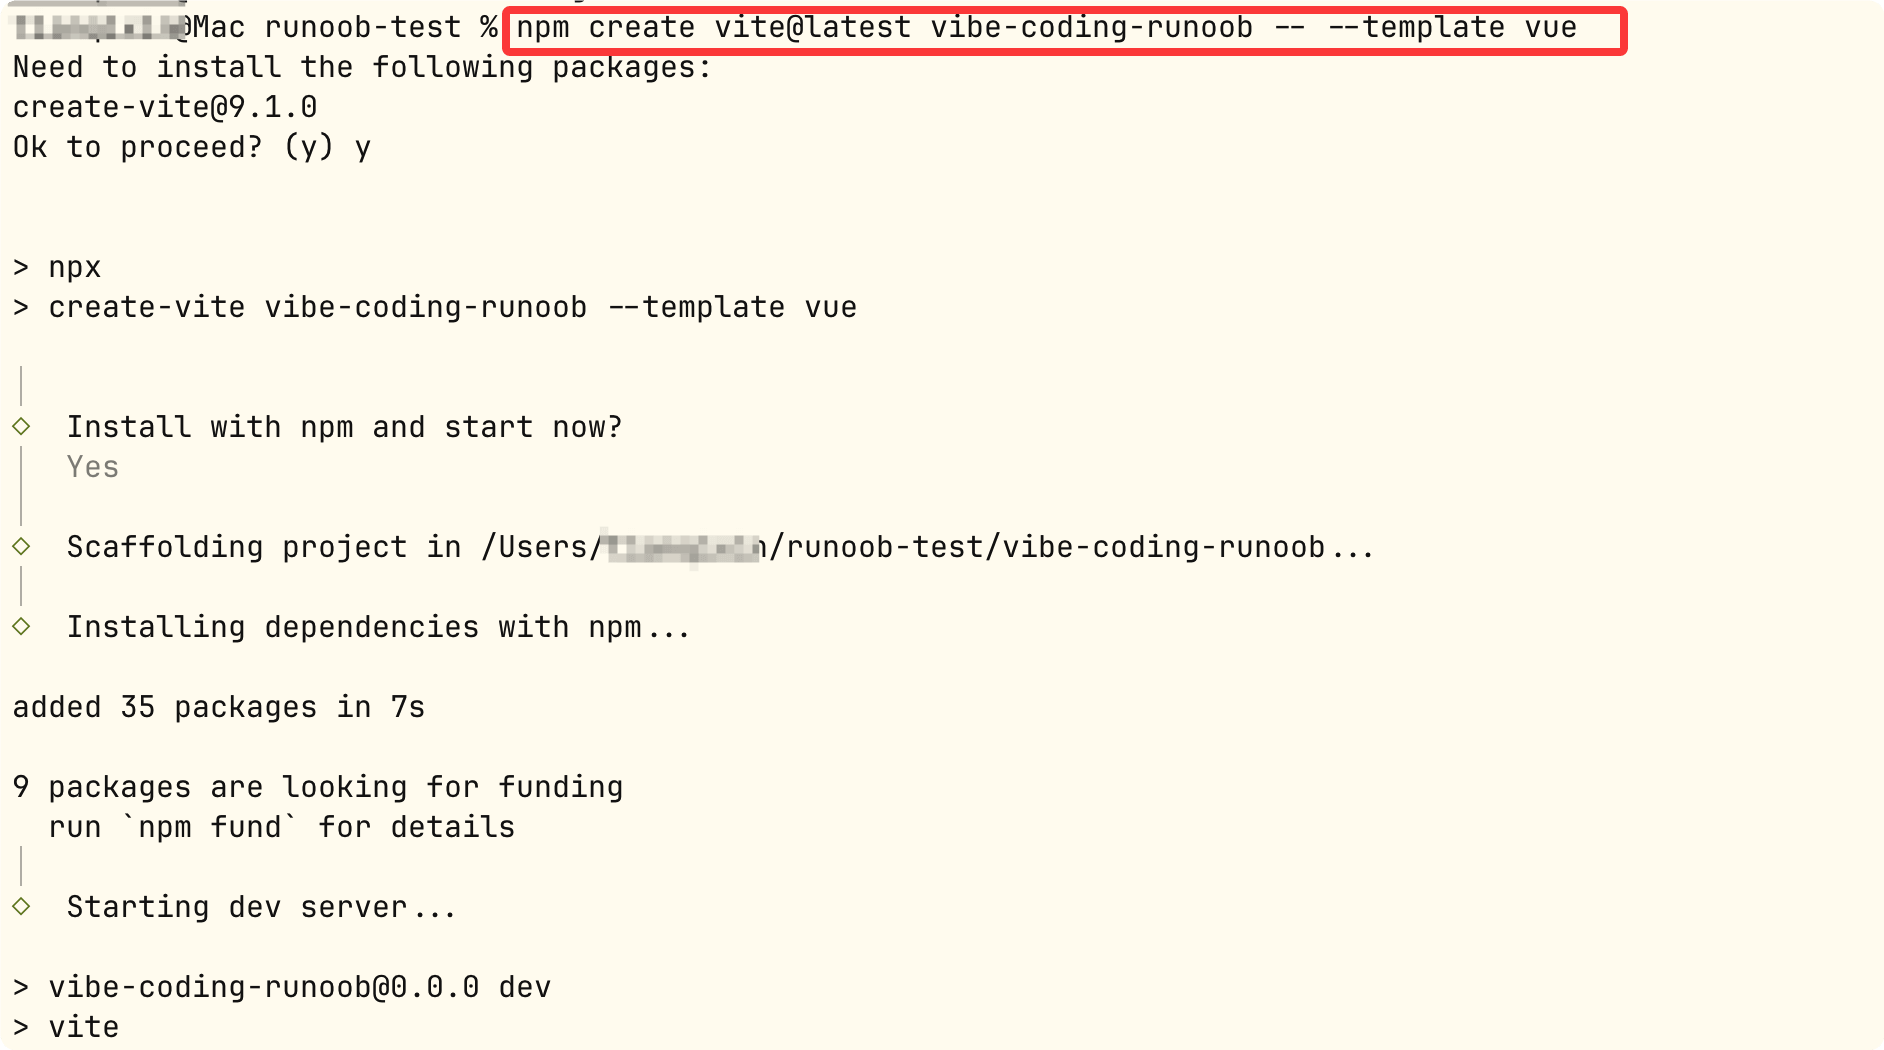
Open a new terminal, enter the project, then following tailwindcss, usecode .the command to open the project in VS Code:
cd vibe-coding-example
npm install
npm install -D tailwindcss @tailwindcss/vite
code .
Now VS Code has opened the project. PressCtrl+Shift+I(Mac: Cmd+Shift+I) to open the Copilot Chat panel. There's also a toggle panel button in the upper right corner:

Step 2: First conversation
Type the following in the Chat panel, which is just describing what you want in natural language:
我在开发一个任务管理 Web App,项目名 vibe-coding-example。
技术栈:Vue 3 + Vite + Tailwind CSS。

请帮我搭建项目骨架,创建以下文件:

1. src/types/task.ts — 定义 Task 类型
   字段:id, title, description, status, priority, dueDate, createdAt
   status 可选值:'todo' | 'in-progress' | 'done'
   priority 可选值:'low' | 'medium' | 'high'

2. src/App.vue — 应用主页面
   - 顶部导航栏(标题"Vibe Coding Example")
   - 中间显示任务列表区域

要求:
- 使用 Vue 3 script setup 语法
- 使用 Tailwind CSS 做样式
- 界面简洁干净,主色调用 indigo(靛蓝色)
- 现在先用假数据展示,后面再接真实功能

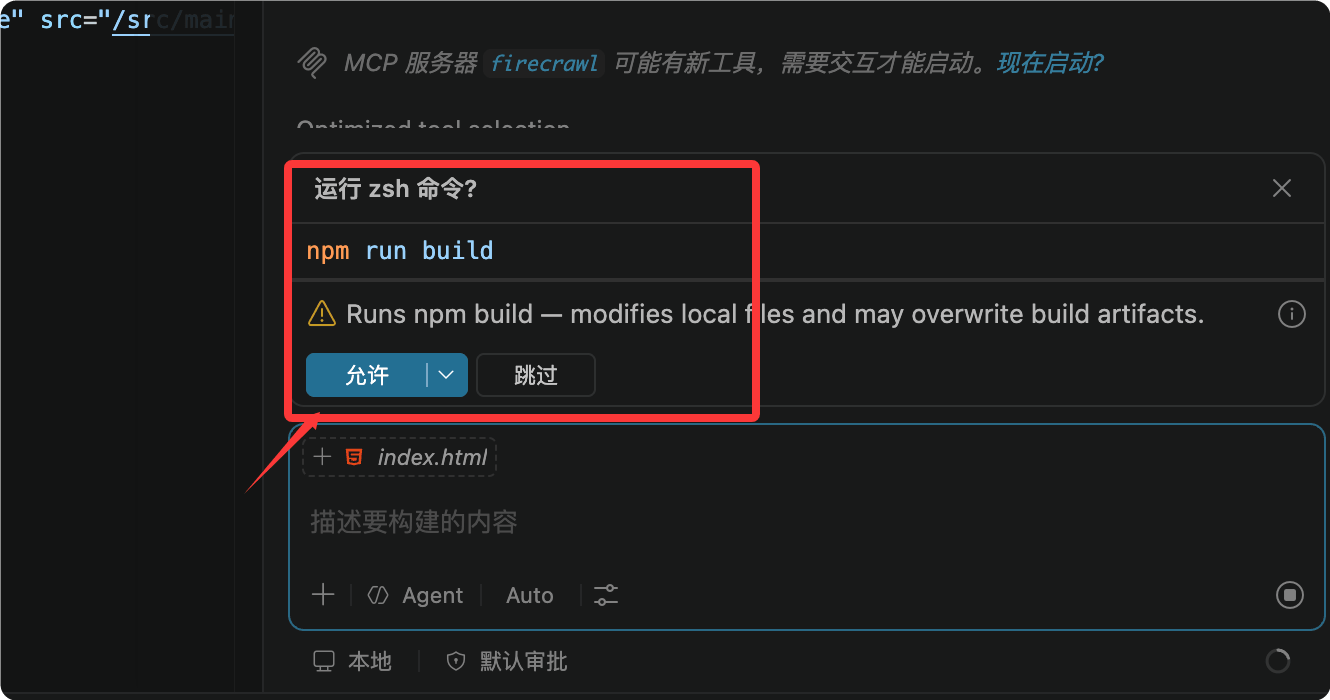
AI will output code piece by piece and modify file code. You clickAcceptto let it automatically write to the file.

When it requests to run a command, you just need to click Allow:
Step 3: Verify
After AI finishes writing the code, it will prompt us that we can run it in the terminal:
npm run dev

Click the Open Terminal button in the upper right corner, then run the command in the terminal:

Open http://localhost:5173 in your browser. If you see the page, the first step succeeded.
The result looks like this:
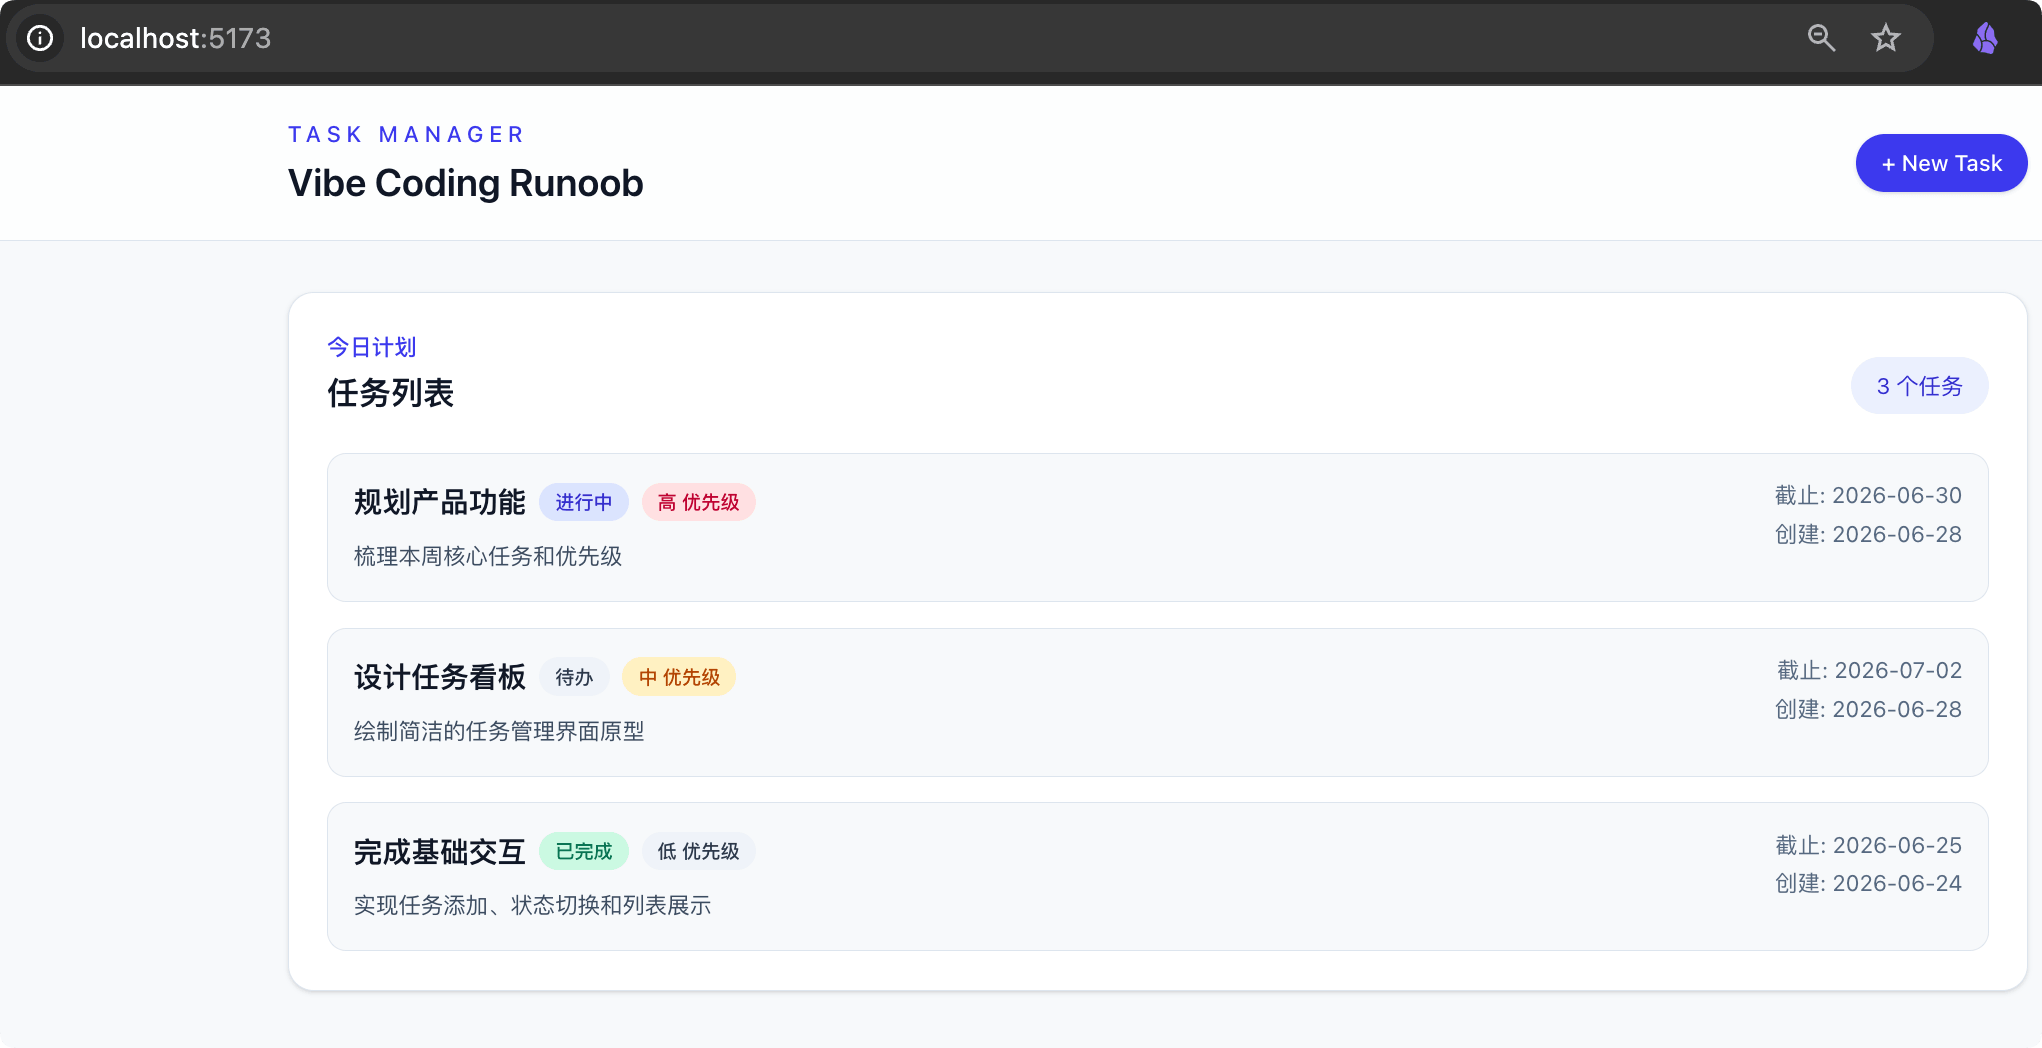
This is the first round of Plan → Execute → Verify. You described the goal, AI executed it, and you verified the result. Every subsequent round follows this rhythm.
Stuck on code you don't understand?
Vibe Coding doesn't require you to understand every line of code. But if you come across a piece of code you can't understand at all, select it and pressCtrl+I, and type:
Explain in plain Chinese what this code does.
AI will explain it in a language you can understand.
Round 2 Conversation: Implement the task list and form
The skeleton works. Now let's implement the real features.
Step 1: Task card component
Continue typing in the Chat panel:
创建 src/components/TaskCard.vue 组件:

功能:
- 展示单个任务的信息:标题、描述、优先级标签、截止日期
- 优先级用颜色区分:high 红色、medium 黄色、low 绿色(左边框即可)
- 点击左侧复选框标记任务为完成(标题加删除线)
- 右上角有删除按钮(× 图标)
- 鼠标悬停时卡片微微放大(hover:scale-[1.02])

Props 接收:task(Task 类型)
Emit 事件:toggle(切换完成状态)、delete(删除任务)

After AI generates, keep the file write points, allow command execution points, and the final result:

Then create the task list container:
创建 src/components/TaskList.vue 组件:

功能:
- 接收任务列表,用 TaskCard 展示每一项
- 任务按创建时间倒序排列(最新的在上面)
- 顶部有状态筛选按钮:全部 / 待办 / 进行中 / 完成
- 没有任务时显示空状态提示:"还没有任务,点击下方按钮创建第一个吧"
Step 2: Create task form
创建 src/components/TaskModal.vue 组件:

功能:
- 点击"+ 新建任务"按钮打开弹窗
- 表单字段:标题(必填)、描述(选填)、优先级(下拉选择)
- 标题为空时显示红色错误提示"标题不能为空"
- 点击弹窗外的灰色遮罩关闭弹窗
- 按 ESC 键关闭弹窗
- 提交后用 emit 把新任务传给父组件

使用 v-model 绑定表单数据
使用 Teleport 把弹窗渲染到 body 下
Step 3: Put the components together
Now update App.vue to combine TaskList and TaskModal:
更新 src/App.vue:

- 引入 TaskList 和 TaskModal 组件
- 使用 reactive 管理 tasks 数组(先用示例数据)
- 实现 addTask 函数:接收 TaskModal 提交的数据,添加到 tasks 数组
- 实现 toggleTask 和 deleteTask 函数
- TaskModal 的显示/隐藏用 ref(false) 控制

示例数据包含 2 条任务,让页面看起来不空
Step 4: Verify
Manually test it in the browser: create a task → click the checkbox to mark it done → delete the task. Once all features work properly, move to the next round.
Round 3 Conversation: Data persistence
Now if you refresh the page, the tasks disappear. We need to store the data in the browser's localStorage.
Tell AI your requirements
现在任务数据只存在内存里,刷新就没了。请把数据持久化到 localStorage:

1. 创建 src/utils/storage.ts:
   - saveTasks(tasks): 把任务数组存为 JSON
   - loadTasks(): 读取并解析 JSON,读取出错时返回空数组
   - 存储键名:vibe-coding-example-tasks

2. 更新 src/stores/taskStore.ts:
   - 用 Vue reactive 管理状态
   - 初始化时从 localStorage 加载数据
   - 使用 watch 自动监听变化并保存(deep: true)
   - 导出 addTask、updateTask、deleteTask 函数
   - 首次使用时如果没有数据,自动创建 3 条示例任务

3. 更新 App.vue,改为从 taskStore 获取数据和方法
Verify
# 在浏览器中:
1. 添加几条任务
2. 刷新页面 → 任务还在!
3. 按 F12 打开开发者工具 → Application → Local Storage
4. 找到 vibe-coding-example-tasks,查看存储的 JSON 数据
If the data is gone, paste the error messages from the F12 console to AI and let it fix them.
Round 4 Conversation: Kanban view
Requirement Description
我想添加一个看板视图(Kanban),文件:src/components/KanbanBoard.vue

功能:
- 三列:待办 | 进行中 | 已完成
- 任务卡片显示在对应状态的列中
- 卡片可以拖拽到其他列(用 HTML5 原生拖拽 API)
- 拖入新列时自动更新任务的 status
- 在 App.vue 顶部加两个 Tab 按钮:"列表"和"看板"
- 切换时保持数据一致

注意:不需要引入任何拖拽库,用原生的 dragstart、dragover、drop 事件即可。
After AI generates, verify: drag a card from 'To Do' to 'In Progress' and confirm the task status is updated.
Round 5 Conversation: Dark mode and mobile adaptation
Dark mode
添加深色模式:创建 src/components/ThemeToggle.vue

功能:
- 点击按钮切换亮色/深色模式
- 在 html 标签上添加/移除 dark class
- 用 localStorage 记住用户选择(键名:vibe-coding-example-theme)
- 首次访问时跟随系统设置(prefers-color-scheme)
- 按钮放在导航栏右侧

同时给所有组件添加 dark: 前缀的深色样式。
Mobile adaptation
适配手机屏幕(375px 宽):

- 看板三列在手机上改成竖向单列布局
- 任务模态框在手机上改成从底部滑出的样式
- 所有按钮的点击区域不小于 44px
- 表单输入框字号不小于 16px(防止 iOS 自动缩放)
- 导航栏在手机上用汉堡菜单

使用 Tailwind 的响应式类:sm: md: lg:
Verify: Press F12 in the browser, switch to mobile mode (375px), and check each page one by one.
What to do when you encounter a bug: The universal debugging template
This is Vibe Coding's 'first-aid kit' — whenever you encounter any error, use this template directly:
I've encountered a problem, help me fix it:

[Error Message]
Paste the complete error from the terminal or browser console here.

[What I Want to Achieve]
Describe what you expect to happen.

[What I've Already Tried]
List the operations you've tried but that didn't solve the problem.
AI will automatically locate the problem based on the error message and provide a fix. You don't need to analyze the cause yourself.
Have AI review your code
After completing a major feature, enter this in the Chat:
请审查我当前项目的代码,重点检查:
1. 有没有安全风险
2. 有没有性能问题
3. 错误处理是否完整
4. 有没有可以简化的地方
AI will list the issues and fix suggestions one by one. This is something only experienced developers could do — but with AI, you can do it too.
Deploy and go live
The project is done; the final step is to put it online so anyone can access it.
Push to GitHub
$ git init
$ git add .
$ git commit -m "feat: vibe-coding-example 任务管理应用"
# 在 github.com 创建同名仓库后:
$ git remote add origin https://github.com/你的用户名/vibe-coding-example.git
$ git push -u origin main
Deploy to Vercel
- Visitvercel.com, log in with your GitHub account
- Click Add New Project and select the vibe-coding-example repository
- Select Vite for Framework, then click Deploy directly
- Wait 1-2 minutes to get your xxxx.vercel.app domain
Send the link to friends, and they can use your app.
Vibe Coding Summary
The formula for writing good prompts
A good prompt =Goal + Constraints + Context
| Not recommended | Recommended |
|---|---|
| Help me make a task list | Create a TaskList.vue component. Features: display a task list with title, status, and priority labels. Use Tailwind CSS, with data passed in via props. Do not introduce third-party UI libraries. |
Iteration rhythm
每次对话 → 只做一个功能
每次修改 → 立刻在浏览器里验证
每个功能完成 → 立刻 git commit
每天结束 → push 到 GitHub
Don't accumulate many changes and test them all at once; that's just making trouble for yourself.
Don't hand these off to AI
- Accepting code without looking at it at all — at least know which files were changed
- When AI says 'this code has security risks,' take it seriously
- Not manually testing every feature before going live