Git server setup
In the previous chapter, we used Github for our remote repository. Github public projects are free, and since 2019, Github private repositories can also be used without restrictions.
Of course, we can also set up our own Git server to use as a private repository.
Using a Bare Repository
1. InstallGit
Install Git on Ubuntu Server:
sudo apt install git
If your system is Centos/RedHat, the installation command is:
yum -y install git-core
Fedora installation command:
# yum install git (Fedora 21 及之前的版本)
# dnf install git (Fedora 22 及更高新版本)
Next, we create a git user group and user to run the Git service:
$ groupadd git
$ useradd git -g git
2. Create a bare repository
Log in as the Git user, then create a bare repository in its home directory.
$ sudo su - gitFirst, select a directory as the Git repository, assuming it is /home/gitrepo/example.git, and run the following command in the /home/gitrepo directory:
$ cd /home
$ mkdir gitrepo
$ chown git:git gitrepo/
$ cd gitrepo

$ git init --bare example.git
The above command creates an empty Git repository. Git repositories on the server usually end with.git.git. Then, change the user of the repository to git (if it is operated by another user, such as root):
$ chown -R git:git example.git
3. Create certificate login
Add your public key to ~/.ssh/authorized_keys to allow remote access.
Collect the public keys of all users who need to log in. The public keys are located in the id_rsa.pub file. Import our public keys into the /home/git/.ssh/authorized_keys file, one per line.
If the file does not exist, create it:
$ cd /home/git/
$ mkdir .ssh
$ chmod 755 .ssh
$ touch .ssh/authorized_keys
$ chmod 644 .ssh/authorized_keys
# 在文件中添加你的 SSH 公钥
4. Clone repository
$ git clone git@192.168.45.4:/home/gitrepo/example.git
Cloning into 'example'...
warning: You appear to have cloned an empty repository.
Checking connectivity... done.
192.168.45.4 is the IP of the Git server. You need to change it to your own Git server IP.
In this way, the installation of our Git server is complete.
Using GitLab
GitLab is a powerful Git service management tool, suitable for medium and large teams, providing rich features such as user management, CI/CD, code review, etc.
1. Install GitLab
According toGitLab official documentationInstall GitLab.
For example, on Ubuntu:
# sudo apt-get update
# sudo apt-get install -y curl openssh-server ca-certificates tzdata perl
# curl https://packages.gitlab.com/install/repositories/gitlab/gitlab-ee/script.deb.sh | sudo bash
# sudo EXTERNAL_URL="http://yourdomain" apt-get install gitlab-ee
EXTERNAL_URL="http://yourdomain" To set your own domain, or public IP, for example:
sudo EXTERNAL_URL=101.132.XX.XX yum install -y gitlab-ee
2. Configure GitLab
After installation, open a browser and visit http://yourdomain to set up the administrator account.
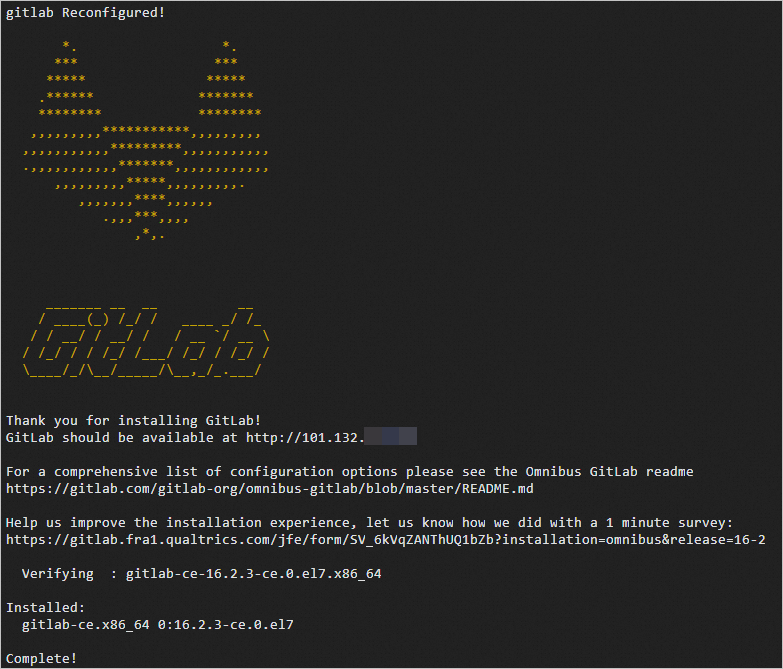
When a similar echo message as follows appears, it indicates that GitLab has been installed successfully.
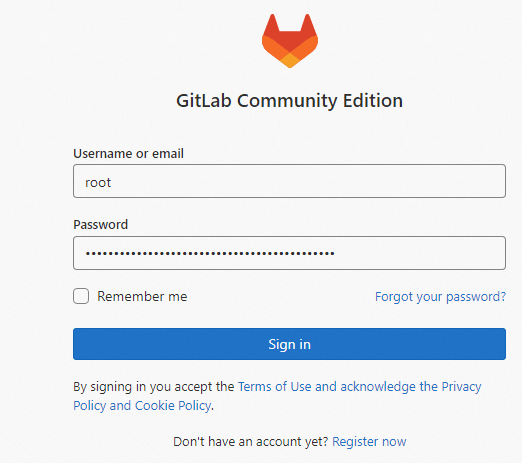
Log in to GitLab, create a new project, the username isroot。
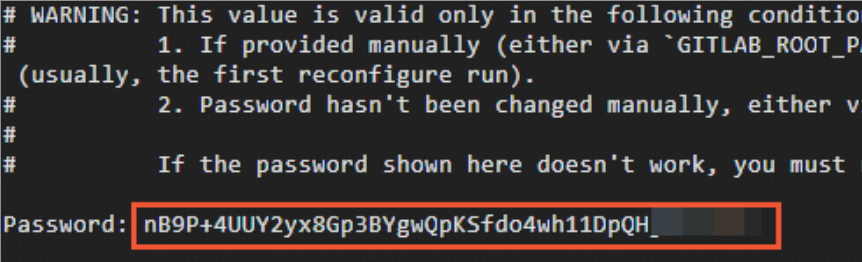
Get login password:
sudo cat /etc/gitlab/initial_root_password
The results are as follows:
Use the username for the first loginroot:
4. Generate a key pair file and obtain the public key
Install the Git tool (skip if already installed):
sudo apt-get install git
Generate the key pair file id_rsa:
ssh-keygen
During the key pair generation process, the system will prompt you to enter the directory for storing the key pair (defaults to .ssh/id_rsa in the current user's home directory, e.g., /home/test/.ssh/id_rsa) and the key pair password. You can enter them manually, or press Enter to keep the defaults.
After generation, the following information is displayed:
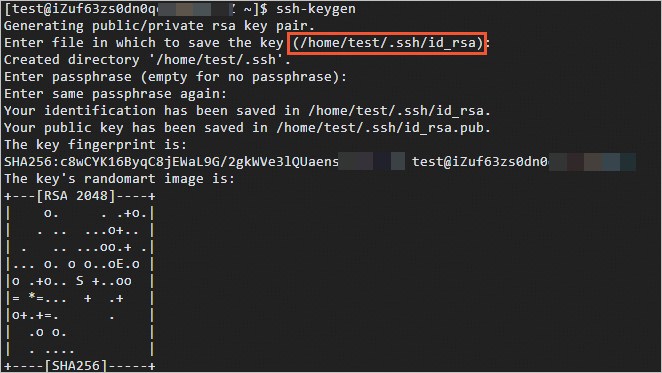
View and copy the contents of the public key file id_rsa.pub:
cat .ssh/id_rsa.pub
It displays information similar to the following:
ssh-rsa AAAAB3NzaC1yc2EAAAADAQABAAABAQDQVwWjF3KXmI549jDI0fuCgl+syJjjn55iMUDRRiCd/B+9TwUda3l9WXH5i7RU53QGRCsDVFZxixLOlmXr9E3VSqkf8xXBnHs/5E2z5PIOCN0nxfB9xeA1db/QxPwK4gkHisep+eNHRn9x+DpCYDoSoYQN0nBg+H3uqfOqL42mJ+tqSfkyqbhjBf1kjtDTlBfVCWtI0siu7owm+c65+8KNyPlj5/0AyJ4Aqk1OX2jv+YE4nTipucn7rHwWuowasPU86l+uBsLNwOSb+H7loJvQyhEINX2FS1KnpRU+ld20t07n+N3ErfX5xBAGfxXpoN9BKKSP+RT7rvTeXTVE**** test@example.com****
5. Create project
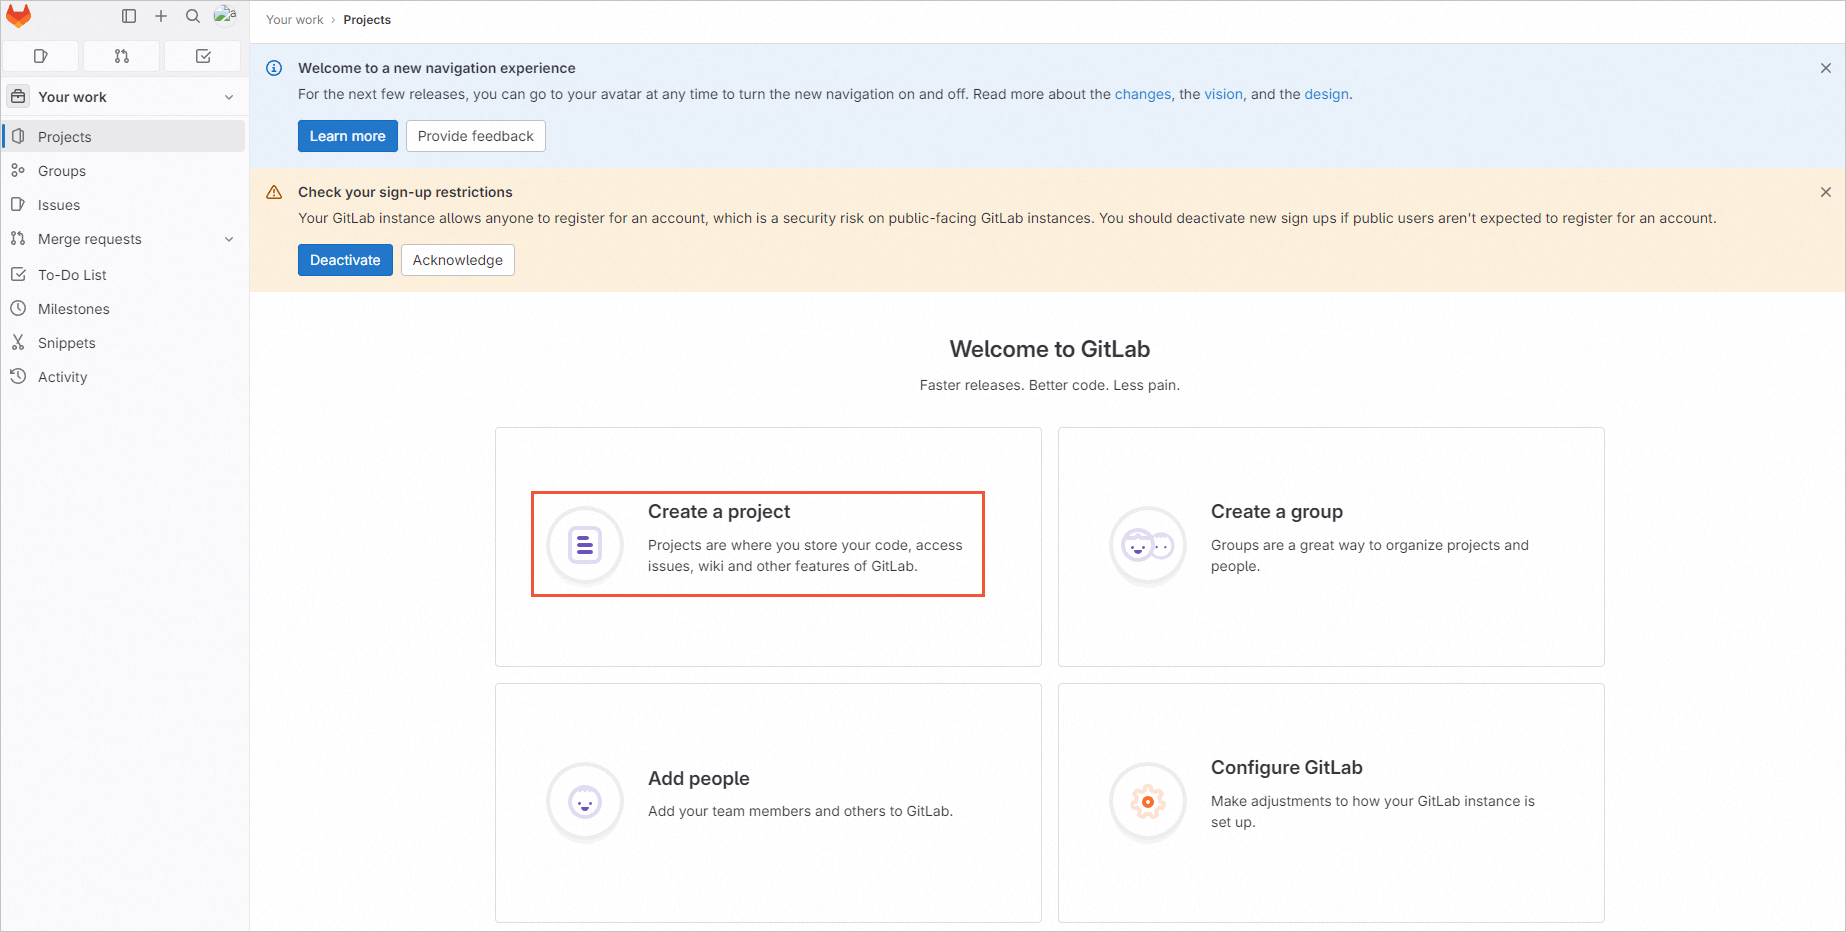
On the GitLab homepage, click the Create a project option:
Click Create blank project, set Project name and Project URL, then click Create project:
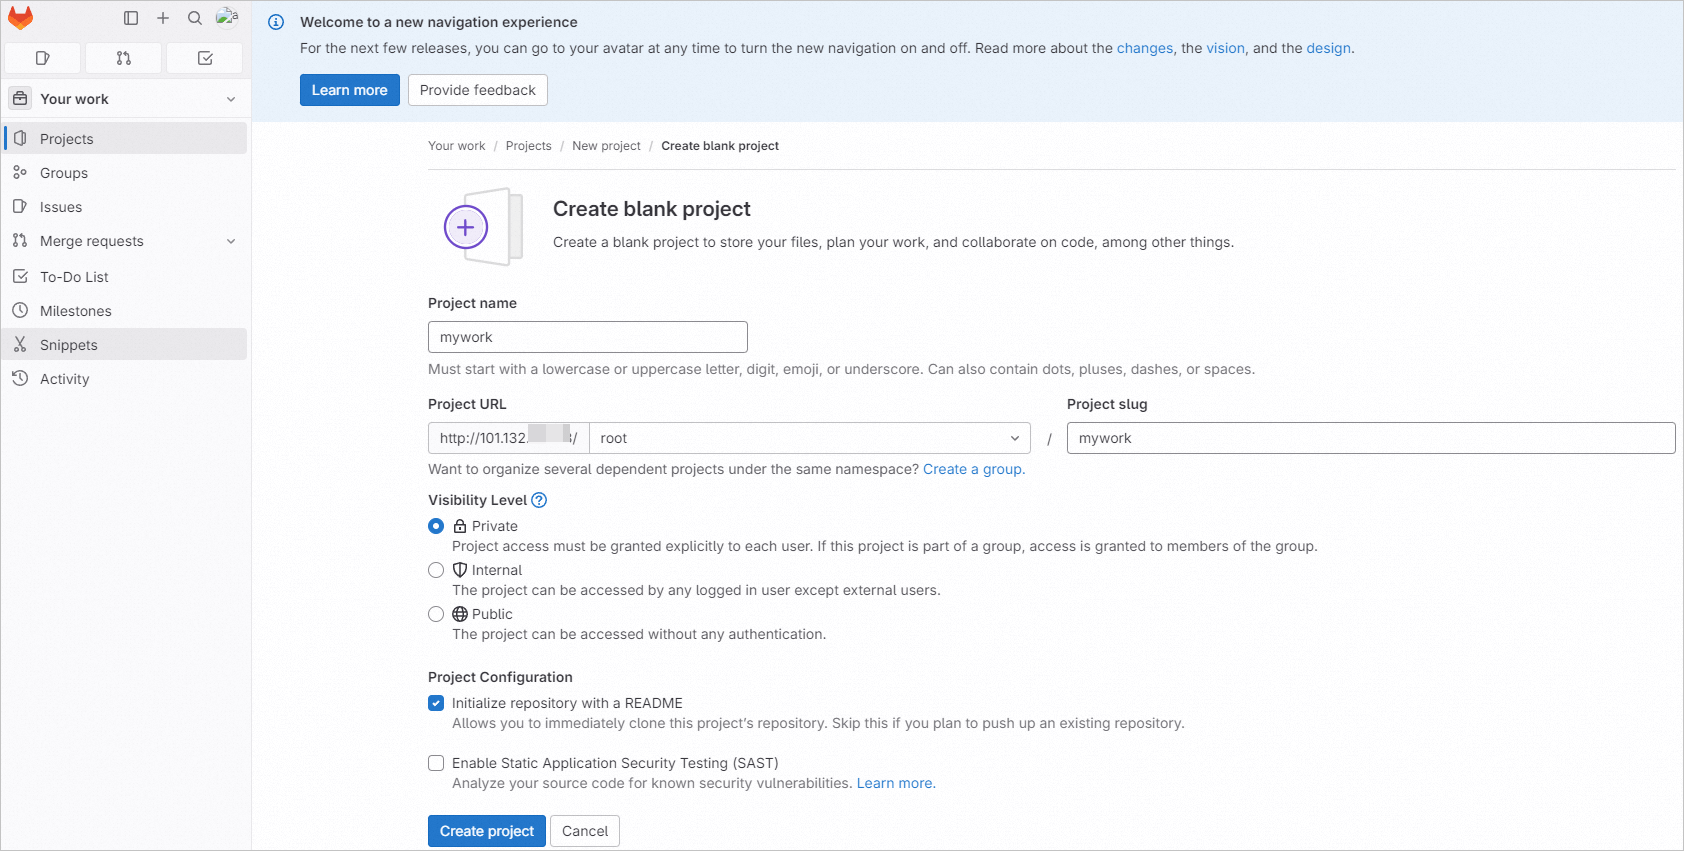
This article uses the mywork project as an example for illustration.
6. Add SSH key
On the current project page, click Add SSH key:
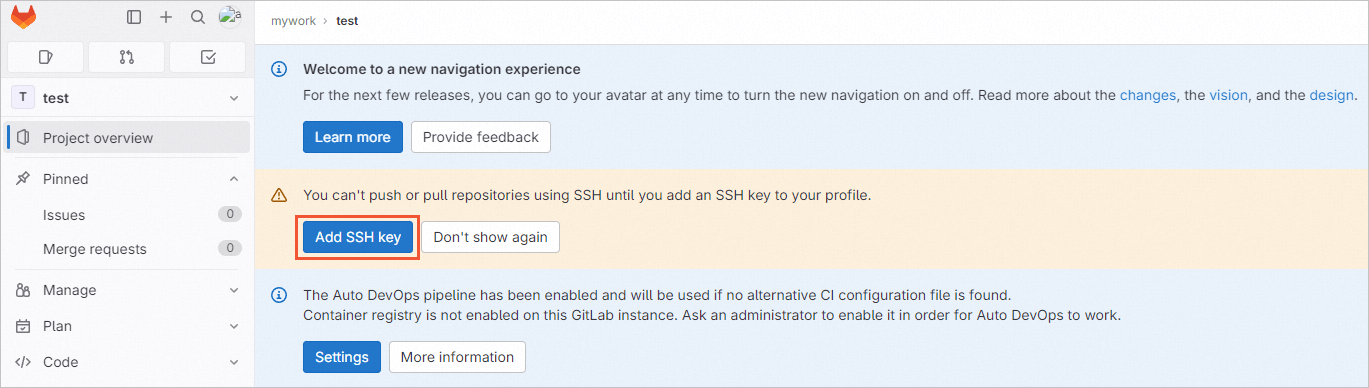
Paste the content in the public key file id_rsa.pub into the text box where Key is located:
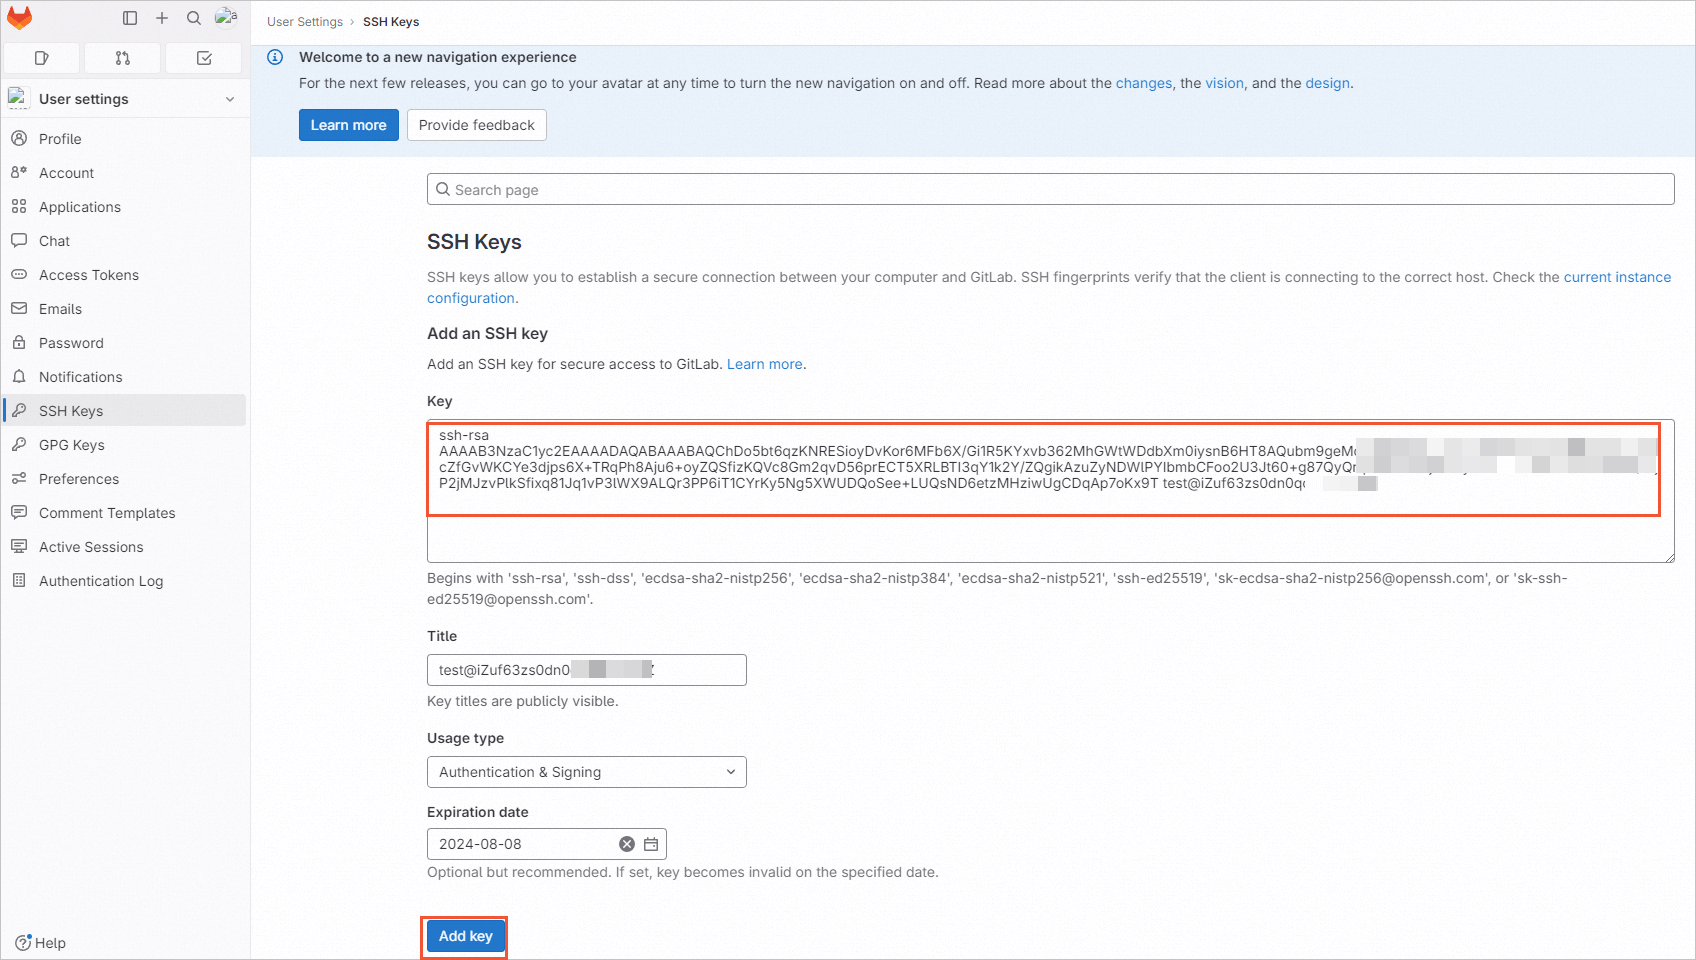
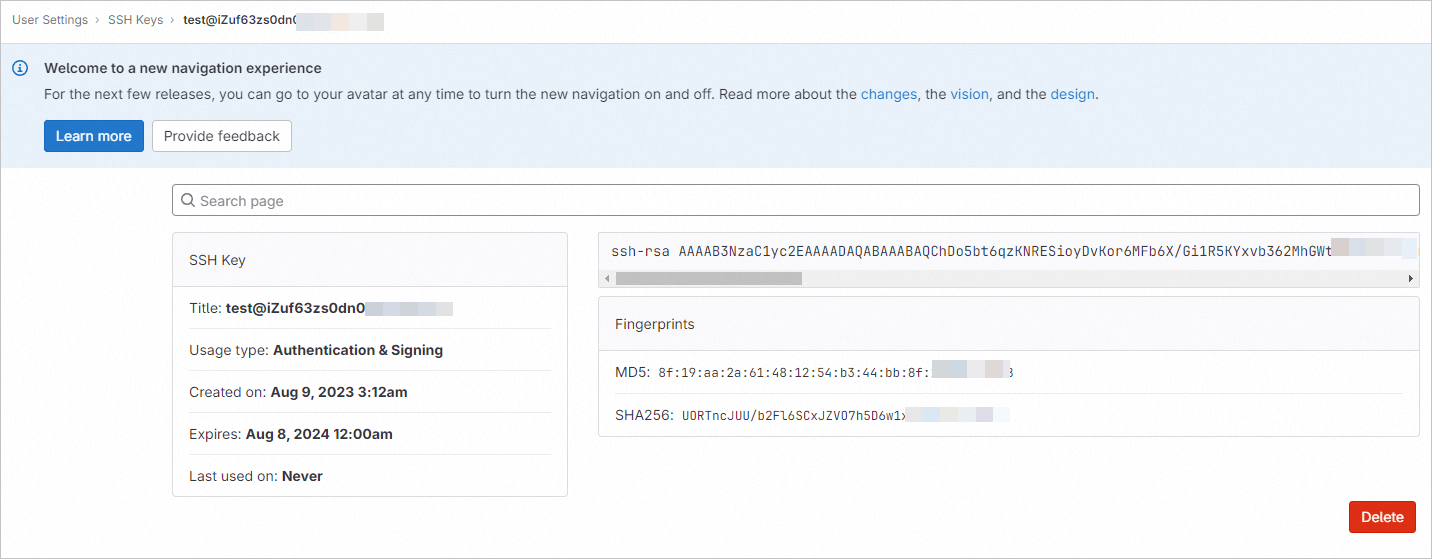
Click Add key. After the SSH Key is added, it is shown in the following figure:
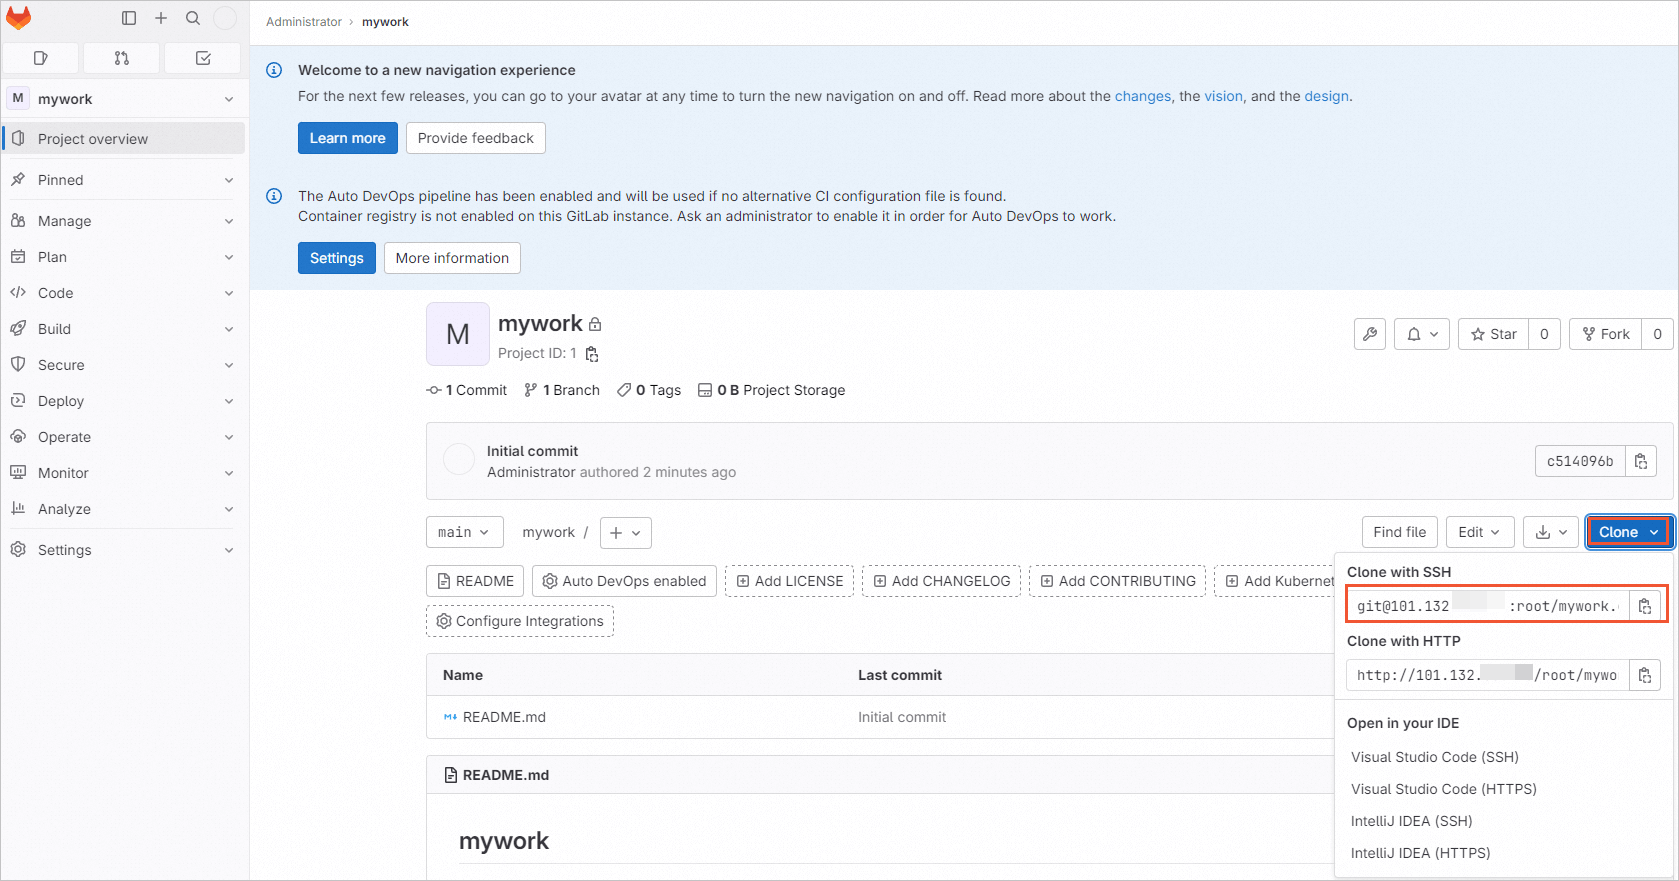
Copy the Clone link. This link is needed when performing clone operations:
Using GitLab
1. Configure the personnel information for using the Git repository, including username and email.
git config --global user.name "testname"

git config --global user.email "abc@example.com"
2. Clone the created project to local.
git clone git@101.132.XX.XX:root/mywork.git
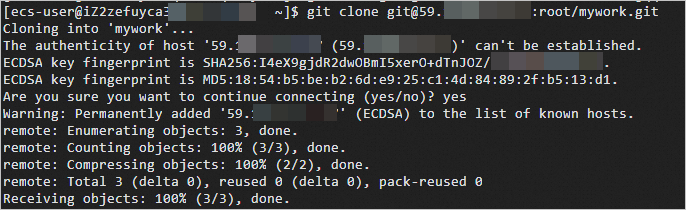
3. Upload the file to the GitLab server:
Enter the project directory:
cd mywork/
Create the target file that needs to be uploaded to GitLab:
echo "test" > /home/test/test.sh
Copy the target file or directory to the project directory:
cp /home/test/test.sh ./
Add the test.sh file to the index:
git add test.sh
Commit the test.sh file to the local repository:
git commit -m "test.sh"
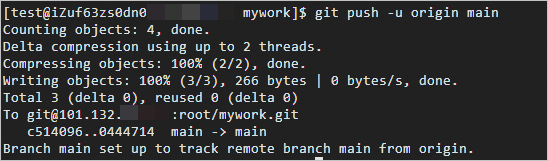
Synchronize the file to the GitLab server:
git push -u origin main
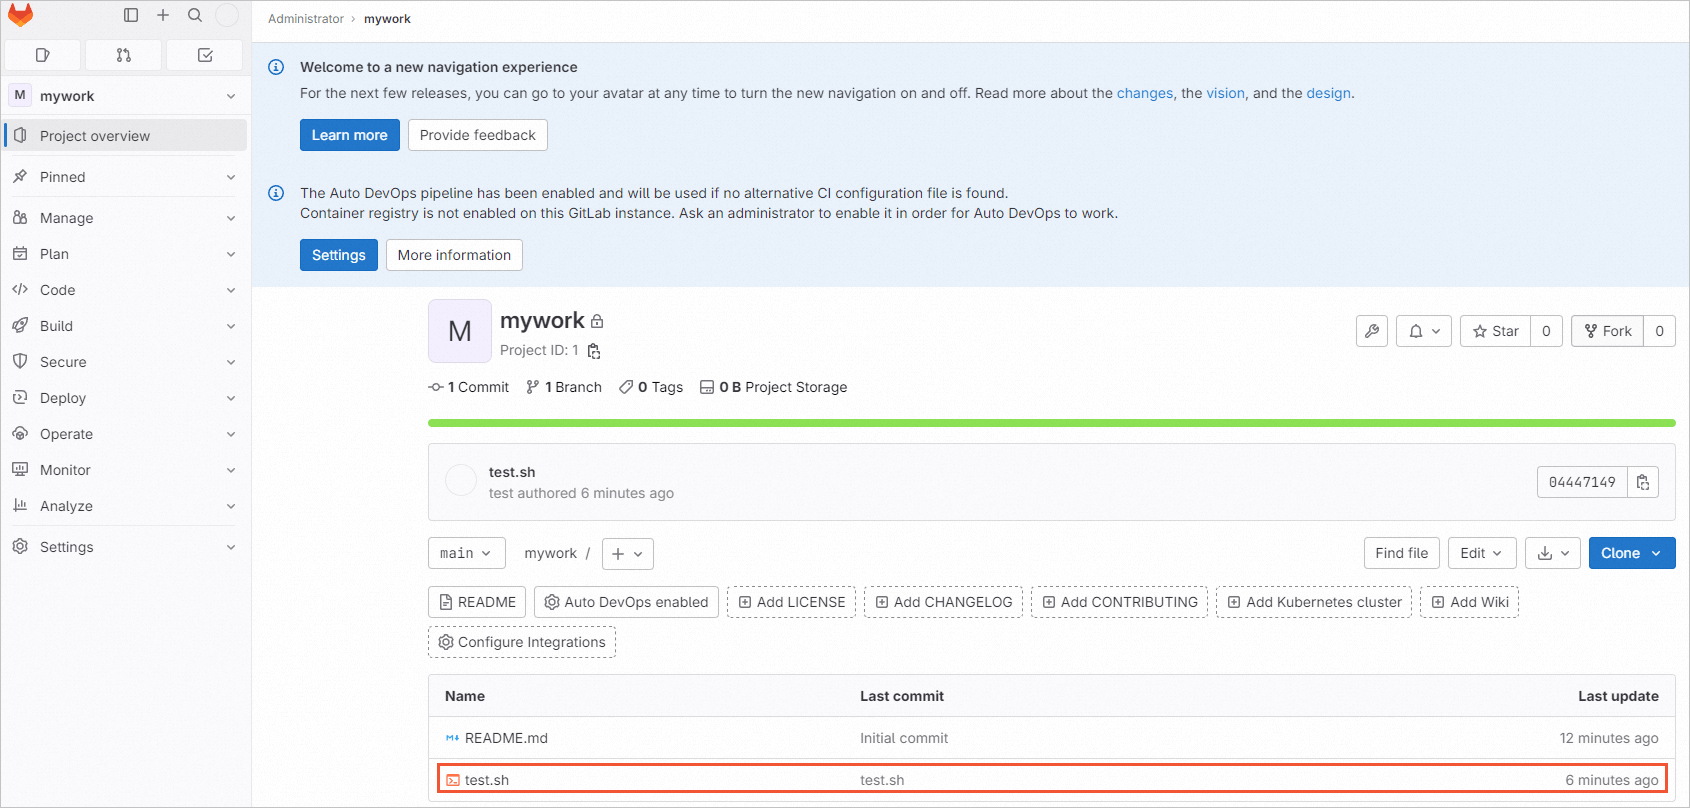
In the web page, verify that the uploaded test.sh file has been synchronized to the GitLab server: